It all started with a craving for those irresistible Hot Italian Sub Sliders I used to devour at a quaint little deli near my college. Every bite was a burst of flavor, with layers of savory Italian meats, gooey cheese, and that tangy dressing that made it impossible to eat just one. But let’s be honest, those deli prices aren’t exactly easy on the wallet, and I thought, why not bring the magic home? Plus, I had this burning desire to elevate those sliders and make them even better — because if I’m gonna indulge, I want it to be worth every calorie!
After a few (okay, more than a few) rounds in the kitchen, I finally nailed down my version of these Hot Italian Sub Sliders. It took me three attempts and quite a few questionable taste tests where I wondered if I’d ever get it right. Each time, I tried to tweak the ratios — more cheese here, less dressing there — until I struck the perfect balance. Let’s just say my friends were very supportive during this journey but also quite relieved when I finally stopped asking them to try yet another iteration!
The payoff was absolutely worth it! These sliders come out of the oven golden brown with melty cheese oozing from every edge and an explosion of zesty flavor that dances on your palate. The combination of crispy bread with those juicy meats creates an irresistible texture that makes you want to dive back for seconds (or thirds!). So, whether you’re gearing up for game day or hosting a cozy gathering with friends, these Hot Italian Sub Sliders are sure to impress. Trust me, you’ll be the star of the show!
These Hot Italian Sub Sliders are….
….the ultimate party pleaser that will have everyone clamoring for seconds!
1. They deliver an explosive flavor that’s a delightful fusion of savory Italian meats and zesty dressing. The combination of salami, pepperoni, and ham creates a mouthwatering medley that bursts with umami, while the banana peppers add a tangy kick that elevates every bite.
2. Irresistibly soft texture – these sliders have a pillowy softness that perfectly complements the hearty fillings. The soft, slightly sweet slider rolls not only create a comforting base but also soak up the flavors from the melted provolone and Italian dressing, making each bite delightfully tender.
3. Elevated technique – brushing the tops with melted butter mixed with garlic powder and oregano before baking gives these sliders an incredible golden crust. This simple step infuses them with aromatic flavors while ensuring they are crispy on the outside yet warm and gooey on the inside.
4. Incredible value – making these Hot Italian Sub Sliders at home is not only easier than you might think but also cost-effective compared to ordering out. With just a handful of ingredients like deli meats and slider rolls, you can whip up a crowd-pleasing platter for any occasion without breaking the bank!
PS These sliders are perfect for gatherings! Each batch makes 12 mini sandwiches, ideal for sharing or enjoying as leftovers throughout the week.
Gather These Ingredients
Each ingredient in this dish plays an essential role in flavor and texture. Here’s what you’ll need:
12 count slider rolls (preferably soft and slightly sweet): These provide a fluffy base that complements the hearty fillings.
6 oz sliced salami: Adds a rich, savory flavor that enhances the overall taste profile.
6 oz sliced pepperoni: Brings a spicy kick and boldness to each bite.
6 oz sliced ham: Offers a touch of sweetness and balance among the meats.
6 oz provolone cheese (sliced): Melts beautifully, contributing creamy texture and mild flavor.
1/2 cup banana peppers (sliced): Delivers a zesty tang that brightens the sandwiches.
1/4 cup Italian dressing (store-bought or homemade): Infuses the sliders with herby goodness and moisture.
1 tbsp butter (melted): Adds richness and helps achieve a golden-brown crust on top.
1 tsp garlic powder: Enhances the savory depth with its aromatic presence.
1 tsp dried oregano: Imparts classic Italian flavor, tying all ingredients together.
You Must Layer the Meats and Cheese Just Right. Trust Me!
I know, I know — this sounds like a simple step, but layering those Italian meats and cheese properly is the key to slider success. I tried to just toss everything on in a hurry, thinking it wouldn’t matter much, but boy, was I wrong! The results were sad little sandwiches that just didn’t deliver the flavor punch I wanted.
When you layer your salami, pepperoni, ham, and provolone cheese evenly over the bottom halves of the rolls, you’re allowing each ingredient to shine and meld together beautifully. Think of it like building a lasagna: if you just pile everything on haphazardly, you won’t get that rich, satisfying bite in every mouthful. Each layer adds its unique flavor profile and texture to the mix, ensuring every bite of these Hot Italian Sub Sliders is packed with deliciousness!
What does layering do?
- Flavor distribution — Evenly layering the meats and cheese ensures that each slider has a balanced taste of salami, pepperoni, ham, and provolone in every single bite.
- Texture contrast — A well-layered sandwich creates a delightful contrast between the chewy meats and creamy cheese, making each bite more enjoyable.
- Moisture retention — Layering helps trap moisture from the Italian dressing and banana peppers within the ingredients so your sliders don’t end up dry.
- Visual appeal — A properly assembled slider looks more appetizing when served at parties or game day gatherings; who doesn’t love a beautifully stacked sandwich?
- Melted cheese perfection — By ensuring the cheese is layered correctly on top of the meats, it melts evenly during baking for that gooey goodness we all crave.
Different layering techniques
- Basic stacking (good) — Simply stacking all ingredients without any thought leads to uneven flavor distribution and dry bites.
- Layered but rushed (better) — If you’re layering but not taking care to spread out ingredients evenly, you’ll notice some sliders taste great while others fall flat.
- Thoughtfully layered (great) — Taking time to layer each component evenly makes for delicious sliders with consistent flavor in every bite.
- Masterclass level (⭐️ best) — When you’ve perfected your layering technique, every slider becomes an explosion of flavors that feels like a gourmet experience.
Be warned: skipping or rushing through the layering process is the most common mistake you can make with these sliders. If you don’t take the time to layer thoughtfully, you’ll end up with an unbalanced sandwich experience that’s far from what these delicious mini sandwiches should be!
How to make Hot Italian Sub Sliders
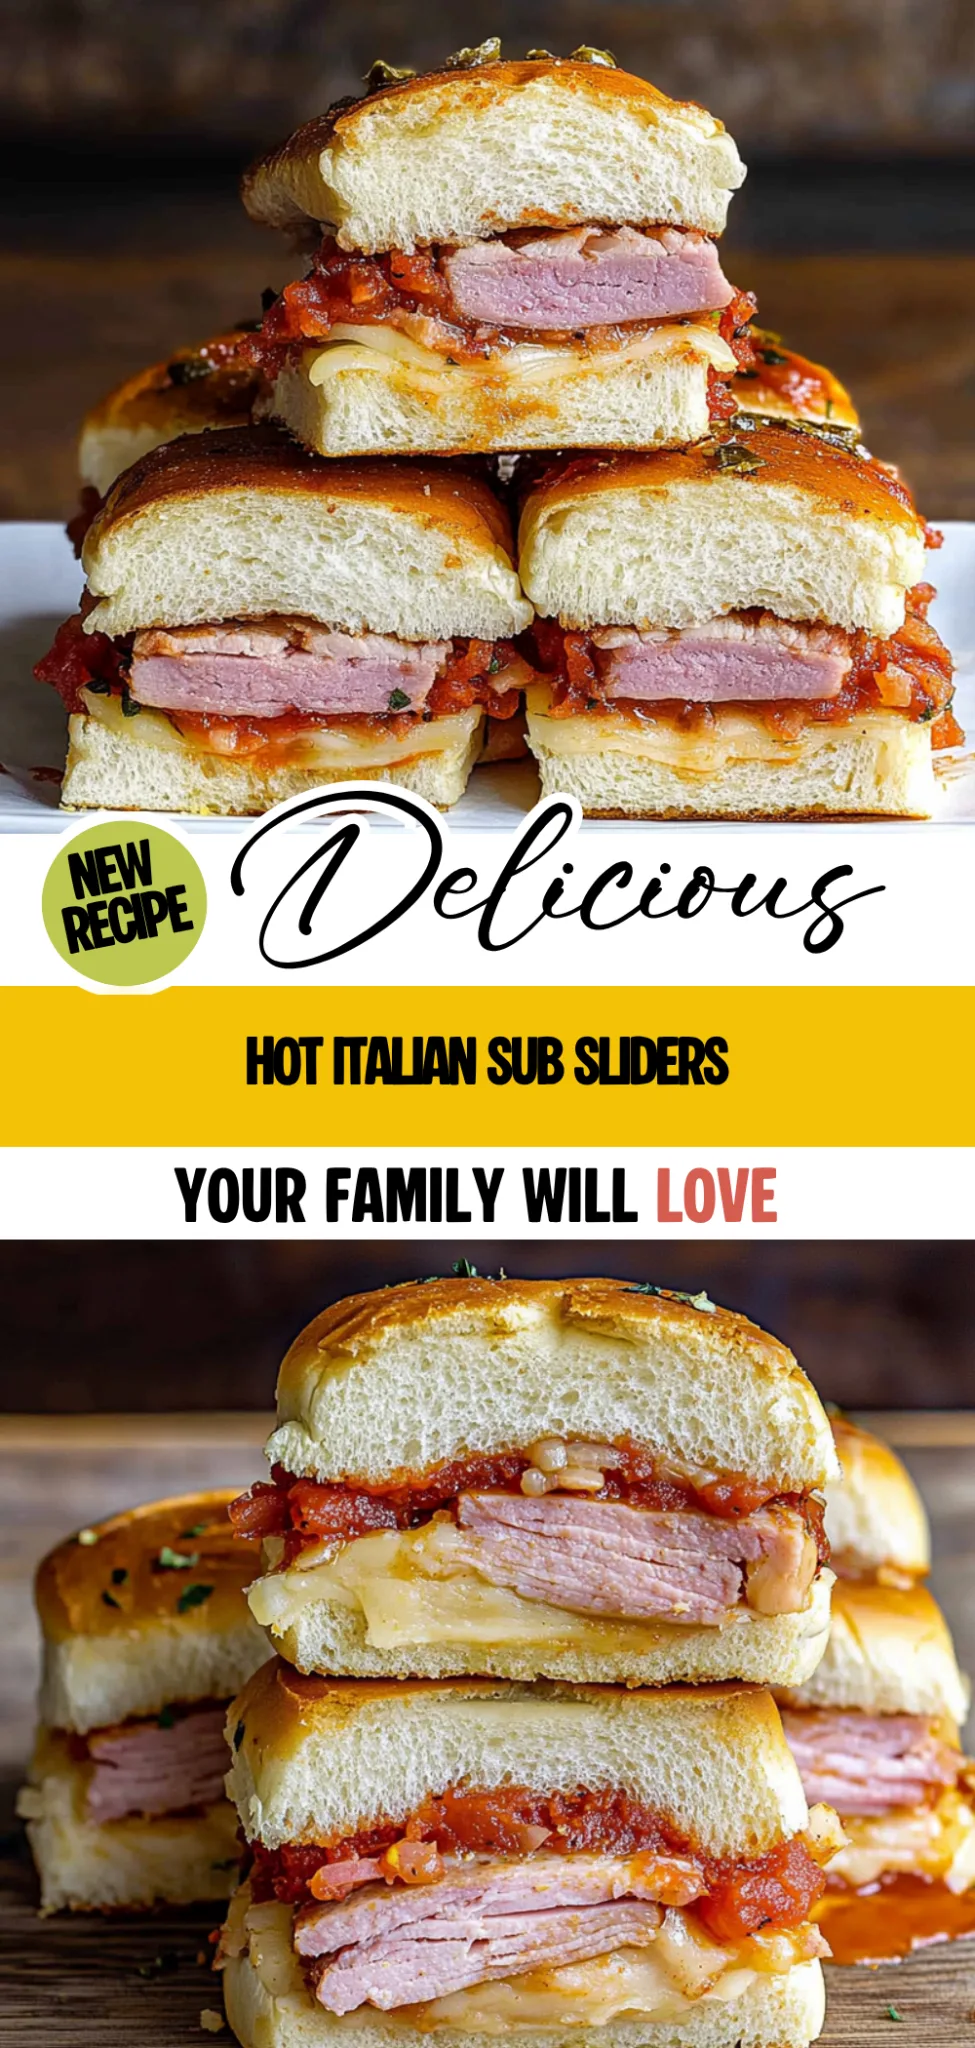
Are you ready to see how straightforward it is to make the Hot Italian Sub Sliders of your dreams??
1. PREPARE THE SLIDERS
Get ready to build the ultimate slider experience!
1. Preheat – Preheat your oven to 350°F (175°C). This ensures that your sliders will bake evenly and come out perfectly warm and melty.
2. Slice – Slice the slider rolls in half horizontally and place the bottom halves in a baking dish. Make sure to use soft, slightly sweet rolls as they hold up well under the weight of all those delicious fillings.
3. Layer – Layer the salami, pepperoni, ham, provolone cheese, and banana peppers evenly over the bottom halves of the rolls. The combination of these Italian meats and cheeses will create an irresistible flavor explosion!
4. Drizzle – Drizzle the Italian dressing over the layered ingredients. This adds a zesty kick that brings everything together beautifully.
5. Top – Place the top halves of the rolls on top of the fillings, creating a complete sandwich ready for baking.
HANDY TIPS
- For extra flavor, consider marinating your sliced banana peppers in a little bit of Italian dressing beforehand!
- If you can’t find soft slider rolls, you can also use dinner rolls as a substitute.
2. BAKE THE SLIDERS
Let’s get these sliders golden brown and mouthwateringly melty!
6. Mix – In a small bowl, mix the melted butter, garlic powder, and dried oregano. This mixture will give your sliders a beautiful aroma and enhance their flavor profile.
7. Brush – Brush the butter mixture generously over the top of the slider rolls. This not only adds flavor but also helps achieve that golden-brown crust during baking.
8. Cover – Cover the baking dish with aluminum foil and bake for 10 minutes. The foil traps steam, helping to melt all that gooey cheese without drying out your sliders.
9. Uncover & Bake – Remove the foil and bake for an additional 5 minutes, or until the tops are golden brown. Keep an eye on them—this is when they transform into cheesy perfection!
10. Cool & Slice – Let cool for a few minutes before slicing and serving. This brief cooling period makes it easier to cut through those gooey layers without everything falling apart.
HANDY TIPS
- If you’d like a little crunch, try adding some diced red onion or fresh arugula on top after baking!
- For even more flavor depth, feel free to swap in different meats or cheeses based on what you have at home – just keep it Italian!
Now you’ve created scrumptious Hot Italian Sub Sliders that are sure to please any crowd! With layers of savory meats and melted cheese wrapped in warm bread, these sliders are perfect for parties or game day gatherings! Enjoy every cheesy bite! – Nagi x
FAQ – Hot Italian Sub Sliders
❄️ How long can I store leftover sliders?
Leftover Hot Italian Sub Sliders can be stored in an airtight container in the refrigerator for up to 3 days. I found that they still taste about 90% as good on day 2, but by day 3, that drops to around 80% as the bread begins to lose its softness. If you want to keep them longer, consider freezing them instead!
⏱️ Can I skip letting the sliders rest after baking?
No, it’s important to let the sliders cool for a few minutes before slicing and serving. This resting time allows the cheese to set slightly, ensuring that the fillings don’t ooze out when you cut into them. Trust me, if you slice them too early, it’ll look like a cheesy explosion!
❄️ Can I freeze these sliders for later?
Absolutely! You can freeze the assembled but unbaked sliders. Just wrap them tightly in plastic wrap and then aluminum foil to prevent freezer burn. When you’re ready to enjoy them, thaw them overnight in the fridge before baking as per the recipe instructions. They’ll taste just as delightful!
🌾 Is there a way to make these sliders gluten-free?
Yes, you can easily make these Hot Italian Sub Sliders gluten-free by using gluten-free slider rolls. Just ensure all your other ingredients, including meats and dressings, are labeled gluten-free as well. It’s a delicious way for everyone to enjoy this treat without any worries!
🥓 Can I substitute one of the meats with something else?
Definitely! While I love the combination of salami, pepperoni, and ham for that classic Italian flavor, you can substitute turkey or chicken breast for a lighter option. You could also use roasted vegetables or even a plant-based deli meat if you’re looking for a vegetarian twist!
🔍 Why do I need to brush butter on top of the rolls?
Brushing melted butter mixed with garlic powder and oregano on top of the rolls not only adds flavor but also creates that beautiful golden-brown crust when baked. Without it, you miss out on that crispy texture that contrasts perfectly with the soft inside of the sliders. Don’t skip this step; your taste buds will thank you!
📏 How many servings does this recipe yield?
This recipe yields 12 sliders, which is perfect for parties or game day gatherings! I’ve found that they disappear quickly — so if you’re serving a crowd or have big eaters at home (like my husband!), consider doubling the recipe for more substantial snacking!
Troubleshooting
I will continue to add more to this Troubleshooting section as I start seeing questions coming through from people who have made the recipe.
Troubleshooting tips
“My sliders turned out too dry! 😭”
- You may have overbaked them. Baking for too long can cause the rolls and fillings to lose moisture, resulting in dryness.
- If your slider rolls were stale or not soft enough, they might not retain moisture as well during baking.
- I bet they were still YUM though!
“The tops of my sliders are too dark! 🔥”
- You might have left them in the oven for a bit too long after removing the foil. The exposed tops continue to brown quickly, so keep an eye on them.
- If your oven runs hot or you used a dark baking dish, it can cause uneven browning and darker tops.
- I bet they were still YUM though!
“My sliders look a bit wonky and misshapen! 🤔”
- If the slider rolls weren’t cut evenly in half, it can lead to uneven stacking of ingredients, causing some sliders to be thicker or thinner than others.
- Placing too many toppings without balancing the weight can also make them lean to one side when baked.
- I bet they were still YUM though!
“Why do my sliders feel soggy? 😳”
- You may have added too much Italian dressing or used a dressing that is particularly watery. This can overwhelm the bread and create sogginess.
- If you didn’t let the banana peppers drain well before adding them, their moisture can seep into the rolls during baking.
- I bet they were still YUM though!
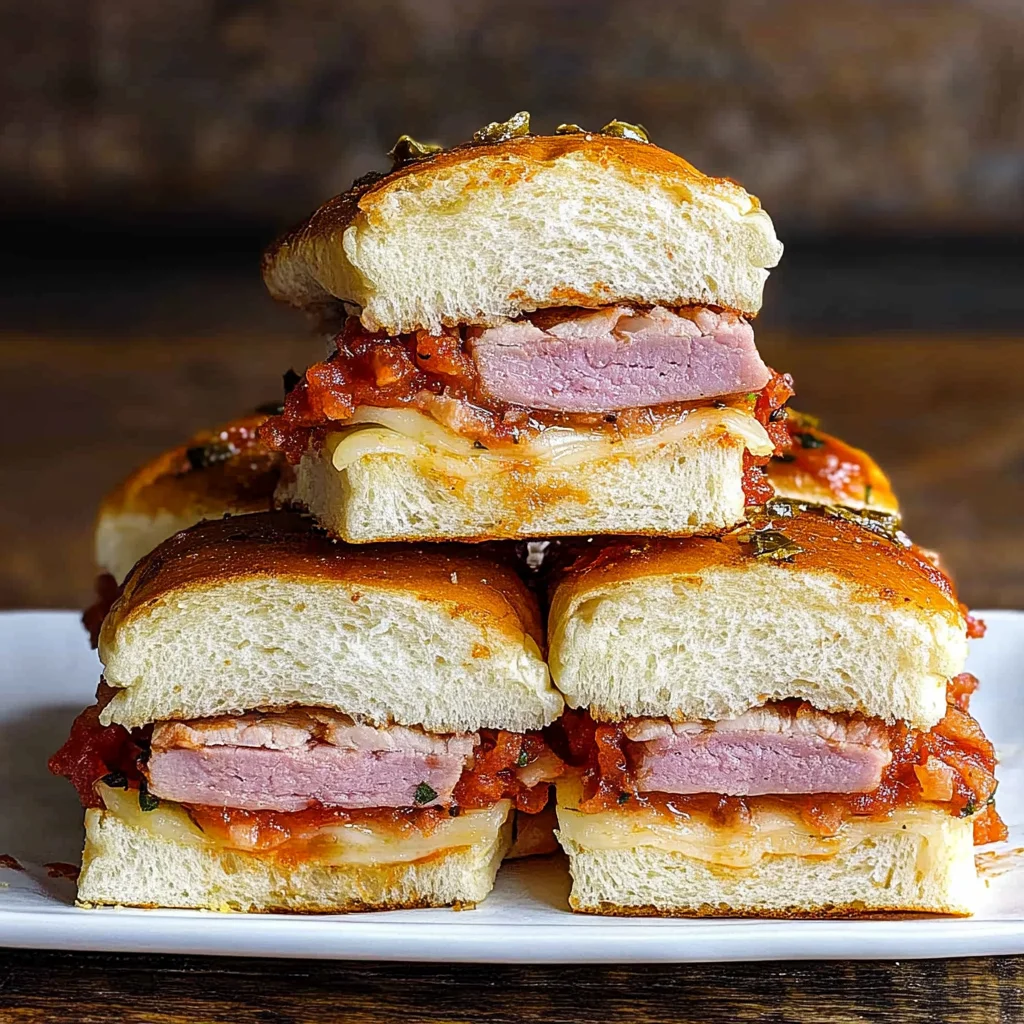
Hot Italian Sub Sliders
Ingredients
Method
- Preheat your oven to 350°F (175°C).
- Slice the slider rolls in half horizontally and place the bottom halves in a baking dish.
- Layer the salami, pepperoni, ham, provolone cheese, and banana peppers evenly over the bottom halves of the rolls.
- Drizzle the Italian dressing over the layered ingredients.
- Place the top halves of the rolls on top of the fillings.
- In a small bowl, mix the melted butter, garlic powder, and dried oregano.
- Brush the butter mixture over the top of the slider rolls.
- Cover the baking dish with aluminum foil and bake for 10 minutes.
- Remove the foil and bake for an additional 5 minutes, or until the tops are golden brown.
- Let cool for a few minutes before slicing and serving.