I’ve always had a serious soft spot for dessert bars, but it was that fateful trip to a cozy little café that truly ignited my passion for creating the perfect Dark Chocolate Raspberry Pie Bars. They had this decadent slice that was rich and velvety with a tangy raspberry layer that sent my taste buds into overdrive. I left the café dreaming about it, but as much as I loved that treat, I couldn’t shake the thought of making my own version—even better, and at a fraction of the cost (because let’s be honest, my dessert budget is not an endless pit of chocolate!).
After several attempts—okay, maybe more than several; let’s just say my kitchen looked like a chocolate bomb exploded—I finally honed in on the right balance of flavors and textures. Each round had its hilarious mishaps: one batch turned out so gooey it could have been mistaken for pudding, while another was so dry I thought I might need a glass of water just to get through a square! But I was determined to achieve that perfect blend of rich dark chocolate and tart raspberry that would leave everyone begging for more.
And oh boy, let me tell you, it was worth every single trial! The final product is nothing short of spectacular—deliciously rich dark chocolate pie bars with a tart raspberry filling that just sings in harmony. They’re beautifully dense yet somehow light at the same time, with a flavor profile that dances between indulgent sweetness and refreshing tartness. Trust me, once you try these Dark Chocolate Raspberry Pie Bars, you’ll be counting down the days until you can make them again. So grab your apron, and let’s get baking—your taste buds are in for a treat!
These Dark Chocolate Raspberry Pie Bars are…
…the ultimate indulgence for dessert lovers seeking a perfect balance of rich chocolate and tart raspberry!
1. They deliver a decadent flavor explosion that combines the richness of dark chocolate with the bright tartness of raspberries. The harmonious blend is achieved by using high-quality semi-sweet chocolate chips, enhancing the overall depth and making every bite a delightful experience.
2. Irresistible texture – these bars have a luscious, fudgy filling atop a perfectly crisp crust. The combination of melted butter and cocoa powder in the crust results in a firm base that contrasts beautifully with the soft, gooey dark chocolate filling, making each bite satisfying.
3. A key technique I employed was to melt the butter before mixing it into the crust ingredients. This not only ensures an even distribution throughout but also contributes to that rich, buttery flavor while keeping the crust sturdy enough to hold the luscious filling without crumbling.
4. Incredible value comes from creating these indulgent bars at home rather than splurging at a fancy bakery. With common pantry staples, you can whip up a batch of these Dark Chocolate Raspberry Pie Bars that yield generous portions for just a fraction of what you’d pay for a single slice elsewhere.
PS These bars cut beautifully into squares, making them perfect for sharing or packing in lunchboxes!
Ingredients for the Dark Chocolate Raspberry Pie Bars
Each ingredient in this dish plays an essential role in flavor and texture. Here’s what you’ll need:
- 1 cup all-purpose flour: Provides the structure and base for the crust.
- 1/4 cup granulated sugar: Adds a hint of sweetness to balance the chocolate.
- 1/2 cup unsalted butter (melted): Contributes richness and helps bind the crust together.
- 1/4 cup cocoa powder (unsweetened): Infuses deep chocolate flavor into the crust.
- 1 cup dark chocolate chips (semi-sweet): Delivers a luscious, rich chocolate experience in every bite.
- 1 cup fresh raspberries: Offers a tart contrast that brightens the overall flavor profile.
- 1/2 cup sweetened condensed milk: Ensures a creamy texture while adding sweetness to the filling.
- 1 teaspoon vanilla extract: Enhances the depth of flavor in the chocolate mixture.
- 2 large eggs: Acts as a binding agent, helping to set the filling perfectly.
You Must Bake the Crust First. No Exceptions!
I’ll admit it—I tried to skip this step. I thought, “What’s the big deal? It’s just a crust!” But after several rounds of testing (and some very sad, crumbly bars), I realized that if you want these Dark Chocolate Raspberry Pie Bars to shine, pre-baking the crust is non-negotiable. Trust me—it’s worth the extra time!
So, why is this step so crucial? Think of it like preparing a pizza base; if you throw all your toppings onto a raw crust and bake it together, you’ll end up with a soggy mess. The same principle applies to our rich cocoa-infused crust. Pre-baking ensures that it sets up perfectly—creating a sturdy foundation for that luscious raspberry filling and gooey dark chocolate layer on top.
What does pre-baking the crust do?
- Texture: A pre-baked crust creates a wonderfully crisp bottom layer that contrasts beautifully with the soft filling.
- Sturdiness: By firming up during baking, the crust holds its shape better when you cut into these bars, preventing them from falling apart.
- Flavor: Baking the crust intensifies the cocoa powder flavor, adding depth and richness that complements the tart raspberries perfectly.
- Moisture Barrier: A baked crust acts as a protective barrier against moisture from the filling, keeping it from becoming soggy over time.
- Color: Pre-baking gives your crust a lovely golden hue that enhances its visual appeal and signals that it’s ready to hold those indulgent layers.
Different pre-baking times
- 5 minutes (okay) — Just enough for a slight set but still too soft; expect some crumble when cutting.
- 10 minutes (good) — The recommended time; sets well but can still be slightly chewy in texture.
- 15 minutes (very good) — A firmer base with enhanced flavor; great for those who love a bit of crunch!
- Beyond 20 minutes (best) — Perfectly crisp and flavorful; however, monitor closely to avoid overt browning.
Beware: The most common mistake is underbaking the crust. If you rush through this step thinking it will all come together in the end, you’ll end up with a mushy bottom that ruins the entire bar. Don’t skip or skimp—trust me!
How to make Dark Chocolate Raspberry Pie Bars
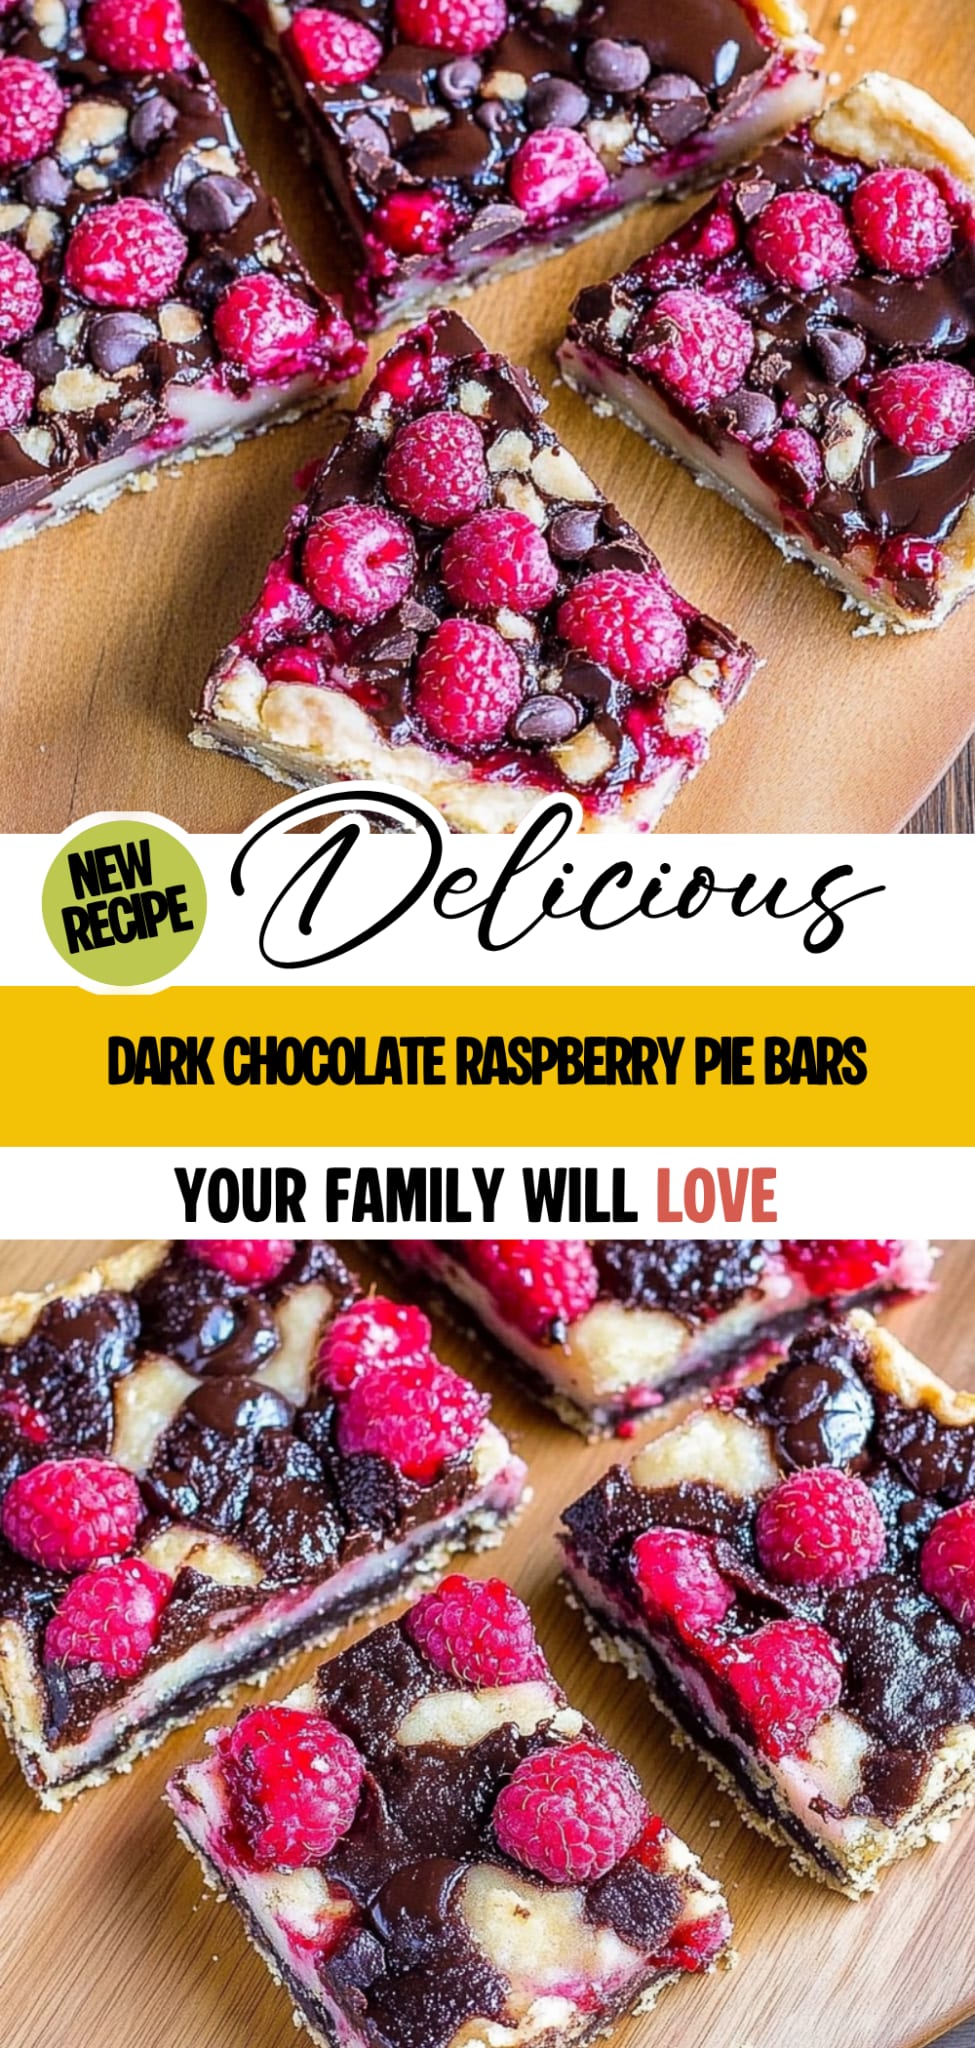
Are you ready to see how straightforward it is to make the Dark Chocolate Raspberry Pie Bars of your dreams??
1. PREPARE THE CRUST
Let’s start with that rich and chocolaty crust that holds all the goodness together!
1. Preheat – Preheat your oven to 350°F (175°C). This ensures a perfectly baked crust that isn’t too soft or hard.
2. Combine – In a mixing bowl, combine 1 cup of all-purpose flour, 1/4 cup of granulated sugar, 1/4 cup of cocoa powder, and 1/2 cup of melted unsalted butter. Mix until crumbly; the texture should resemble wet sand.
3. Press – Firmly press the mixture into the bottom of a greased 9×13 inch baking pan, ensuring an even layer for uniform baking.
4. Bake – Bake for 10 minutes until it’s slightly set. You want it to be fragrant and just starting to firm up.
HANDY TIPS
- If you prefer a thicker crust, you can increase the ingredients by half; just ensure your baking time is adjusted accordingly!
- Want a bit of crunch? Consider adding chopped nuts to the crust mixture for additional texture!
2. MAKE THE FILLING
Now onto that luscious filling that’s going to steal the show!
1. Melt – In a saucepan over low heat, melt 1 cup of dark chocolate chips until smooth, stirring continuously. Remove from heat and let cool slightly; this prevents cooking the eggs later on.
2. Whisk – In a separate bowl, whisk together 2 large eggs, 1/2 cup of sweetened condensed milk, and 1 teaspoon of vanilla extract until well combined and slightly frothy.
3. Combine – Stir in the melted chocolate into the egg mixture until fully incorporated; this creates a rich chocolate base.
4. Fold – Gently fold in 1 cup of fresh raspberries, being careful not to crush them too much; you want those beautiful bursts of flavor throughout.
HANDY TIPS
- If you’re feeling adventurous, try using frozen raspberries! Just thaw them first and drain excess moisture to maintain that perfect texture.
- For added flavor depth, consider adding a pinch of sea salt to enhance the chocolatey goodness!
3. BAKE THE BARS
The final step is where all your hard work comes together in delicious harmony!
1. Pour – Carefully pour the raspberry chocolate filling over the baked crust and spread it evenly with a spatula.
2. Bake – Bake for an additional 20 minutes or until set; it should look slightly puffed and not jiggly in the center when done.
3. Cool – Let cool completely before cutting into bars; this helps them hold their shape better once sliced.
HANDY TIPS
- For perfect squares, use a sharp knife dipped in hot water before slicing!
- You can sprinkle some flaky sea salt on top after baking for an extra flavor kick!
You’ve just created something truly special! These Dark Chocolate Raspberry Pie Bars are not only stunning but also incredibly satisfying with their rich chocolate layers complemented by tart raspberries—perfect for any dessert lover! Make these once, and I wager they will invade your dreams every night too! – Nagi x
FAQ – Dark Chocolate Raspberry Pie Bars
🍫 Can I make these pie bars ahead of time?
Absolutely! These Dark Chocolate Raspberry Pie Bars can be made a day or two in advance, and they actually taste even better after a night in the fridge as the flavors meld. Just make sure to store them in an airtight container to prevent them from drying out. If you plan on serving them later, I recommend cutting them into bars right before serving for the freshest presentation.
❄️ Can I freeze these pie bars?
Yes, you can freeze these pie bars for up to 3 months! To do this, allow the bars to cool completely after baking, then cut them into squares. Wrap each square tightly in plastic wrap and place them in a freezer bag or airtight container. When you’re ready to enjoy, just thaw them in the refrigerator overnight. They may lose a tiny bit of that fresh texture but will still taste divine!
🌾 Can I make these pie bars gluten-free?
Definitely! To make these Dark Chocolate Raspberry Pie Bars gluten-free, simply substitute the all-purpose flour with a 1: 1 gluten-free flour blend. I’ve tested it myself, and it works beautifully without compromising texture or flavor. Just keep an eye on baking times as they might vary slightly.
🍯 Can I reduce the sugar in the filling?
No, unfortunately, you can’t reduce the sugar without altering the balance of flavors and textures significantly. The sweetened condensed milk not only adds sweetness but also contributes to the creamy consistency of the filling. If you’re looking for alternatives, consider using a sugar-free sweetened condensed milk product specifically formulated for baking.
🥚 Why do I need to let the chocolate cool slightly before mixing it with eggs?
This step is crucial because adding hot chocolate directly to eggs can cook them and create a scrambled texture instead of a smooth filling. By letting it cool slightly, you ensure that when you combine it with the eggs and other ingredients, you’ll achieve that velvety smooth filling we’re all after! Trust me; it’s worth taking those extra few minutes.
🔄 Can I add different fruits instead of raspberries?
Absolutely! While raspberries add a lovely tartness that beautifully complements dark chocolate, feel free to experiment with other fruits like strawberries, blackberries, or even cherries. Just keep in mind that if you’re using larger fruits like strawberries, you’ll want to chop them into smaller pieces so they distribute evenly throughout the filling. Happy experimenting!
🙋♀️ How many times did you test this recipe?
More times than I’d like to admit! 😅 I tested this recipe at least eight times to get the perfect balance of rich chocolate and tart raspberry flavors. Each iteration taught me something new—whether about crust thickness or filling consistency—and I’m thrilled with how they turned out! So rest assured, it’s been meticulously crafted just for you!
Troubleshooting
I will continue to add more to this Troubleshooting section as I start seeing questions coming through from people who have made the recipe.
Troubleshooting tips
“My bars came out too thin! 😱”
- You may not have pressed the crust mixture firmly enough into the baking pan, which can lead to a thinner base. Make sure to press it down evenly and firmly next time.
- If you used a larger baking pan than specified, your bars will spread out more, resulting in a thinner texture. Stick to the 9×13 inch size for best results.
- Don’t worry, they still tasted great, right? 😉
“The crust is too dry and crumbly! 😩”
- If you measured your flour too loosely, you might have ended up with more flour than needed. Make sure to spoon the flour into your measuring cup and level it off for accuracy.
- Using melted butter that’s too hot can also dry out the crust; it should be warm but not scalding when mixed. Let it cool slightly after melting.
- I bet they were still YUM though!
“My filling turned out too runny! 😟”
- If you didn’t allow the melted chocolate to cool slightly before mixing it with the eggs and condensed milk, it could cause the eggs to scramble a bit, resulting in a runnier filling. Let that chocolate cool just a tad!
- Be sure to properly fold in the raspberries without overmixing; if you break them down too much, they can release excess liquid into the filling.
- But hey, at least it was still deliciously chocolatey!
“The top of my bars cracked while baking! 😢”
- Overbaking can cause cracks on the surface of your bars. Keep an eye on them during that last 20 minutes — they should be set but still slightly jiggly in the center when you take them out.
- If your oven runs hot or unevenly (which many do), it may also contribute to cracking. Consider using an oven thermometer for accuracy next time.
- I bet they were still YUM though!
“My crust is too dark on the edges! 🔥”
- If your oven temperature is slightly higher than 350°F (175°C), this can cause the edges of the crust to brown faster than expected. An oven thermometer can help ensure you’re at exactly the right temp!
- Not greasing your pan adequately might also lead to uneven cooking and browning. Always grease thoroughly so that heat distributes evenly.
- But even with those darker edges, I’m sure they tasted amazing!
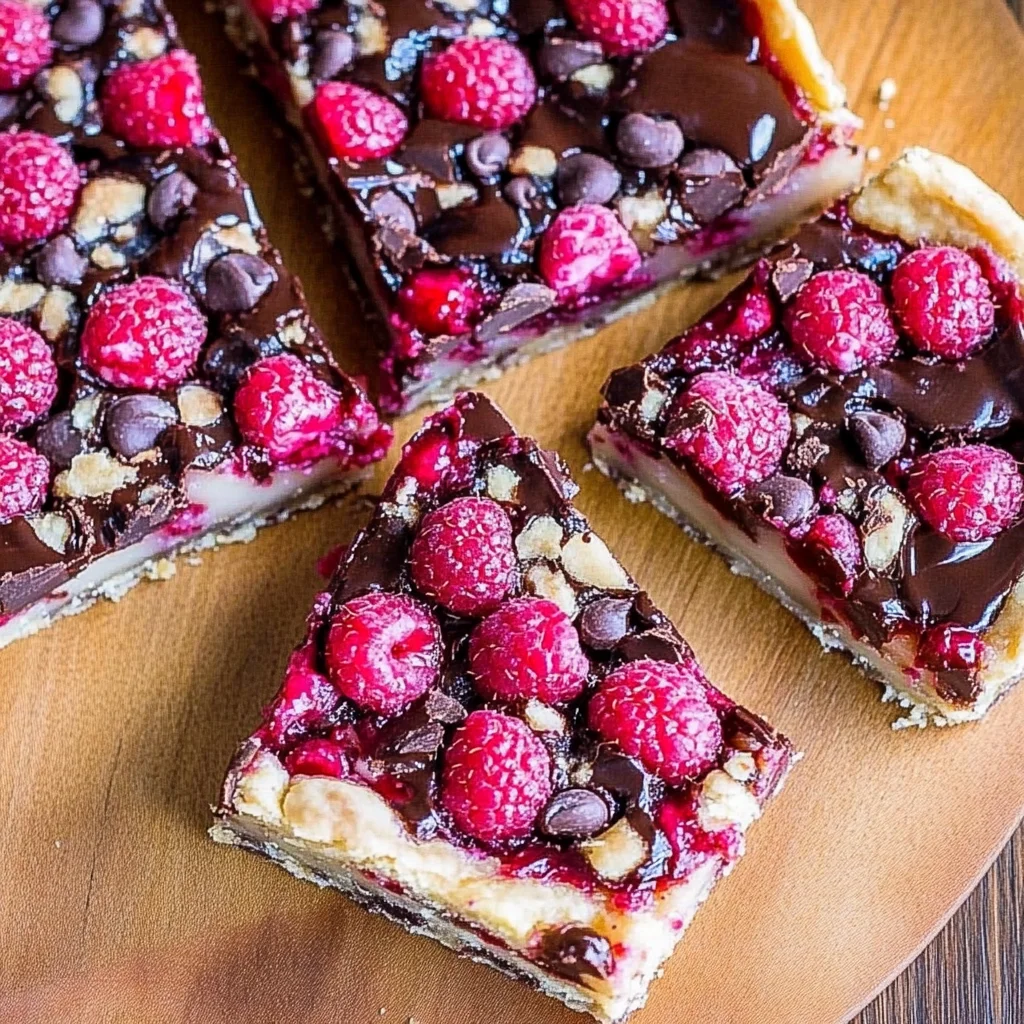
Dark Chocolate Raspberry Pie Bars
Ingredients
Method
- Preheat the oven to 350°F (175°C). In a mixing bowl, combine flour, sugar, cocoa powder, and melted butter. Mix until crumbly.
- Press the mixture into the bottom of a greased 9x13 inch baking pan. Bake for 10 minutes.
- In a saucepan over low heat, melt the dark chocolate chips until smooth. Remove from heat and let cool slightly.
- In a bowl, whisk together the eggs, sweetened condensed milk, and vanilla extract. Stir in the melted chocolate.
- Gently fold in the fresh raspberries.
- Pour the filling over the baked crust and spread evenly.
- Bake for an additional 20 minutes or until set. Let cool completely before cutting into bars.