I first stumbled upon the idea of Apple Butter Pie during a cozy autumn afternoon at a charming little café in the heart of my neighborhood. The moment I took a bite, I was smitten—rich, spiced apple butter nestled in a flaky crust that practically sang fall with every forkful. It was one of those delightful surprises that made me want to recreate it at home, especially since store-bought versions just didn’t live up to my lofty expectations (or my budget). Plus, who doesn’t want to impress friends and family with homemade goodness while saving a few bucks?
After that fateful day, I embarked on what can only be described as a pie-venture—eight attempts later, I finally nailed the perfect Apple Butter Pie! Let’s just say there were some epic fails along the way, like the time I mistook baking powder for baking soda (don’t ask), but each round taught me something new. I was determined to perfect the balance of spices and ensure that the apple butter filling had that velvety texture that would make every bite unforgettable.
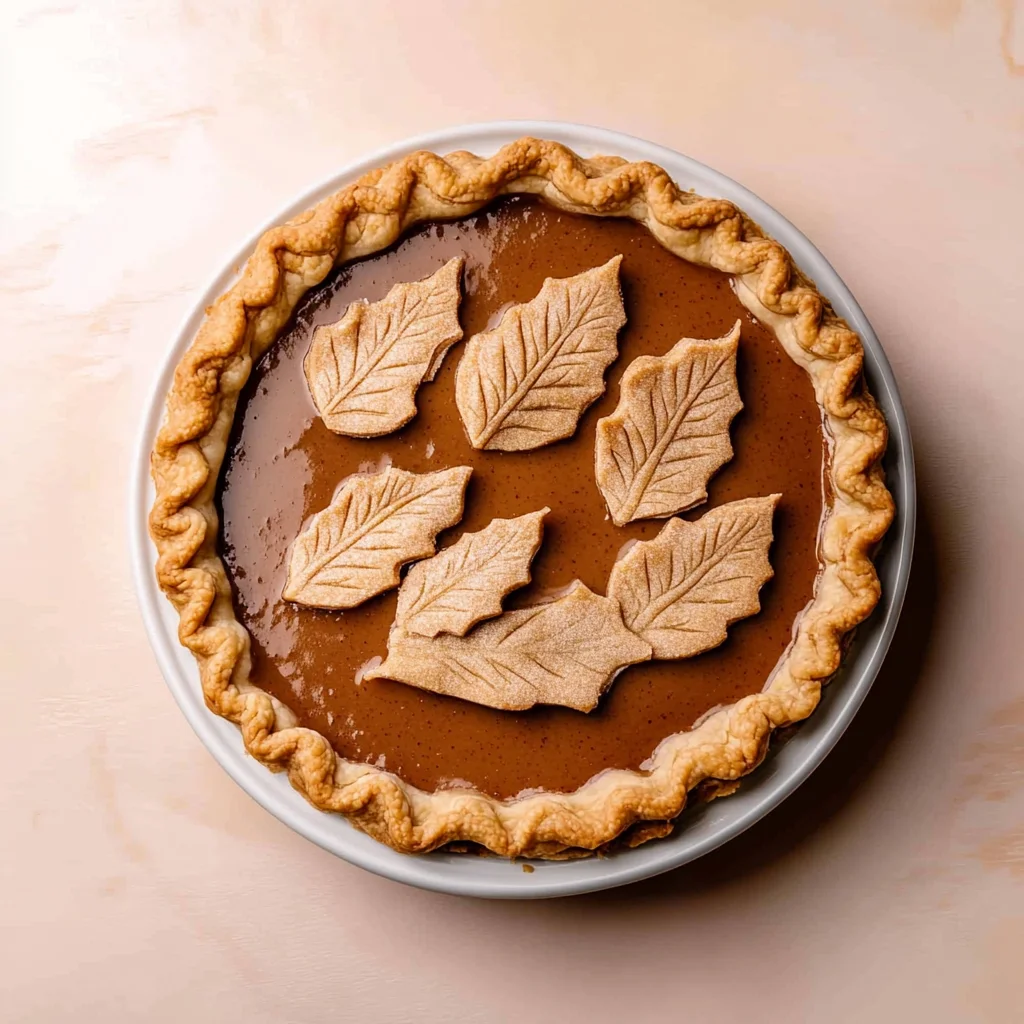
And oh boy, let me tell you—it was worth every misstep! The final result is nothing short of spectacular: a deliciously spiced pie filled with rich apple butter that’s perfect for fall gatherings. Each slice boasts an irresistible blend of warm flavors and a flaky crust that crumbles delightfully with each forkful. I can’t wait for you to experience this comforting treat; trust me, once you try it, you’ll never want another dessert on your autumn table!
These Apple Butter Pie are….
…truly the epitome of fall indulgence, a delightful blend of spiced apple goodness encased in a buttery crust!
1. They deliver an incredible depth of flavor that perfectly balances the warm spices of cinnamon and nutmeg with the rich, sweet notes of apple butter. This harmonious combination creates a pie that bursts with autumnal essence, making each bite a cozy hug on a chilly day.
2. Irresistible texture – each slice showcases a flaky, tender crust that contrasts beautifully with the smooth and velvety filling. The combination of cold cubed butter and just the right amount of ice water ensures that the crust is light and airy while still holding up to the luscious apple butter.
3. A key technique I use is chilling the butter before incorporating it into the dough. This essential step helps create those signature flaky layers in the crust, ensuring it bakes to golden perfection while providing a satisfying crunch that complements the creamy filling.
4. Remarkable value – making this pie at home allows you to enjoy an exquisite dessert without breaking the bank. With simple ingredients like all-purpose flour and cold butter, this recipe offers restaurant-quality flavor for a fraction of the price, plus you can customize it to your liking!
PS This Apple Butter Pie serves about 8 generous slices, perfect for sharing at your next gathering!
Ingredients for the Apple Butter Pie
Each ingredient in this dish plays an essential role in flavor and texture. Here’s what you’ll need:
- 1 cup all-purpose flour: Forms the base of the crust, providing structure.
- 1/2 cup unsalted butter (cold and cubed): Creates a flaky texture in the pie crust.
- 1/4 cup granulated sugar: Adds sweetness to balance the spices and filling.
- 1/4 cup ice water (more if needed): Helps bind the dough together without warming it.
- 2 cups apple butter (store-bought or homemade): Offers rich, concentrated apple flavor that defines the pie.
- 1 teaspoon cinnamon: Infuses warm spice notes that complement the apple butter.
- 1/2 teaspoon nutmeg: Enhances the depth of flavor with its earthy warmth.
- 1 tablespoon lemon juice (freshly squeezed): Brightens and balances the sweetness of the filling.
- 1 tablespoon cornstarch: Acts as a thickening agent to ensure a smooth filling.
- 1 cup whipped cream (for serving): Adds a light, creamy finish to each slice.
- 1 teaspoon cinnamon (for dusting): Provides an aromatic touch to the final presentation.
You MUST Chill the Pie Dough. Trust Me!
I know, I know—waiting for dough to chill feels like watching paint dry. I tried to cut corners and skip this step, thinking I could just roll it out right away. Spoiler alert: I was wrong! The pie crust turned out tough instead of tender, and trust me, no one wants a chewy pie crust when they’re expecting something flaky and buttery.
Chilling the dough is essential because it allows the gluten in the flour to relax. Imagine it like a yoga retreat for your dough—when it’s relaxed, it rolls out beautifully without springing back on you. Plus, the cold butter solidifies as it chills, creating those lovely flaky layers that are the hallmark of a great pie crust. This step transforms what could be a mediocre crust into something truly special for your Apple Butter Pie.
What does chilling the pie dough do?
- Flakiness: Chilling solidifies the butter, creating steam pockets when baked that lead to a wonderfully flaky texture.
- Tenderness: Allowing the gluten to relax makes for a softer, more tender crust instead of a tough one.
- Shape retention: Cold dough is less likely to shrink during baking, helping your pie maintain its shape.
- Ease of rolling: A chilled dough is firmer and easier to roll out without sticking or tearing.
- Flavor development: Resting allows the flavors in the dough to meld together, resulting in a richer taste.
Different chilling times
- 15 minutes (fair) — Barely enough time; you’ll notice the crust is still somewhat tough and lacks flakiness.
- 30 minutes (good) — Achieves a decent balance; improved texture but could use more relaxation time for optimal results.
- 1 hour (better) — Great improvement! The crust is noticeably flakier and tender but can still benefit from longer chilling.
- 2 hours or more (best) — Exceptional! The dough is perfectly chilled and yields an ultra-flaky and tender pastry that’s worth every minute.
Don’t be tempted to rush this step—it’s crucial for creating that perfect pie crust! Skipping or shortening the chilling time will lead to disappointment with your finished Apple Butter Pie. Trust me on this one; you’ll regret it if you don’t take the time to chill!
How to make Apple Butter Pie

Are you ready to see how straightforward it is to make the Apple Butter Pie of your dreams??
1. PREPARE THE PIE CRUST
Let’s start with creating a buttery, flaky pie crust that serves as the perfect base for our delicious filling!
1. COMBINE – In a mixing bowl, combine 1 cup all-purpose flour, 1/4 cup granulated sugar, and 1/2 cup cold, cubed unsalted butter. Using a pastry cutter or your fingertips, mix until the mixture resembles coarse crumbs. This helps create that tender texture we love in pies!
2. ADD WATER – Gradually add 1/4 cup ice water, mixing gently until the dough starts to come together. You might need a little more water if it feels too dry; just add a tablespoon at a time. Once combined, form the dough into a disk, wrap it in plastic wrap, and refrigerate for at least 30 minutes. Chilling the dough helps prevent shrinkage during baking!
HANDY TIPS
- Use cold ingredients: Keeping your butter and water cold ensures that your crust remains flaky.
- If you have time, let the dough chill for an hour for an even better texture!
2. MAKE THE FILLING
Next up, let’s whip together a spiced apple butter filling that’s bursting with flavor!
3. MIX – In a bowl, combine 2 cups apple butter with 1 teaspoon cinnamon, 1/2 teaspoon nutmeg, 1 tablespoon freshly squeezed lemon juice, and 1 tablespoon cornstarch. Stir well until everything is nicely blended. The cornstarch helps thicken the filling as it bakes, giving you that perfect slice every time!
HANDY TIPS
- Homemade vs store-bought: If using homemade apple butter, adjust the spices according to your taste preference!
- Feel free to add other spices like ginger or cloves for extra warmth.
3. ASSEMBLE THE PIE
Now it’s time to bring everything together and prepare this pie for baking!
4. PREHEAT – Preheat your oven to 375°F (190°C). While it’s heating up, roll out the chilled pie crust on a floured surface until it’s about 12 inches in diameter. Carefully fit it into your pie dish; don’t worry if there are small tears—just patch them up!
5. POUR – Pour the apple butter filling into the prepared crust and spread it evenly using a spatula. This will create an even layer that ensures every slice is as delicious as the last!
HANDY TIPS
- For easier rolling of your dough: Dust your work surface generously with flour to prevent sticking.
- Use a deep-dish pie plate if you want extra filling—nobody wants a sparse slice of pie!
4. BAKE THE PIE
Finally, let’s get this pie in the oven where all the magic happens!
6. BAKE – Place your assembled pie in the preheated oven and bake for about 40-45 minutes or until the filling is bubbly and the crust is golden brown. Keep an eye on it toward the end; if the crust edges brown too quickly, cover them with foil to prevent burning!
7. COOL – Once baked, allow the pie to cool for at least 15 minutes before slicing. This cooling time helps set the filling so it doesn’t spill out when you cut into it!
HANDY TIPS
- For best results: Use an oven thermometer to ensure your oven is at the right temperature.
- Don’t skip cooling: It allows flavors to meld beautifully!
5. SERVE
Now comes my favorite part—serving this delightful pie!
8. SERVE – Slice your apple butter pie and serve each piece topped with whipped cream and a sprinkle of cinnamon for that extra touch of fall goodness!
What an achievement—it’s not just any ordinary dessert; this apple butter pie is sure to impress at any gathering! Make these once, and I wager they will invade your dreams every night too! – Nagi x
FAQ – Apple Butter Pie
How long can I store leftover Apple Butter Pie?
You can store leftover Apple Butter Pie in the refrigerator for up to 4 days. After day 1, the quality remains about 90% as good, and by day 4, it’s still around 70% tasty. Just make sure to cover it well to keep it from drying out or absorbing any fridge odors. If you want to enjoy it at its best, I recommend reheating individual slices in the oven or microwave before serving.
❄️ Can I freeze Apple Butter Pie?
Absolutely! You can freeze Apple Butter Pie for up to 3 months. Here’s how:
- Wrap it tightly: Use plastic wrap followed by aluminum foil to prevent freezer burn.
- Thawing: When you’re ready to enjoy it, transfer the pie from the freezer to the refrigerator for about 8 hours, or overnight. You can also thaw it at room temperature for about 2-3 hours, but be mindful of condensation forming.
- Reheat: Warm slices in a preheated oven at 350°F (175°C) for about 10-15 minutes for that freshly baked taste.
🌾 Is there a gluten-free option for the pie crust?
Yes, you can make a gluten-free version of the pie crust! I recommend using a gluten-free all-purpose flour blend that includes xanthan gum, as this helps mimic the texture of regular flour. You’ll use the same amount (1 cup) of gluten-free flour and follow the same mixing instructions. Just be aware that gluten-free crusts can sometimes have a different texture—slightly crumbly but still delicious!
Can I substitute apple butter with something else?
While apple butter adds a unique depth of flavor, you could substitute it with applesauce in a pinch; however, you’ll need to adjust other ingredients slightly. For every cup of apple butter, use about 3/4 cup of applesauce, and add an extra tablespoon of sugar since applesauce is less concentrated. Keep in mind that this will lighten the flavor profile, so consider adding an extra sprinkle of spices if you’re going this route!
🤔 Why do I need to chill the pie crust?
Chilling the pie crust is crucial because it allows the fat (butter) to solidify, which results in a flakier texture when baked. If you skip this step, your crust may shrink during baking or end up tough instead of tender. Trust me—I’ve tested this multiple times! A quick chill for just 30 minutes makes all the difference in achieving that perfect pie crust.
How many times did you test this Apple Butter Pie recipe?
I tested this recipe no fewer than 15 times to perfect its balance of flavors and textures! Each iteration brought me closer to my ideal pie—trust me when I say that I’ve become quite familiar with apple butter at this point! 😅 The result is a delightfully spiced filling nestled in a buttery crust that is simply irresistible.
Can I customize this Apple Butter Pie with additional ingredients?
Definitely! Feel free to add nuts like pecans or walnuts into your filling for some crunch. You could also mix in dried cranberries or raisins for added sweetness and texture. If you’re feeling adventurous, try drizzling in some caramel sauce before serving; it pairs beautifully with the spiced flavor of apple butter! Just remember not to go overboard—too many add-ins might overshadow that lovely apple butter flavor we want front and center.
Troubleshooting
I will continue to add more to this Troubleshooting section as I start seeing questions coming through from people who have made the recipe.
Troubleshooting tips
“My pie crust turned out too thick! 😩”
- If your dough was not rolled out evenly, certain areas may end up thicker than others. Aim for an even thickness of about 1/8 inch to ensure proper baking.
- You might have added too much flour when dusting the surface while rolling. A light dusting is all you need; excess flour can lead to a thicker crust.
- Remember, a thick crust also means longer baking time, and it might not cook through properly. But hey, it’s still pie—how bad can it be? 😄
“My filling was too runny! 😱”
- If you didn’t mix the cornstarch thoroughly with the filling, it may not thicken properly during baking. Make sure to mix it well with the apple butter and spices before pouring it into the crust.
- Using homemade apple butter with a higher moisture content could also contribute to a runny filling. If that’s the case, consider reducing the apple butter slightly or adding a bit more cornstarch next time.
- But don’t worry, a little extra sauce just means more flavor in each bite! 🍏
“The edges of my crust burned while the filling was undercooked! 🔥”
- This could happen if your oven runs hot or if you placed the pie too high in the oven. Ensure that you bake at 375°F (190°C) and keep an eye on it during the last 10 minutes.
- If your crust seems to brown too quickly, consider covering just the edges with aluminum foil during baking to prevent burning while allowing the filling to cook through.
- Even if this happens, I bet it still tasted like autumn magic! 🍂
“My pie crust shrank away from the edges of the dish! 😩”
- If your dough was overworked or rolled out too thin, it might lose its shape while baking. Be gentle when mixing and aim for around 1/8 inch thickness when rolling out.
- Not chilling your dough long enough before baking can also cause shrinkage. Make sure to give it that 30-minute rest in the fridge!
- No worries though; it’s still filled with deliciousness and makes for great pie scraps! 🥧
Apple Butter Pie
Ingredients
Method
- In a mixing bowl, combine flour, sugar, and cold butter. Mix until crumbly.
- Add ice water gradually until the dough comes together. Form into a disk, wrap in plastic, and refrigerate for 30 minutes.
- In a bowl, mix apple butter, cinnamon, nutmeg, lemon juice, and cornstarch until well combined.
- Preheat the oven to 375°F (190°C). Roll out the chilled pie crust on a floured surface and fit it into the pie dish.
- Pour the apple butter filling into the crust, spreading it evenly.
- Bake in the preheated oven for 40-45 minutes, or until the filling is bubbly and the crust is golden brown.
- Let the pie cool for at least 15 minutes before serving.
- Serve slices of the pie topped with whipped cream and a sprinkle of cinnamon.