I first fell in love with Thai Peanut Chicken at a little hole-in-the-wall restaurant tucked away in a bustling market. The moment I tasted that creamy, rich peanut sauce coating tender chicken, my taste buds did a happy dance! I knew I had to recreate it at home—not just because dining out can be pricey (and let’s be honest, who doesn’t want to save a bit of cash?), but also because I wanted the satisfaction of putting my own spin on this delightful dish. Plus, there’s something incredibly rewarding about mastering a recipe that you’ve come to crave.
After several attempts and more than a few kitchen mishaps—let’s just say my first version was more “chicken soup” than “Thai Peanut Chicken”—I finally found the perfect balance of flavors and textures. It took me about a week of tinkering, tasting, and maybe even shedding a tear or two over lumpy sauce. Each iteration brought me closer to the creamy consistency and nutty flavor that makes this dish so special. I was determined to nail that authentic taste while keeping it super simple for busy weeknights!
And let me tell you, all those efforts were absolutely worth it! The final result is pure bliss: tender chicken enveloped in a velvety peanut sauce, served alongside colorful veggies and fluffy rice that soak up every delicious drop. It’s got rich flavor with just the right amount of crunch from the veggies, making it not only comforting but also exciting to eat. I can’t wait for you to try my version of Thai Peanut Chicken—it’s bound to become a staple in your kitchen just like it has in mine!
These Thai Peanut Chicken are….
…a vibrant celebration of flavors and textures that will make your taste buds dance!
1. They offer a bold, savory punch with the perfect balance of creamy peanut butter and savory soy sauce. This combination creates a rich depth of flavor that elevates the chicken, ensuring every bite is bursting with deliciousness and reminiscent of authentic Thai cuisine.
2. The crisp tenderness of the vegetables—like colorful bell peppers and broccoli—provides a delightful contrast to the creamy sauce. Sautéing them in vegetable oil just until they’re tender-crisp retains their vibrant colors and nutrients, making each mouthful not only tasty but also visually appealing.
3. A key technique is marinating the chicken briefly in a blend of soy sauce and ginger before cooking. This step infuses the meat with flavor from the inside out, resulting in juicy, succulent pieces that are packed with taste and complement the richness of the peanut sauce beautifully.
4. This dish is an affordable and quick weeknight meal, as it uses everyday ingredients easily found at your local grocery store. In under 30 minutes, you can whip up a hearty serving of Thai Peanut Chicken that rivals any takeout option, all while saving money without sacrificing flavor.
PS This recipe serves about 4 people generously, making it perfect for family dinners or meal prep for the week ahead!
Ingredients for the Thai Peanut Chicken
Each ingredient in this dish plays an essential role in flavor and texture. Here’s what you’ll need:
1 lb boneless, skinless chicken breasts (cut into bite-sized pieces): Provides tender protein that absorbs the rich sauce beautifully.
2 cups mixed bell peppers (sliced): Adds a vibrant crunch and sweetness to balance the savory elements.
1 cup broccoli florets: Contributes a fresh texture and earthy flavor that complements the other ingredients.
2 tablespoons vegetable oil: Used for sautéing, it helps achieve a perfect sear on the chicken.
1/2 cup creamy peanut butter: Gives the sauce its signature creaminess and nutty depth.
1/4 cup soy sauce (low sodium): Enhances umami flavor while keeping the dish balanced and not overly salty.
2 tablespoons honey: Adds a touch of natural sweetness to round out the sauce’s flavor profile.
1 tablespoon rice vinegar: Introduces a subtle tang that brightens the richness of the peanut sauce.
1 teaspoon sesame oil: Infuses a nutty aroma that elevates the overall taste experience.
1 clove garlic (minced): Brings warmth and depth with its aromatic essence.
1 teaspoon ginger (grated): Offers a zesty kick that adds complexity to the dish.
2 tablespoons water (to thin the sauce): Adjusts the consistency of the sauce for optimal coating on chicken and vegetables.
2 cups cooked jasmine rice (for serving): Serves as a fragrant base to soak up all the delicious flavors.
2 tablespoons chopped peanuts (for garnish): Provides an extra crunch and enhances the peanut flavor in the dish.
- 2 tablespoons fresh cilantro (for garnish): Adds a burst of freshness that brightens every bite.
The Secret to a Creamy Peanut Sauce: No Shortcuts Allowed!
I’ll be honest with you—I tried to find a shortcut for making the peanut sauce. I thought maybe I could just mix everything quickly without whisking or even blending. Spoiler alert: it didn’t work. The sauce turned out lumpy and lacked that silky smooth texture that makes this Thai Peanut Chicken truly irresistible. Trust me, you don’t want to skip this step!
Why is whisking the sauce so crucial? When you vigorously combine the peanut butter, soy sauce, honey, and other ingredients, you’re not just mixing; you’re creating a velvety emulsion. This process helps to blend the flavors seamlessly and ensures that every bite of chicken is coated in that rich, creamy goodness. Think of it like stirring together a salad dressing—if it’s not emulsified, you’ll just end up with a sad, watery mess instead of a cohesive flavor bomb!
What does whisking do?
- Flavour: Whisking combines all the ingredients evenly, allowing the flavors of garlic, ginger, and honey to meld beautifully with the peanut butter.
- Texture: A well-whisked sauce is smooth and creamy, ensuring that it clings perfectly to the chicken and vegetables without being chunky or separated.
- Consistency: By adding water while whisking, you achieve a pourable consistency that coats your chicken evenly rather than leaving globs of sauce on your plate.
- Visual Appeal: A smooth sauce has an inviting sheen that enhances the presentation of your dish, making your Thai Peanut Chicken as delightful to look at as it is to eat.
- Balance: Properly whisked ingredients lead to a balanced taste where no single flavor overpowers another—each ingredient plays its part harmoniously.
Different whisking intensities
- 30 seconds (good) — results in a somewhat mixed sauce; it’s okay but can have tiny lumps and uneven flavor distribution.
- 1 minute (better) — achieves decent smoothness but may still have some texture inconsistencies; not quite luxurious yet.
- 2 minutes (great) — produces a lovely creamy consistency with balanced flavors; this is where we start getting close to perfection!
- ⭐️ 3 minutes or more ⭐️ — optimal! The result is silky smooth and well-blended; you’ll notice the difference immediately when you pour it over your chicken.
Just remember—if you skip or rush the whisking step, you’ll end up with an unevenly flavored sauce that’s more lumpy than luscious. Don’t say I didn’t warn you!
How to make Thai Peanut Chicken
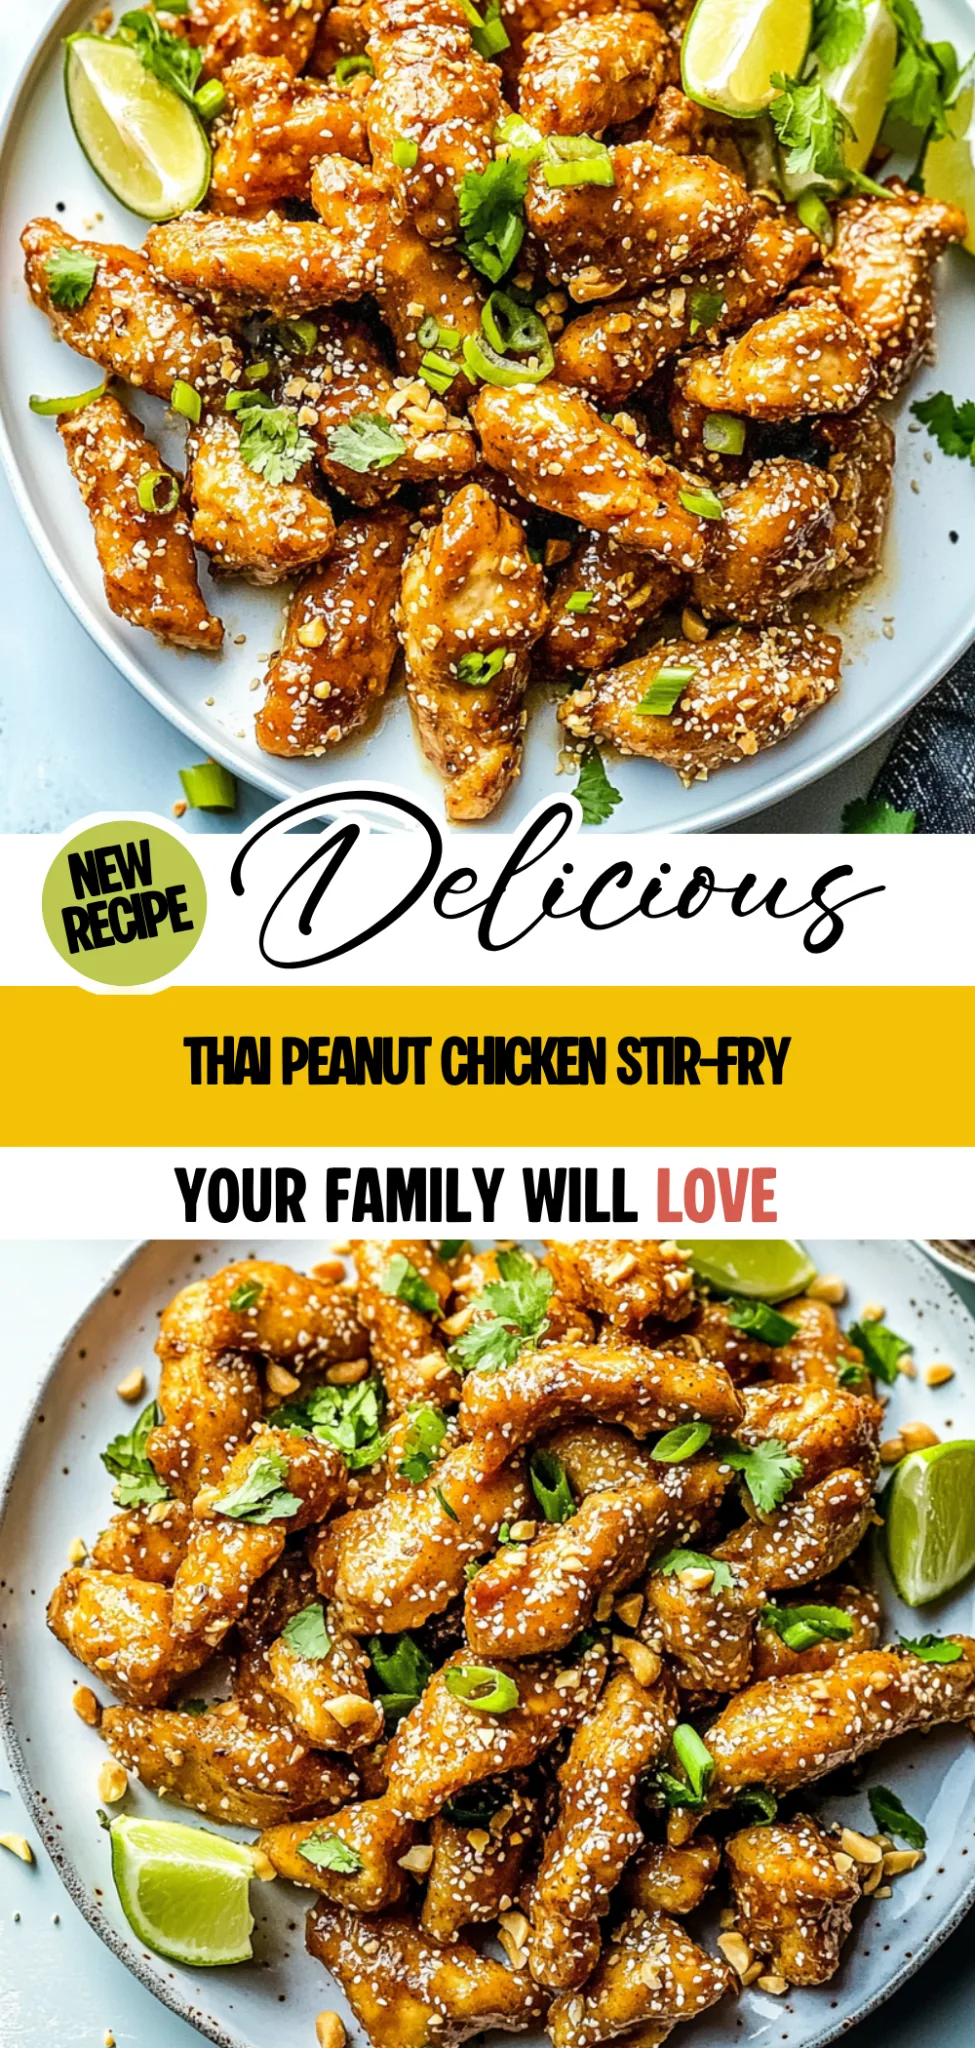
Are you ready to see how straightforward it is to make the Thai Peanut Chicken of your dreams??
1. PREPARE THE PEANUT SAUCE
This creamy peanut sauce is going to take your dish to the next level!
1. WHISK – In a mixing bowl, whisk together 1/2 cup of creamy peanut butter, 1/4 cup of low sodium soy sauce, 2 tablespoons of honey, 1 tablespoon of rice vinegar, 1 teaspoon of sesame oil, 1 clove of minced garlic, 1 teaspoon of grated ginger, and 2 tablespoons of water until the mixture is smooth and well combined. This sauce will become the luscious coating for your chicken and vegetables, bringing together sweet and savory flavors that are quintessentially Thai.
2. SET ASIDE – Once blended to perfection, set the peanut sauce aside while you cook the chicken and vegetables. This allows the flavors to meld just a bit more!
HANDY TIPS
- 💡 TIP: For an extra kick, consider adding a pinch of chili flakes or sriracha to the peanut sauce!
- 💡 TIP: The peanut sauce can be made ahead and stored in the fridge for up to a week — great for meal prep!
2. COOK THE CHICKEN AND VEGETABLES
Let’s get that skillet sizzling!
3. HEAT – Heat 2 tablespoons of vegetable oil in a large skillet over medium-high heat. Make sure the oil is hot enough that it shimmers but doesn’t smoke; this ensures your chicken gets nice and brown without being greasy.
4. COOK – Add the cut bite-sized pieces of 1 lb boneless, skinless chicken breasts into the skillet in a single layer. Cook for about 5-7 minutes until they are browned and cooked through — look for no pink remaining inside! Stir occasionally to ensure all sides are golden brown.
5. ADD VEGGIES – Next, add in the sliced bell peppers (2 cups) and broccoli florets (1 cup). Stir-fry everything together for another 3-5 minutes until the vegetables are tender yet still crisp. This gives you that vibrant color and crunch that complements the creamy peanut sauce perfectly.
HANDY TIPS
- ⚠️ Warning: Don’t overcrowd the pan when cooking chicken; if necessary, cook in batches — you want that beautiful sear!
- 💡 TIP: Feel free to use any combination of bell peppers you like; red, yellow, or green all work splendidly!
3. COMBINE AND SERVE
Time to bring it all together for a delicious finish!
6. POUR – Pour the prepared peanut sauce over the cooked chicken and vegetables in the skillet while stirring gently to coat everything evenly with that rich sauce. Let it simmer for about a minute so it thickens slightly as it clings to your ingredients.
7. SERVE – Serve your Thai peanut chicken over freshly cooked jasmine rice (about 2 cups), garnishing with chopped peanuts (2 tablespoons) and fresh cilantro (2 tablespoons). This adds not only flavor but also a lovely presentation that will impress anyone at your table.
HANDY TIPS
- 💡 TIP: I like serving this dish with lime wedges on the side; a little squeeze adds brightness!
- 💡 TIP: If you’re short on time, pre-cooked rotisserie chicken makes an easy swap—just heat it through before adding the sauce!
What an incredible dish you’ve just created! Rich flavors from creamy peanuts paired with tender chicken and crisp veggies all served over fluffy rice — it’s comfort food at its finest! I can’t wait for you to dig into this delightful Thai Peanut Chicken experience! – Nagi x
FAQ – Thai Peanut Chicken
🥡 How long will the leftovers keep in the fridge?
Leftover Thai Peanut Chicken can be stored in an airtight container in the refrigerator for up to 3 days. After that, the quality starts to diminish, and it may only be about 80% as good on day 4. I recommend consuming it within this time frame for the best flavor and texture. When reheating, be sure to do so gently to avoid drying out the chicken.
⏱️ Can I skip marinating the chicken?
No, you cannot skip marinating! The beauty of this dish lies in the rich peanut sauce that infuses flavor into the chicken as it cooks. While it’s not a traditional marinating step, letting the chicken sit in the sauce for even just a few minutes helps enhance its taste. If you’re short on time, just make sure to coat it well before cooking; even a short rest will help!
❄️ Can I freeze Thai Peanut Chicken?
Yes, you can freeze Thai Peanut Chicken! To do this:
- Allow it to cool completely after cooking.
- Transfer it to an airtight freezer-safe container or freezer bag.
- It can be frozen for up to 3 months.
When ready to eat, thaw it overnight in the fridge and reheat gently on the stove or in the microwave. Just be careful not to overcook it when reheating!
🌱 Is there a way to make this dish gluten-free?
Absolutely! To make Thai Peanut Chicken gluten-free, simply use gluten-free soy sauce, which is widely available now. Additionally, check that any other condiments you use, like rice vinegar and sesame oil, are labeled as gluten-free. This way, you can enjoy all those delicious flavors without any worry!
🔄 Can I substitute creamy peanut butter with something else?
Yes, but keep in mind that using a different type of nut butter will change the flavor profile of your dish. If you want a similar taste but need a substitute due to allergies or preference, you could try almond butter or sunflower seed butter. Just remember that these alternatives might affect the creaminess and depth of flavor slightly — each nut butter has its own unique characteristics.
🤔 Why do we need to whisk together the peanut sauce ingredients?
Whisking together the peanut sauce ingredients ensures that everything blends smoothly, creating a creamy consistency without lumps. If you were to just mix them without whisking, you’d likely end up with clumps of peanut butter rather than a luscious sauce that coats your chicken and vegetables beautifully. Trust me; I’ve tried skipping this step before…and let’s just say it wasn’t pretty! 😅
🍽️ What are some good add-ins or variations for this dish?
There are countless ways to customize your Thai Peanut Chicken! Here are some ideas:
- Add diced carrots or snap peas for extra color and crunch!
- Toss in some cooked noodles instead of rice for a noodle bowl version.
- For heat lovers, add sliced jalapeños or red pepper flakes while cooking.
Whatever you choose, just remember — more veggies mean more fun! And who doesn’t love variety?
Troubleshooting
I will continue to add more to this Troubleshooting section as I start seeing questions coming through from people who have made the recipe.
Troubleshooting tips
“My chicken turned out dry and tough! 😩”
- The chicken was overcooked. Cooking it for too long or at too high a temperature can cause it to lose moisture, leading to a dry texture. Aim for a cooking time of 5-7 minutes until just cooked through.
- You may have used larger pieces of chicken than recommended. If your pieces are not bite-sized, they will take longer to cook, resulting in dryness. Make sure to cut your chicken into uniform bite-sized pieces.
I bet it still tasted good with that peanut sauce though!
“My peanut sauce is way too thick! 😬”
- You might not have added enough water to thin the sauce. Adjusting the consistency is key, so if you find it too thick, add a bit more water, one tablespoon at a time, until smooth.
- If you’re using natural peanut butter instead of creamy, it can be thicker. Consider using a commercial creamy peanut butter for a smoother texture next time.
I know it was still deliciously peanut-y though!
“My vegetables got mushy and overcooked! 😱”
- You may have cooked the bell peppers and broccoli for too long. These veggies only need about 3-5 minutes of stir-frying; any longer can lead to mushiness. Keep an eye on them!
- Adding the vegetables too early in the cooking process can also contribute to this issue. They should be added after the chicken is cooked through for optimal texture.
At least they were colorful and tasty in your dish!
“The sauce didn’t cling to my chicken properly! 🤔”
- You might not have allowed the chicken to brown properly before adding the sauce. Browning creates a nice surface for the sauce to adhere to, so make sure your chicken is nicely browned first.
- If you didn’t stir the sauce well enough before pouring it over, it can separate and won’t coat evenly. Give that sauce a good whisk before adding!
No worries—I bet it was still full of flavor!
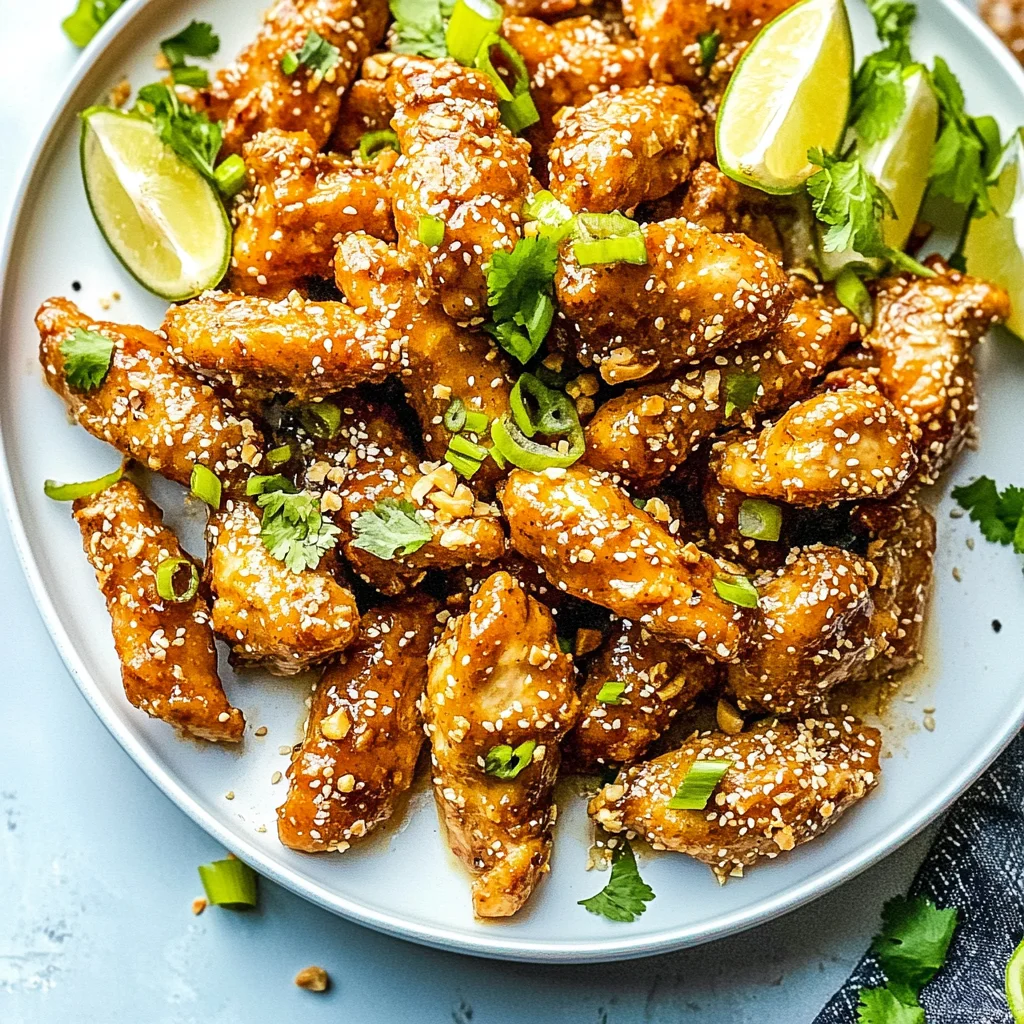
Thai Peanut Chicken
Ingredients
Method
- In a mixing bowl, whisk together peanut butter, soy sauce, honey, rice vinegar, sesame oil, garlic, ginger, and water until smooth.
- Set aside the peanut sauce.
- Heat vegetable oil in a skillet over medium-high heat.
- Add chicken pieces and cook until browned and cooked through, about 5-7 minutes.
- Add bell peppers and broccoli, and stir-fry for another 3-5 minutes until vegetables are tender.
- Pour the peanut sauce over the chicken and vegetables, stirring to coat evenly.
- Serve the Thai peanut chicken over cooked jasmine rice, garnished with chopped peanuts and cilantro.