I first fell in love with Thai peanut curry during a late-night food adventure at a tiny Thai restaurant tucked away in my neighborhood. The moment I took my first bite, I was swept away by the rich, creamy sauce that enveloped tender vegetables and juicy protein. It was comfort in a bowl! I knew I had to recreate this masterpiece at home—not just for the sheer joy of it but also because let’s be real, dining out all the time can get pricey, and I was determined to make my version even better (and more budget-friendly!).
After countless attempts—seriously, I lost count after about five iterations—I finally nailed this Thai Peanut Curry Recipe. Each round had its own set of challenges: sometimes too salty, other times not enough peanut flavor, and let’s not even talk about the disastrous attempts that resulted in a curry as thick as cement. But through each misstep (and yes, there were many), I learned what worked and what didn’t. It became a ridiculously fun experiment in flavor balance and texture, transforming me from a curious cook into a dedicated curry enthusiast.
And oh boy, was it worth every spoonful of effort! The final result is nothing short of spectacular—a rich and creamy Thai peanut curry that’s packed to the brim with vibrant vegetables and protein. The sauce is luxuriously smooth with a perfect nutty undertone, while the combination of textures keeps every bite interesting. Trust me, this dish will have you coming back for seconds (or thirds!). So grab your apron and let’s dive into this delightful creation together—I can’t wait for you to taste it!
These Thai Peanut Curry are…
…a delightful explosion of flavors and textures that will have you craving more after every bite!
1. They deliver an incredible depth of flavor thanks to the combination of garlic, ginger, and onion. Sautéing these aromatics at the start unlocks their natural sweetness and adds a complex layered taste that forms the backbone of this curry, making it rich and satisfying.
2. Expect a wonderful contrast in texture from the tender vegetables like broccoli and carrots, which provide a slight crunch against the creamy coconut milk and peanut butter sauce. This balance keeps each mouthful interesting, ensuring that every bite is both hearty and pleasantly varied.
3. The technique of layering flavors is key here; by cooking the onion, garlic, and ginger first, I found that their flavors meld beautifully with the sauce. This method elevates the dish beyond just ordinary curry, allowing the vegetable base to shine through in harmony with the creamy richness.
4. This recipe offers exceptional value, as it makes use of affordable pantry staples like chickpeas and tofu alongside fresh vegetables. You get a comforting meal packed with nutrients for a fraction of what you’d pay at a restaurant, plus it’s incredibly easy to whip up at home!
PS This Thai Peanut Curry serves about 4 generous portions, making it perfect for meal prep or sharing with friends!
Ingredients You’ll Need
Each ingredient in this dish plays an essential role in flavor and texture. Here’s what you’ll need:
1 medium onion (diced): Provides a sweet base flavor that enhances the curry.
2 cloves garlic (minced): Adds aromatic depth and a savory punch.
1 inch ginger (grated): Contributes warmth and a hint of spice to the dish.
1 cup bell pepper (sliced): Offers a crisp texture and vibrant color.
1 cup carrot (sliced): Adds natural sweetness and a satisfying crunch.
1 cup broccoli florets: Brings freshness and a nutritious element to the curry.
1 can chickpeas (drained and rinsed): Introduces protein and a creamy texture when cooked.
1 block tofu (cubed): Provides a hearty source of protein and absorbs the curry flavors beautifully.
1 cup coconut milk: Delivers rich creaminess that balances the spices.
1/2 cup peanut butter (smooth): Adds nutty richness that defines the curry’s flavor.
2 tablespoons soy sauce (or tamari): Enhances umami depth and rounds out the overall taste.
1 tablespoon lime juice (freshly squeezed): Brightens the dish with a zesty kick.
1 tablespoon red curry paste (adjust to taste): Infuses authentic Thai flavors and heat into the sauce.
2 tablespoons fresh cilantro (chopped): Provides a fresh herbaceous note as a garnish.
- 1 tablespoon peanuts (chopped): Adds crunch and nuttiness for finishing touches.
You HAVE to sauté the onion, garlic, and ginger. Trust me on this!
I’ll confess right off the bat: I tried to skip this step. I thought, “Why not just throw everything in at once and save time?” Spoiler alert: it didn’t work. After a few attempts that left my curry tasting flat and sad, I reluctantly accepted that some things just can’t be rushed.
Sautéing the onion, garlic, and ginger is crucial because it releases their natural oils and flavors, transforming them from raw to aromatic powerhouses. Think of it like roasting marshmallows over a campfire — until they’re nicely browned, they just taste like sugar on a stick! This technique builds a flavor foundation for your Thai peanut curry that you simply can’t achieve by tossing everything in uncooked.
What does sautéing do?
- Flavor — The caramelization of onions adds sweetness and depth, making your curry rich and inviting.
- Aroma — Sautéing releases essential oils from garlic and ginger, creating an irresistible aroma that fills your kitchen.
- Texture — Cooking these aromatics softens them, giving the base of your curry an incredible mouthfeel instead of crunchy bits.
- Color — Properly sautéed onions turn golden brown, contributing a warm hue that visually enhances your dish.
- Digestibility — Sautéing breaks down the cell walls in vegetables like onion and garlic, making them easier to digest and absorb nutrients.
Different sauté times
- 1 minute (barely okay) — You’ll still taste raw onion with no depth; it’s not terrible but far from ideal.
- 3 minutes (good) — The onion begins to soften but lacks full flavor development; a decent starting point.
- 5 minutes (great) — Onions are translucent and sweet; garlic starts to become fragrant; you’re getting close!
- 7 minutes or more (best) — Perfectly caramelized onions with rich flavor; garlic is fully developed; this is where magic happens.
Common mistake alert: skipping or rushing the sautéing process! Don’t think you can just toss everything into the pot without cooking these key ingredients first. Trust me, you’ll end up with a curry that’s missing that vibrant punch of flavor.
How to make Thai Peanut Curry

Are you ready to see how straightforward it is to make the Thai Peanut Curry of your dreams??
1. PREPARE THE INGREDIENTS
Let’s kick things off by prepping our vibrant veggies and protein!
1. Dice – Start by dicing the medium onion. This will be the aromatic base of your curry, adding depth of flavor.
2. Mince – Next, mince the garlic and grate the ginger. These ingredients infuse the curry with an irresistible fragrance and warmth.
3. Slice – Slice the bell pepper and carrot into thin strips, ensuring they cook evenly. Cut the broccoli into florets for a delightful texture in every bite.
HANDY TIPS
- Aim for uniform sizes when slicing vegetables; this ensures even cooking throughout.
- You can use different colors of bell peppers for a more visually appealing dish!
2. COOK THE VEGETABLES
Now it’s time to bring those fresh ingredients to life!
1. Heat – In a large pot, heat a little oil over medium heat until shimmering. This is crucial as it prevents sticking and promotes even cooking.
2. Sauté – Add the diced onion, minced garlic, and grated ginger to the pot. Sauté until the onion turns translucent, about 5 minutes, releasing all those delicious aromas into your kitchen!
3. Add Veggies – Toss in the sliced bell pepper, carrot, and broccoli florets. Cook for another 5 minutes until they are slightly tender but still vibrant in color.
HANDY TIPS
- To keep your broccoli bright green, don’t overcook it; you want a bit of crunch for that perfect bite!
- If you like more spice, consider adding some red chili flakes at this stage!
3. MAKE THE CURRY SAUCE
Let’s create that rich and creamy sauce that ties everything together!
1. Stir in Protein – Gently stir in the drained chickpeas and cubed tofu into the vegetable mix; they’ll soak up all that fantastic flavor as they cook.
2. Mix Sauce – In a separate bowl, whisk together the coconut milk, smooth peanut butter, soy sauce (or tamari), freshly squeezed lime juice, and red curry paste until well combined.
3. Combine – Pour this luscious sauce over the veggie mixture in your pot and stir well to ensure everything is coated evenly.
HANDY TIPS
- For extra creaminess, let your peanut butter sit at room temperature before mixing; it makes blending easier!
- Adjust the amount of red curry paste depending on how spicy you like your curry!
4. SIMMER THE CURRY
Now comes the hard part… just kidding! This is where all that goodness melds together.
1. Simmer – Bring your mixture to a gentle simmer over medium heat and let it cook for 15-20 minutes, stirring occasionally until it’s thickened slightly and fragrant.
2. Taste & Adjust – Before serving, taste your curry and adjust seasoning if necessary—maybe a touch more lime juice or soy sauce?
HANDY TIPS
- A simmering time of about 15 minutes allows flavors to deepen without losing too much texture from your veggies.
- If you prefer a thicker curry, simmer it a little longer until it reaches your desired consistency.
5. SERVE
The moment we’ve all been waiting for—let’s plate up!
1. Garnish – Serve your fragrant Thai Peanut Curry hot! Garnish with freshly chopped cilantro and chopped peanuts for an added burst of flavor and crunch.
2. Pairing – Enjoy this delightful dish with steamed rice or noodles to soak up all that creamy sauce.
That’s it! You’ve just created an incredibly comforting Thai Peanut Curry packed with vibrant vegetables and protein—all in about 45 minutes! Make this once, and I wager it will invade your dreams every night too! – Nagi x
FAQ – Thai Peanut Curry
🌱 Can I make this curry vegan?
Yes, you can! This Thai Peanut Curry is already vegan-friendly as it contains chickpeas and tofu, both great plant-based protein sources. The coconut milk adds creaminess without any dairy. Just ensure that the red curry paste you use is also vegan, as some brands may contain shrimp paste. Most importantly, it’s a hearty and satisfying meal that even non-vegans will love!
🥡 How long does leftover Thai Peanut Curry last in the fridge?
Leftover Thai Peanut Curry can last for about 3 to 4 days in the refrigerator. I found it still tastes quite good on day 3 (around 97% as good) but by day 4, the freshness starts to fade. Make sure to store it in an airtight container to keep it from absorbing other flavors from your fridge. Always give it a sniff before reheating; if it smells off, it’s best to toss it!
❄️ Can I freeze this curry for later?
Absolutely! Freezing is a great option for this curry. To do so, let the curry cool completely, then transfer it into freezer-safe containers or ziplock bags. It will keep well for up to 3 months in the freezer. When you’re ready to enjoy it again, simply thaw overnight in the fridge and reheat on the stove over medium heat, stirring occasionally until warmed through.
🔄 What can I substitute for peanut butter if I have allergies?
If you have a peanut allergy or just want a different flavor profile, there are several alternatives you can use:
- Almond butter: Slightly sweeter and less intense than peanut butter.
- Sunflower seed butter: Great for nut-free options and has a unique taste.
- Cashew butter: Creamy and rich, similar texture but milder flavor.
Be sure to adjust quantities based on your preference since some alternatives might be thicker.
🔪 Why do I need to sauté the onions, garlic, and ginger first?
Sautéing the onions, garlic, and ginger at the beginning helps to develop their flavors fully before adding other ingredients. This step creates a flavorful base for your curry because cooking these aromatics releases their essential oils and enhances their natural sweetness. Trust me; skipping this step would leave you with a less complex flavor profile—no one wants bland curry!
🌶️ How spicy is this Thai Peanut Curry?
The spiciness of this dish largely depends on how much red curry paste you choose to add. The recipe suggests starting with 1 tablespoon; however, if you’re sensitive to spice or are serving kids, feel free to start with just half a tablespoon. You can always add more as you simmer! On the flip side, if you love heat like I do (I’m all about that zing!), feel free to crank it up!
🍚 What should I serve with my Thai Peanut Curry?
This Thai Peanut Curry pairs beautifully with steamed rice or rice noodles—both absorb the delicious sauce perfectly! You could also serve it over quinoa for a protein boost or alongside crusty bread if you’re feeling adventurous. If you’re looking for extra crunch or freshness, consider adding a side salad topped with lime dressing—perfect for balancing out those rich flavors!
Troubleshooting
I will continue to add more to this Troubleshooting section as I start seeing questions coming through from people who have made the recipe.
Troubleshooting tips
“My curry is too thick! 😩”
- You may have added too much peanut butter compared to the coconut milk. Peanut butter is dense and can easily overpower the sauce if not balanced correctly.
- Alternatively, not enough coconut milk can make your curry overly thick. Make sure to measure out one cup for a creamy consistency.
- Don’t worry, you can always add a splash of water or extra coconut milk to loosen it up while simmering. I bet it was still YUM though!
“My vegetables are too crunchy! 🥕”
- If your bell peppers, carrots, or broccoli aren’t cooked through, it might be because they weren’t sautéed long enough before adding the sauce. The initial cooking time should be sufficient to soften them.
- Also, if you cut your veggies larger than specified, they will take longer to cook. Try slicing them into smaller pieces next time for a better texture.
- No worries though, next time they’ll be perfectly tender and delicious!
“Why does my curry look so pale? 🤔”
- A pale color can indicate that you didn’t use enough red curry paste. This paste not only adds flavor but also gives the curry its signature hue.
- Additionally, if you didn’t sauté the onion, garlic, and ginger until they were golden and fragrant, this could affect the overall color as well.
- But hey, even if it’s not as vibrant as you’d like, I bet it was still packed with flavor!
“My curry tastes bland! 😱”
- If your curry lacks flavor, it’s likely due to insufficient seasoning when mixing in the soy sauce and lime juice. These ingredients are key for balancing out the richness of the peanut butter and coconut milk.
- Make sure to taste your curry during cooking and adjust seasoning accordingly; sometimes a little extra soy sauce or lime juice can work wonders!
- Don’t fret—I’m sure there was still some good flavor in there!
“The tofu crumbled into mush! 😬”
- If your tofu disintegrated instead of holding its shape, it may be because you used soft tofu instead of firm or extra-firm. Soft tofu is delicate and doesn’t hold up well in cooking.
- Another possibility is that stirring too aggressively while cooking caused it to break apart. Gentle handling will keep those cubes intact!
- No biggie though; a tasty mush is still a delight on rice or noodles!
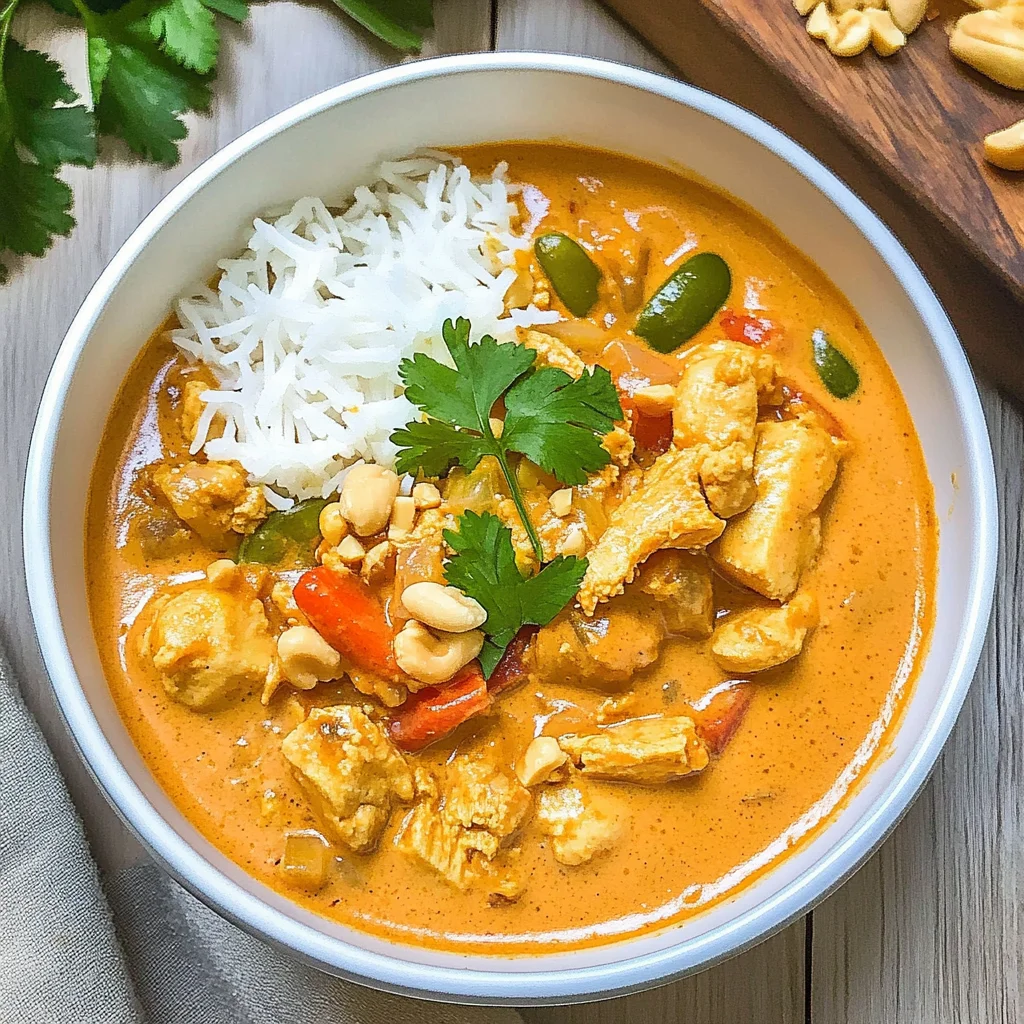
Thai Peanut Curry
Ingredients
Method
- Dice the onion, mince the garlic, and grate the ginger.
- Slice the bell pepper and carrot, and cut the broccoli into florets.
- In a large pot, heat a little oil over medium heat.
- Add the onion, garlic, and ginger, and sauté until the onion is translucent (about 5 minutes).
- Add the bell pepper, carrot, and broccoli, and cook for another 5 minutes.
- Stir in the chickpeas and tofu.
- In a bowl, mix together the coconut milk, peanut butter, soy sauce, lime juice, and red curry paste.
- Pour the sauce into the pot and stir well to combine.
- Bring the mixture to a simmer and cook for 15-20 minutes, stirring occasionally.
- Adjust seasoning if necessary.
- Serve the curry hot, garnished with chopped cilantro and peanuts.
- Enjoy with rice or noodles.