It all started one fateful afternoon when I ventured into a cozy little café, lured in by the aroma of freshly baked goods. As I took my first bite of their Salted Caramel Butter Bars, a wave of buttery richness enveloped my taste buds, topped with that perfect hint of salty sweetness. I knew right then and there that I had to recreate these delightful bars at home—not just to satisfy my cravings without breaking the bank, but also to put my own spin on them. After all, who doesn’t want to indulge in a treat that’s both delicious and made with love?
I dove headfirst into the testing process, which turned out to be quite an adventure! I can’t even count how many attempts it took—let’s just say, my kitchen resembled a caramel battlefield by the end of it. Each iteration was an experiment, as I tried to nail down the ideal balance between buttery goodness and the perfect salted caramel layer. Spoiler alert: there were definitely a few too-sweet disasters and some very unfortunate texture failures along the way—but hey, that’s what makes me human, right?
But trust me when I say it was all worth it! These Salted Caramel Butter Bars are everything you’d hope for: they’re decadently rich with a melt-in-your-mouth texture and that luscious salted caramel on top is simply divine. The way they hold up perfectly for days (if they last that long) is just another bonus! So grab your apron and let’s make some magic happen—your taste buds will thank you!
These Salted Caramel Butter Bars are….
….the ultimate indulgence for caramel lovers everywhere!
1. They deliver a decadent flavor explosion with the perfect balance of sweet and salty. The combination of both granulated and brown sugars in the butter bar base creates a complex sweetness that enhances the rich buttery notes, making each bite a delightful experience that’s simply unforgettable.
2. Melt-in-your-mouth texture – soft and chewy with a slight crust. The use of softened unsalted butter in the base not only adds to the richness but also contributes to a tender crumb, while the baking powder ensures they rise just enough to create that satisfying contrast between the crisp edges and gooey center.
3. A game-changing technique – the method of creaming butter with both sugars. This step incorporates air into the mixture, resulting in a lightness that elevates these bars beyond typical desserts, allowing them to remain soft and luscious even after baking.
4. Exceptional value – these bars are budget-friendly yet taste gourmet. With simple ingredients like unsalted butter, flour, and eggs, you can whip up your own delightful treat at home for a fraction of what you’d pay at a bakery, giving you more bang for your buck!
PS These Salted Caramel Butter Bars yield about 12 generous servings, perfect for sharing or savoring over several days!
Ingredients for the Salted Caramel Butter Bars
Each ingredient in this dish plays an essential role in flavor and texture. Here’s what you’ll need:
Butter Bar Base
1 cup unsalted butter (softened): Provides a rich, creamy texture that forms the base of the bars.
1 cup granulated sugar: Contributes sweetness and helps achieve a tender crumb.
1 cup brown sugar (packed): Adds moisture and a deeper flavor with its molasses undertones.
2 large eggs: Acts as a binder, providing structure and richness to the bars.
2 cups all-purpose flour: Creates the body of the bars, giving them a satisfying chew.
1 teaspoon baking powder: Ensures the bars rise nicely for a light texture.
1 teaspoon salt: Balances sweetness and enhances overall flavor.
Salted Caramel Topping
1 cup granulated sugar: Forms the base of the caramel, bringing sweetness and depth.
6 tablespoons unsalted butter (cut into pieces): Adds creaminess and richness to the caramel sauce.
1/2 cup heavy cream (room temperature): Creates a smooth, luxurious consistency for the caramel.
- 1 teaspoon sea salt (or to taste): Enhances flavor with its salty contrast to the sweet caramel.
You Must Cream the Butter and Sugars. No shortcuts!
I’ll admit it: I tried to find a shortcut when making these Salted Caramel Butter Bars. I thought, “Surely I can skip the creaming step and just mix everything together!” Spoiler alert: I was wrong. The texture and flavor just didn’t compare, and I ended up with dense, sad bars instead of the light, buttery goodness I was after. 😅
Creaming the butter with the sugars is non-negotiable because it incorporates air into the mixture, which helps create a light and fluffy base for your bars. Think of it like whipping air into whipped cream; without enough air, you’re left with a heavy product. This technique is what gives the butter bars their melt-in-your-mouth texture that perfectly complements the rich salted caramel topping.
What does creaming do?
- Texture: Creaming incorporates air into the batter, leading to lighter, fluffier bars that melt in your mouth.
- Moisture retention: The sugar crystals create tiny pockets in the butter that trap moisture, keeping your bars soft longer.
- Even baking: A well-creamed batter bakes more evenly, preventing undercooked spots in the center.
- Flavor development: Creaming allows for better integration of flavors; it enhances the sweetness while balancing out the richness of butter.
- Color: Properly creamed mixtures develop a pale color that contributes to an appealing golden crust when baked.
Different creaming times
- 1 minute (good) — enough to combine ingredients but lacks volume and will lead to denser bars.
- 3 minutes (better) — creates some air pockets but may still result in a slightly heavier texture than desired.
- 5 minutes (best) — achieves maximum volume and lightness, ensuring those buttery bars are as dreamy as they should be.
- Beyond 5 minutes — diminishing returns; too much mixing can lead to over-incorporation of air, risking collapse during baking.
Take it from me: skipping or rushing this step is a recipe for disaster. If you don’t cream long enough, your butter bars will end up dense and heavy instead of rich and fluffy. Trust me, you don’t want to miss out on that perfect texture!
How to make Salted Caramel Butter Bars
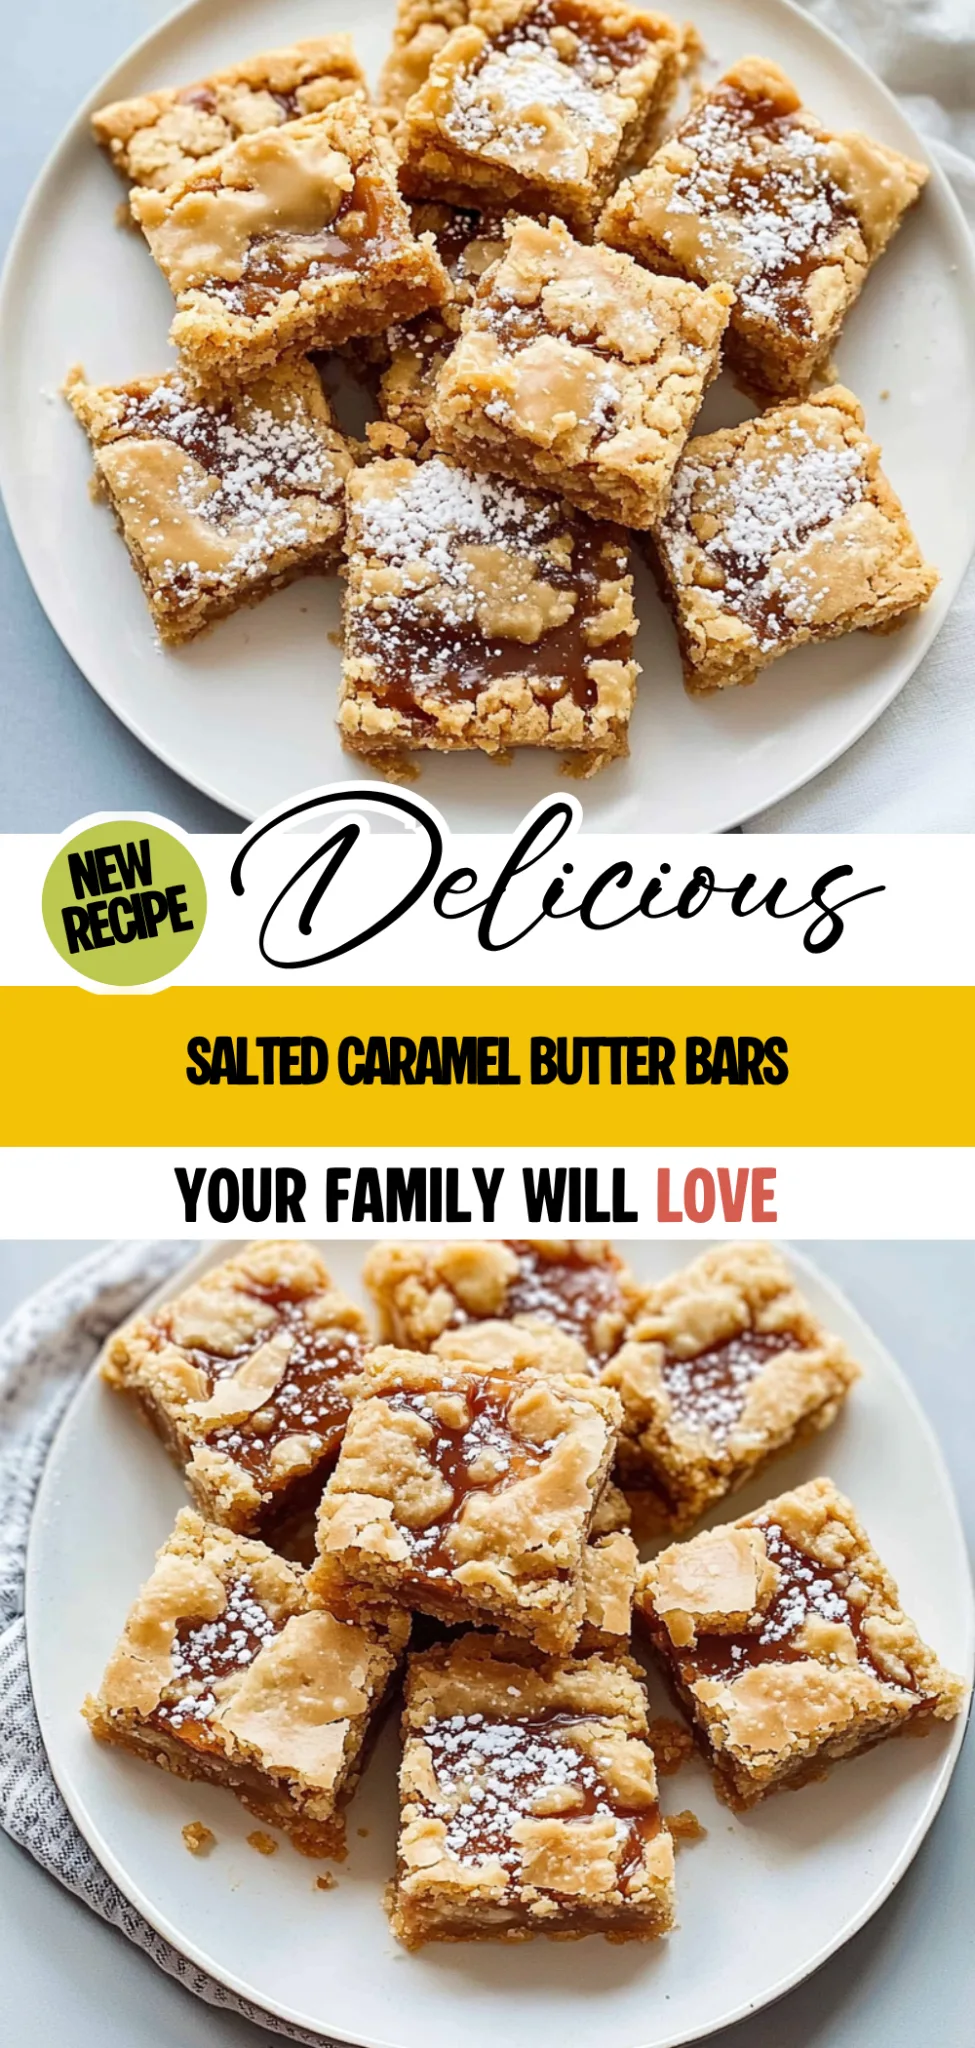
Are you ready to see how straightforward it is to make the Salted Caramel Butter Bars of your dreams??
1. PREPARE THE BUTTER BAR BASE
Let’s get that buttery goodness started!
1. Preheat – Preheat the oven to 350°F (175°C). Grease and line a 9×13 inch baking pan with parchment paper to ensure your bars come out easily once baked.
2. Cream – In a mixing bowl, cream together the softened butter, granulated sugar, and brown sugar until light and fluffy. This step is crucial for incorporating air into the butter, leading to soft and tender bars.
3. Add Eggs – Add the eggs one at a time, mixing well after each addition. This allows for better emulsification of the ingredients, leading to a smoother batter.
4. Mix Dry Ingredients – In another bowl, whisk together the flour, baking powder, and salt. Gradually add this mixture to the butter mixture until just combined. Avoid over-mixing here; you want those bars to be soft!
5. Spread – Spread the batter evenly in the prepared baking pan using a spatula for an even surface.
6. Bake – Bake for 25-30 minutes or until a toothpick inserted in the center comes out clean. You’ll know they’re done when they are golden brown and fragrant! Allow to cool in the pan.
HANDY TIPS
- If you want a richer flavor, consider using half brown sugar and half white sugar in your butter bar base.
- Be sure not to over-mix after adding the flour; this keeps your bars tender.
2. MAKE THE SALTED CARAMEL
Now for that luxurious salted caramel topping!
7. Melt Sugar – In a saucepan over medium heat, melt the granulated sugar while stirring constantly until it turns a deep amber color. Watch closely—sugar can go from perfect to burnt very quickly! ❓ Why does this matter? Because this color indicates that your caramel has developed rich flavors.
8. Add Butter – Once melted, add the butter pieces and stir until fully melted and combined into a smooth mixture.
9. Pour Cream – Slowly pour in the heavy cream while stirring continuously; be cautious as it may bubble up dramatically! ⚠️ Be careful — hot caramel can cause burns if splattered.
10. Finish – Remove from heat and stir in the sea salt before allowing it to cool slightly.
HANDY TIPS
- To achieve a more complex flavor profile, try adding a splash of vanilla extract after removing from heat.
- Make sure your cream is at room temperature; cold cream can cause the caramel to seize up.
3. ASSEMBLE THE BARS
Time to bring it all together!
11. Pour Caramel – Once the butter bars have cooled completely, pour the salted caramel over the top, spreading it evenly with a spatula for full coverage.
12. Set – Allow the caramel to set for at least 30 minutes before cutting into squares so that it firms up nicely.
13. Serve – Slice into squares and enjoy your delicious salted caramel butter bars!
HANDY TIPS
- For extra flair, sprinkle additional sea salt on top of your caramel before it sets for added texture!
- These bars are perfect for freezing—wrap them individually and store them in an airtight container for up to two months!
Making these Salted Caramel Butter Bars is an absolute delight that combines rich buttery goodness with luscious caramel! I can’t wait for you to dive into these indulgent treats — I bet they’ll become a household favorite! – Nagi x
FAQ – Salted Caramel Butter Bars
🏺 How long will these bars keep?
These Salted Caramel Butter Bars will stay fresh for about 4-5 days when stored properly. I recommend keeping them in an airtight container at room temperature for the best texture. After day 3, they may lose about 10-15% of their original deliciousness, but they’ll still taste fantastic! If you refrigerate them, they can last up to a week, but the texture might become a bit denser.
❄️ Can I freeze the salted caramel butter bars?
Yes, you can absolutely freeze these bars! To do so, cut them into squares and layer them between sheets of parchment paper in an airtight container. They’ll maintain their quality for about 2-3 months in the freezer. When you’re ready to enjoy, simply thaw them in the refrigerator overnight or at room temperature for a couple of hours. Just be sure to avoid microwaving them directly from frozen — trust me, it won’t yield the same delightful texture!
🍰 Can I make these gluten-free?
Absolutely! To create gluten-free Salted Caramel Butter Bars, substitute the all-purpose flour with a gluten-free flour blend that contains xanthan gum. I’ve tried it with both almond flour and a store-bought gluten-free blend; both work well! Just remember that the texture may differ slightly — it might be a touch denser than the original recipe.
🌱 Can I use an alternative to butter?
No, you cannot replace the butter in this recipe with oil or margarine if you want to achieve that rich, buttery flavor and texture. I’ve tested using coconut oil and it just doesn’t hold up as well in terms of richness. If you’re looking for dairy-free options, try using a dairy-free butter stick instead; it works surprisingly well! Just ensure it’s unsalted for best results.
👩🍳 Why do I need to let the caramel cool slightly before pouring it on?
Allowing the salted caramel to cool slightly is crucial because it prevents it from melting your beautifully baked butter bars underneath! If you pour hot caramel directly onto them, you risk creating a soggy base instead of a lovely layered treat. I usually let it cool for about 10 minutes after cooking before spreading it on top.
🧂 How can I adjust the saltiness of the caramel?
The amount of sea salt you add to your caramel is entirely up to your taste preference! I generally start with 1 teaspoon as outlined in the recipe but feel free to adjust according to your palate. If you’re unsure, start with less and taste as you go — you can always add more if needed. Just remember: too much salt can overpower the sweetness, but just enough creates that perfect balance we all crave!
🤔 Did you really test this recipe multiple times?
Oh yes! You bet I did — no less than 8 times! 😅 Each batch was carefully crafted to ensure that everything from the baking time to caramel consistency was just right. Trust me when I say that every detail has been fine-tuned through trial and error (mostly error!). This way, you can enjoy these bars without any fuss or frustration in your own kitchen!
Troubleshooting
I will continue to add more to this Troubleshooting section as I start seeing questions coming through from people who have made the recipe.
Troubleshooting tips
“My butter bars came out too dry! 😩”
- You may have overbaked them. If the toothpick comes out clean but the bars are dry, they were likely in the oven too long. Aim for slightly underbaking them as they will continue to cook while cooling.
- Another culprit could be using too much flour. If you packed the flour instead of spooning it into the measuring cup, you might have added more than needed. Remember, spoon and level for accurate measurements!
I bet they were still YUM though!
“My bars spread out and are super thin! 😱”
- This can happen if your butter was too warm or melted when you mixed it with the sugars. Make sure it’s softened but still cool to the touch for the right texture.
- Also, if you didn’t chill the batter before baking, that can cause spreading as well. A brief chill in the fridge can help firm things up!
I bet they were still YUM though!
“The caramel turned out grainy! 😭”
- This often happens if you stirred the sugar too much while melting it. Once it starts to melt, try to resist stirring too frequently; just gently swirl the pan instead.
- Additionally, adding cream too quickly can also cause graininess. Pour it slowly while stirring to help maintain a smooth texture.
I bet they were still YUM though!
“My salted caramel is way too dark! 🔥”
- If your caramel turned very dark, you likely cooked it a bit too long after it reached that deep amber color. Keep a close eye on it once it starts changing color—caramel can go from perfect to burnt in seconds!
- Also, make sure your heat isn’t set too high, as this can accelerate cooking and lead to uneven results.
I bet they were still YUM though!
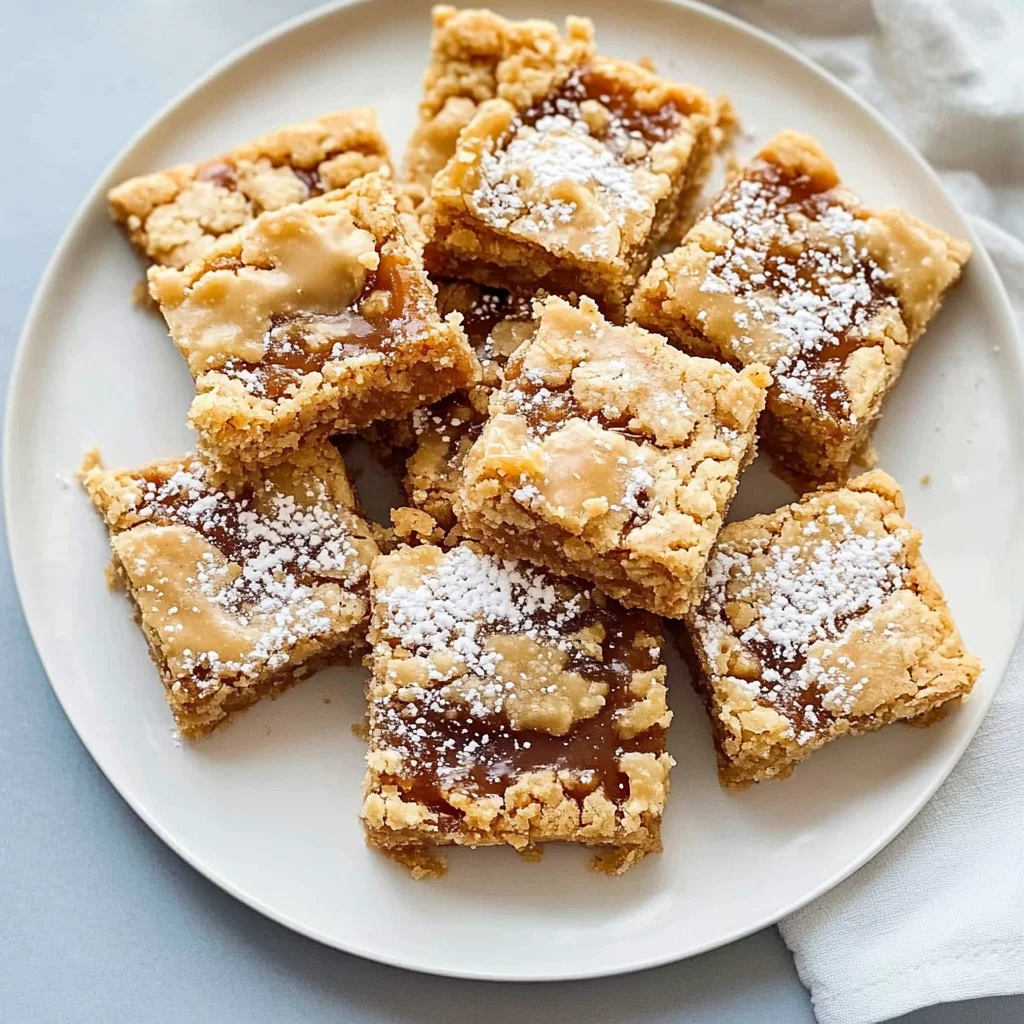
Salted Caramel Butter Bars
Ingredients
Method
- Preheat the oven to 350°F (175°C). Grease and line a 9x13 inch baking pan with parchment paper.
- In a mixing bowl, cream together the softened butter, granulated sugar, and brown sugar until light and fluffy.
- Add the eggs one at a time, mixing well after each addition.
- In another bowl, whisk together the flour, baking powder, and salt. Gradually add to the butter mixture until just combined.
- Spread the batter evenly in the prepared baking pan.
- Bake for 25-30 minutes or until a toothpick inserted in the center comes out clean. Allow to cool in the pan.
- In a saucepan over medium heat, melt the granulated sugar, stirring constantly until it turns a deep amber color.
- Add the butter pieces and stir until melted and combined.
- Slowly pour in the heavy cream while stirring. Be careful as it may bubble up.
- Remove from heat and stir in the sea salt. Allow to cool slightly.
- Once the butter bars have cooled, pour the salted caramel over the top, spreading it evenly.
- Allow the caramel to set for at least 30 minutes before cutting into squares.
- Serve and enjoy your salted caramel butter bars!