I first encountered the magic of cronut hybrids while visiting a trendy little bakery in New York City, where the line wrapped around the block just for a taste of this delightful pastry. The moment I took that first bite — flaky croissant layers merging with the sweet, decadent charm of a doughnut — I knew I had to recreate it at home. After all, let’s be honest: as much as I love indulging in artisanal treats, my wallet doesn’t always agree! So, driven by a craving and a desire for homemade goodness, I embarked on my journey to perfect these Homemade Cronuts.
Oh boy, what a journey it was! I lost count of how many times I attempted this recipe — let’s just say my kitchen looked like a flour bomb exploded more times than I’d like to admit. Each batch brought its own set of challenges, whether it was achieving the right flakiness or getting that perfect balance of sweetness without overwhelming the buttery croissant flavor. I think my family started placing bets on how many tries it would take before I finally nailed it, but hey, persistence pays off, right?
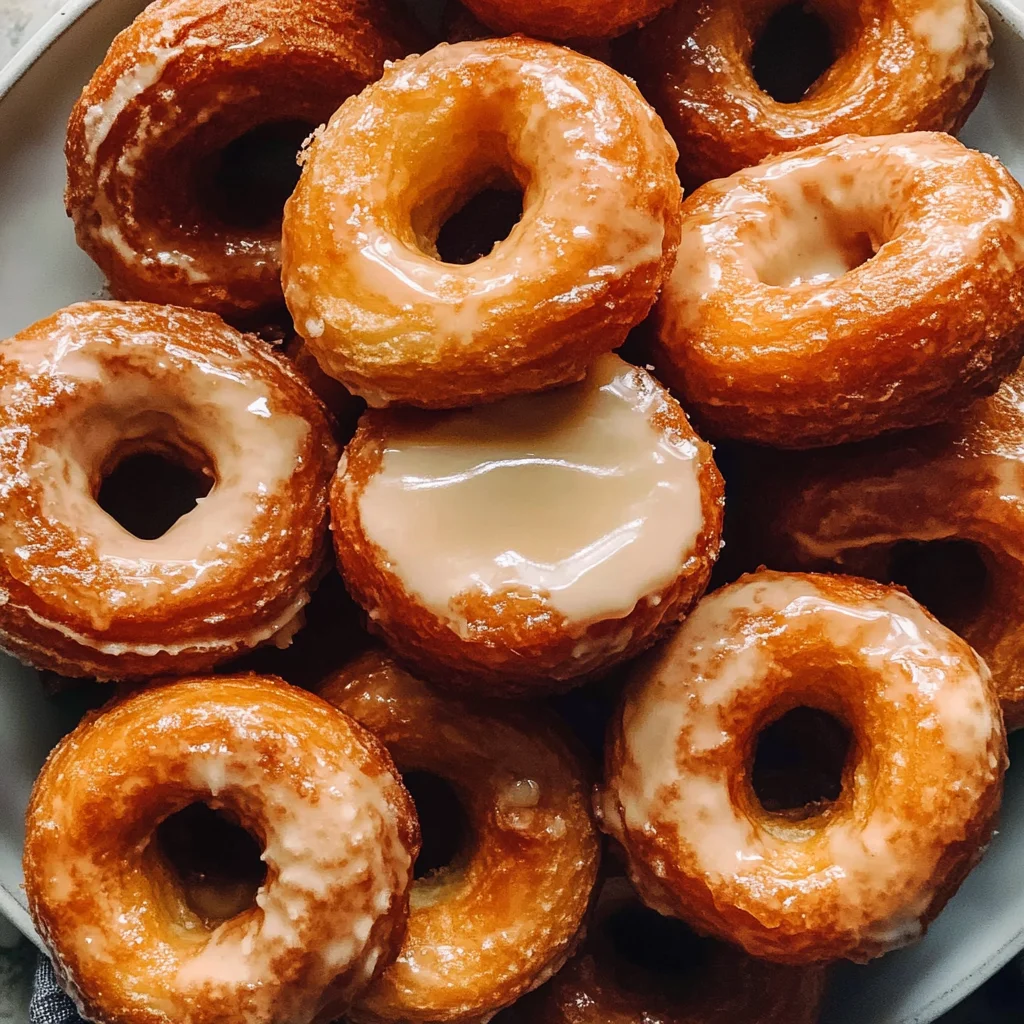
And let me tell you, all those failed attempts were totally worth it! The final result is nothing short of heavenly — these Homemade Cronuts are light and airy with an irresistible crunch on the outside and luscious cream filling that oozes pure bliss with every bite. Not only do they boast the perfect texture and flavor combo, but they also keep well for days (if you can resist devouring them immediately). Trust me when I say you won’t want to miss out on making these beauties; your taste buds will thank you!
These Homemade Cronuts are….
…a delightful pastry revolution that you won’t want to miss!
1. They deliver an incredible flavor that strikes the perfect balance between sweet and buttery. The combination of warm milk and a hint of sugar in the dough amplifies the natural richness of the unsalted butter, resulting in a taste that’s utterly irresistible with every bite.
2. Enjoy a flaky, layered texture that brings together the best of both worlds – croissant and doughnut. The cold, cubed butter is incorporated into the dough through a technique called lamination, creating delicate layers that puff up beautifully during frying for that satisfying crunch on the outside while staying soft and airy within.
3. A foolproof technique is key to achieving those perfect layers. By incorporating active dry yeast into warm milk, I’ve found it helps create just the right amount of lift in the dough, ensuring your Homemade Cronuts rise perfectly and have a lightness that distinguishes them from standard pastries.
4. They offer fantastic value for your effort when you compare them to store-bought options. With simple ingredients like flour, sugar, and butter, these Homemade Cronuts can be made at home for a fraction of the cost of café versions while still delivering gourmet quality that will impress friends and family alike.
PS These cronuts are best enjoyed fresh out of the fryer! They’re light yet decadent, making them perfect for sharing or indulging on a special occasion.
Ingredients You’ll Need
Each ingredient in this dish plays an essential role in flavor and texture. Here’s what you’ll need:
- 2 cups all-purpose flour: Provides the structure for the flaky layers.
- 1 tablespoon granulated sugar: Enhances sweetness and helps with browning.
- 1 teaspoon salt: Balances flavors and enhances overall taste.
- 1 cup unsalted butter (cold and cubed): Creates tender layers with rich flavor.
- 1 cup milk (warm): Activates the yeast and adds moisture to the dough.
- 1 packet active dry yeast: Leavens the dough for a light, airy texture.
- 1 cup pastry cream (store-bought or homemade): Offers a creamy, decadent filling.
- 1 cup powdered sugar: Forms a sweet glaze that adds a delightful finish.
- 2 tablespoons milk: Thins out the glaze for a smooth consistency.
- 1 teaspoon vanilla extract: Infuses the glaze with warm, aromatic notes.
You MUST Knead the Dough — No Exceptions!
I know, I know—kneading the dough feels like a chore, and let’s be honest, it adds time to your cronut-making adventure. I tried to skip this step, thinking I could just mix everything and hope for the best. Spoiler alert: I was wrong! The difference in texture and flavor is so stark that you won’t believe you ever considered cutting corners.
Kneading is essential because it develops the gluten in the flour, giving your cronuts that desirable chewy texture. Think of it as giving your dough a workout; it strengthens the structure that will hold all those flaky layers together. Without proper kneading, your dough would be dense and sad—more lump than lovely. So trust me on this one: give your dough some love!
What does kneading do?
- Texture — Kneading creates gluten strands that provide structure, resulting in a beautifully chewy cronut.
- Flakiness — Properly kneaded dough allows for better lamination, leading to those irresistible flaky layers we crave.
- Rise — The action of kneading helps incorporate air into the dough, allowing it to rise properly when fried.
- Flavor Development — Kneading promotes fermentation by distributing yeast evenly, enhancing the overall flavor profile.
- Consistency — A well-kneaded dough ensures uniformity in texture throughout each cronut, avoiding any gummy bits.
Different kneading times
- 1 minute (poor) — Barely mixes ingredients; results in dense cronuts with little-to-no rise or flakiness.
- 5 minutes (acceptable) — Minimum required time; cronuts will have some texture but not enough chew or flakiness.
- ⭐️ 10 minutes ⭐️ (good) — Ideal for achieving a smooth and elastic dough, leading to lighter and flakier pastries.
- Beyond 15 minutes (diminishing returns) — Potentially overworked dough; gluten can become too tight, yielding tougher cronuts.
Beware! The most common mistake is under-kneading the dough. If you don’t develop that gluten properly, you’ll end up with cronuts that are flat and sad instead of light and flaky. Don’t skimp on this crucial step!
How to make Homemade Cronuts

Are you ready to see how straightforward it is to make the Homemade Cronuts of your dreams??
1. PREPARE THE DOUGH
First, let’s create a rich and flaky dough that will form the base of your cronuts!
1. COMBINE – In a mixing bowl, combine the all-purpose flour, granulated sugar, and salt. In a separate bowl, dissolve the active dry yeast in warm milk and let it sit for 5 minutes until it becomes frothy. This step activates the yeast, ensuring your cronuts will rise beautifully! Once ready, add the yeast mixture to the flour mixture and mix until a dough forms.
2. KNEAD – Transfer the dough onto a lightly floured surface and knead for about 5 minutes until smooth and elastic. This develops the gluten, which is essential for that perfect texture! Wrap the dough in plastic wrap and refrigerate for at least 30 minutes to allow it to chill and firm up.
HANDY TIPS
- Make sure your butter is cold when you begin; this is crucial for achieving those flaky layers!
- If you’re tight on time, you can chill the dough for only 15 minutes, but I recommend 30 minutes for optimal texture.
2. LAMINATE THE DOUGH
Now comes the fun part where we create those beautiful buttery layers!
3. ROLL OUT – On a floured surface, roll out the chilled dough into a rectangle about 1/2 inch thick. Place your cold cubed unsalted butter in the center of the rectangle and fold the dough over to encase it completely. This process is called lamination and is key to creating flaky layers!
4. FOLD – Roll out the dough again into a rectangle and fold it into thirds like a letter. This traps more layers of butter within the dough. Chill between folds if needed, repeating this process two more times to achieve that perfect layered structure.
HANDY TIPS
- Keep your workspace cool; if your butter starts melting during this process, pop everything back in the fridge.
- Don’t skip folding; each fold adds layers that make your cronuts irresistibly flaky!
3. CUT AND FRY
Get ready for that satisfying frying moment!
5. CUT – Roll out the laminated dough to about 1/2 inch thick once more. Use a donut cutter or two different sized round cutters to cut out shapes from the dough. Allow them to rest for another 30 minutes; this helps them puff up nicely while frying!
6. FRY – Heat oil in a deep fryer or large pot to 350°F (175°C). Carefully fry each cronut until golden brown, about 2-3 minutes per side. Keep an eye on them as they cook; they should puff up beautifully! Once done, remove them with a slotted spoon and drain on paper towels.
HANDY TIPS
- Always use a thermometer to check oil temperature; if it’s too hot, you’ll burn them before they cook through!
- If you want smaller bites, you can cut mini cronuts; just adjust frying time accordingly.
4. FILL AND GLAZE
Finally, let’s fill these beauties with creamy goodness and top them off with glaze!
7. FILL – Using a piping bag fitted with a small tip, carefully fill each cronut with pastry cream through the side until filled but not bursting — it’s all about balance here!
8. GLAZE – In a bowl, mix powdered sugar with milk and vanilla extract until smooth to create your glaze. Dip just the tops of each filled cronut into this luscious glaze and let it set for a few moments before serving!
HANDY TIPS
- For added flavor in your glaze, try adding a pinch of cinnamon or cocoa powder!
- Letting filled cronuts sit at room temperature for about 10 minutes before glazing results in less runny icing!
You’ve just created homemade cronuts that are flaky on the outside and creamy on the inside—what an achievement! These delightful pastries are sure to impress anyone who tries them (and trust me, they won’t last long)! Make these once, and I wager they will invade your dreams every night too! – Nagi x
FAQ – Homemade Cronuts
❄️ Do I really have to chill the dough?
Yes, you absolutely must chill the dough! Chilling is crucial for achieving the flaky layers that make cronuts so irresistible. After kneading, wrapping it in plastic wrap and refrigerating for at least 30 minutes allows the gluten to relax and the butter to firm up, which helps during the lamination process. If you skip this step, you risk a tough dough and less-than-perfect layers. Trust me, I’ve tested it both ways—chill it!
🥐 Can I use a different type of flour for this recipe?
While all-purpose flour is ideal for cronuts due to its moderate protein content, you can experiment with other flours. For instance, using bread flour will give you a chewier texture, while cake flour may lead to a softer cronut. However, if you’re aiming for that classic croissant-doughnut hybrid texture, I recommend sticking with all-purpose flour for best results. Make it your own—just know that results may vary!
🌾 Can these cronuts be made gluten-free?
Absolutely! You can use a gluten-free all-purpose flour blend as a substitute for regular all-purpose flour in this recipe. Just make sure your blend contains xanthan gum or another binding agent to help mimic the structure usually provided by gluten. While I haven’t personally tested every brand, many gluten-free blends work well in pastry recipes. Just keep in mind that the texture might differ slightly from traditional cronuts.
🥛 What can I substitute for pastry cream?
If you don’t have pastry cream on hand or want alternatives, you can use whipped cream or even store-bought custard as a filling. Alternatively, homemade options like Bavarian cream or even flavored cream cheese can add an interesting twist! Keep in mind that each filling will change the flavor profile slightly but still complement the cronut’s texture beautifully.
⏳ How long will these cronuts stay fresh?
Freshly made cronuts are best enjoyed on the day they are made; however, they can be stored at room temperature in an airtight container for up to 2 days. After that, their quality drops significantly—I’d say they are about 80% as good on day 3 and continue to decline from there. If you’re not planning to eat them right away, consider freezing them (see below!).
❄️ Can I freeze leftover cronuts?
You can indeed freeze cronuts! To do this effectively, let them cool completely after frying and filling. Wrap each cronut tightly in plastic wrap and then place them in a freezer-safe bag or container. They can be frozen for up to 2 months. When you’re ready to enjoy one again, simply thaw at room temperature and reheat briefly in an oven at 350°F (175°C) for about 5-10 minutes until warmed through.
🍩 How many times did you test this recipe before sharing it?
Oh goodness, let’s just say it was more than a few times! 😅 I wanted to refine every detail—from the dough consistency to the frying time—to ensure you get perfect cronuts at home. Honestly, I probably made over 20 batches before settling on this version! Yes, it’s a labor of love—and yes, my kitchen looked like a flour bomb exploded—but trust me when I say it’s worth every effort!
🍽️ Can I customize the flavors of my cronuts?
Definitely! The beauty of making your own cronuts lies in customization. You could infuse your pastry cream with various flavors—think vanilla bean, chocolate ganache, or even seasonal spices like pumpkin spice during fall! You could also top them with different glazes or sprinkles for visual appeal and added flavor. Just remember: creativity is key here; go wild!
Troubleshooting
I will continue to add more to this Troubleshooting section as I start seeing questions coming through from people who have made the recipe.
Troubleshooting tips
“My cronuts came out too flat! 😩”
- You may not have rolled your dough thick enough; it should be about 1/2 inch thick before cutting out shapes. If it’s too thin, they won’t rise properly during frying.
- If your dough was not chilled enough before frying, it can also lead to flattening, as the butter may melt too quickly. Make sure to chill the laminated dough adequately between folds!
I bet they were still YUM though!
“My cronuts are way too oily! 🤔”
- If the oil temperature is too low (below 350°F/175°C), the cronuts will absorb more oil instead of frying quickly, resulting in a greasy texture. Always use a thermometer to ensure accurate oil temperature!
- Not draining them properly on paper towels after frying can also leave them sitting in oil; make sure to let excess oil drip off.
I bet they were still YUM though!
“My cronuts are dry and tough 😢”
- Over-kneading your dough can develop too much gluten, making the cronuts tough instead of flaky. Knead just until smooth for the best texture!
- If you didn’t keep your butter cold enough while laminating, it could have melted into the dough and created a dense structure instead of layers. Keep that butter icy!
I bet they were still YUM though!
“The tops of my cronuts went dark way too fast! 🔥”
- If your oil is too hot (over 350°F/175°C), the outside will brown before the inside cooks through, leading to burnt tops. Use a thermometer for accuracy—it’s worth it!
- Frying them for too long can also result in overly browned surfaces; always stick to that 2-3 minutes per side guideline.
I bet they were still YUM though!
Homemade Cronuts
Ingredients
Method
- In a mixing bowl, combine flour, sugar, and salt. In a separate bowl, dissolve yeast in warm milk and let it sit for 5 minutes. Add the yeast mixture to the flour mixture and mix until a dough forms.
- Knead the dough for about 5 minutes until smooth. Wrap in plastic wrap and refrigerate for at least 30 minutes.
- On a floured surface, roll out the dough into a rectangle. Place the cold butter in the center and fold the dough over to encase the butter.
- Roll out the dough again into a rectangle and fold it into thirds. Repeat this process two more times, chilling the dough between folds.
- Roll out the laminated dough to about 1/2 inch thick. Use a doughnut cutter to cut out shapes. Let them rest for 30 minutes.
- Heat oil in a deep fryer to 350°F (175°C). Fry the cronuts until golden brown, about 2-3 minutes per side. Remove and drain on paper towels.
- Using a piping bag, fill the cronuts with pastry cream through the side.
- Mix powdered sugar, milk, and vanilla to create a glaze. Dip the tops of the filled cronuts into the glaze and let set.