I first stumbled upon the idea for these Peanut Butter and Jelly Cookies when I was visiting a quirky little café that boasted an extensive menu of nostalgic treats. As soon as I took a bite of their PB&J-inspired cookie, I was transported back to my childhood—those carefree days spent with gooey peanut butter sandwiches and jelly-stained fingers. It was so good that I couldn’t shake the thought of recreating it at home, especially since it meant I could tweak it to my liking and save some money in the process. Plus, who wouldn’t want to indulge in a cookie that captures the essence of a classic sandwich?
Little did I know, perfecting my Peanut Butter and Jelly Cookies Recipe would turn into quite the adventure! After what felt like an eternity (okay, maybe just five attempts), I finally cracked the code. Each batch had its quirks—some were too dry, others too crumbly or sweet—but with every iteration, I learned something new. While my kitchen looked like a peanut butter explosion site at times, it was all about finding that sweet balance between soft, chewy cookies and a luscious filling that didn’t ooze out all over your hands.
But let me tell you, all those attempts were totally worth it! The final result? Deliciously soft cookies filled with creamy peanut butter and a burst of fruity jelly—a match made in heaven! These cookies not only boast an irresistibly tender texture but also an incredible depth of flavor that’ll make you go back for seconds (and thirds). So grab your apron and get ready to whip up these delightful treats; trust me, your taste buds will thank you!
These Peanut Butter and Jelly Cookies are…
…the ultimate nostalgic treat that will have you reaching for just one more!
1. They deliver an irresistibly sweet and nutty flavor that combines the best of both worlds. The rich, creamy peanut butter is perfectly balanced with a hint of sweetness from the granulated and brown sugars, creating a flavor profile that’s simply addictive. This harmonious blend makes each bite feel like a warm hug from your childhood.
2. A soft, chewy texture that melts in your mouth is what sets these cookies apart. The combination of peanut butter and just the right amount of flour results in cookies that are thick yet soft, ensuring you experience that perfect contrast between a tender inside and a slightly crisp exterior. It’s this texture that keeps you coming back for more!
3. The one-bowl technique I use not only simplifies the process but also ensures all ingredients are thoroughly combined for maximum flavor infusion. By mixing everything in one bowl, I guarantee that the peanut butter binds beautifully with the sugars and egg, resulting in a uniform dough that bakes evenly—no clumps or dry patches here!
4. An affordable indulgence that rivals any bakery treat is what I love most about this recipe. With common pantry staples like peanut butter, sugar, and flour, these cookies are not only easy to make but also budget-friendly compared to buying gourmet cookies from your local café. Plus, they freeze well—so you can enjoy them anytime!
PS These cookies yield about 12 generous servings, making them perfect for sharing or stashing away for late-night cravings!
Ingredients for the Peanut Butter and Jelly Cookies
Each ingredient in this dish plays an essential role in flavor and texture. Here’s what you’ll need:
1 cup peanut butter (creamy or crunchy): Provides a rich, nutty flavor and chewy texture.
1/2 cup granulated sugar: Sweetens the cookies and helps create a crisp exterior.
1/2 cup brown sugar (packed): Adds moisture and a hint of caramel flavor.
1 large egg: Acts as a binder to hold the ingredients together.
1 teaspoon vanilla extract: Enhances the overall sweetness with a warm aroma.
1 cup all-purpose flour: Gives structure to the cookies for a satisfying bite.
1/2 teaspoon baking soda: Helps the cookies rise and gives them a light texture.
1/4 teaspoon salt: Balances the sweetness and enhances all flavors.
- 1/2 cup jelly or jam (your choice of flavor): Adds a fruity burst that complements the peanut butter.
You absolutely must mix the dough until smooth. No shortcuts!
I have to confess, I tried to take a shortcut here. I thought, “How hard can it be to just mix it all together roughly and call it a day?” Spoiler alert: I was wrong. The cookies turned out lumpy, uneven, and far less enjoyable than their silky-smooth counterparts. Trust me, you’ll want to take that extra minute to get it right!
Mixing the dough until it’s completely smooth is crucial because it ensures that all the ingredients are evenly distributed. Think of it like mixing paint for a perfect color — if you don’t blend it well, you’ll end up with streaks instead of a beautiful finish. In this cookie base, getting that creamy peanut butter blended with the sugars, egg, and vanilla is essential for a consistent flavor and texture throughout your Peanut Butter and Jelly Cookies.
What does mixing the dough until smooth do?
- Flavor — It allows sugar and peanut butter to meld together, creating a harmonious sweetness that elevates every bite.
- Texture — A well-mixed dough leads to softer cookies; lumpy dough can create uneven baking results.
- Uniformity — Ensures jelly or jam fills each cookie indentation uniformly for a balanced taste experience.
- Moisture Distribution — Even mixing helps retain moisture from the peanut butter, preventing dry edges while keeping the center chewy.
- Leavening Effectiveness — Mixing thoroughly activates the baking soda properly, contributing to better rise and fluffiness in your cookies.
Different mixing times
- 1 minute (good) — Dough is mixed but still has lumps; cookies will bake unevenly with varied textures.
- 2 minutes (better) — Dough is smoother but may still have minor inconsistencies; flavor begins to develop nicely.
- ⭐️ 3 to 4 minutes⭐️ — Best! Achieves silky consistency; cookies bake evenly with great texture and flavor.
- Beyond 5 minutes — Overmixing can introduce too much air into the dough leading to overly puffy cookies.
You need to avoid skimping on this step! The most common mistake is not mixing long enough, thinking “it’s good enough.” It’s not. If there are lumps in your dough, expect uneven cookies that aren’t as delightful as they should be. Don’t risk ruining your batch!
How to make Peanut Butter and Jelly Cookies
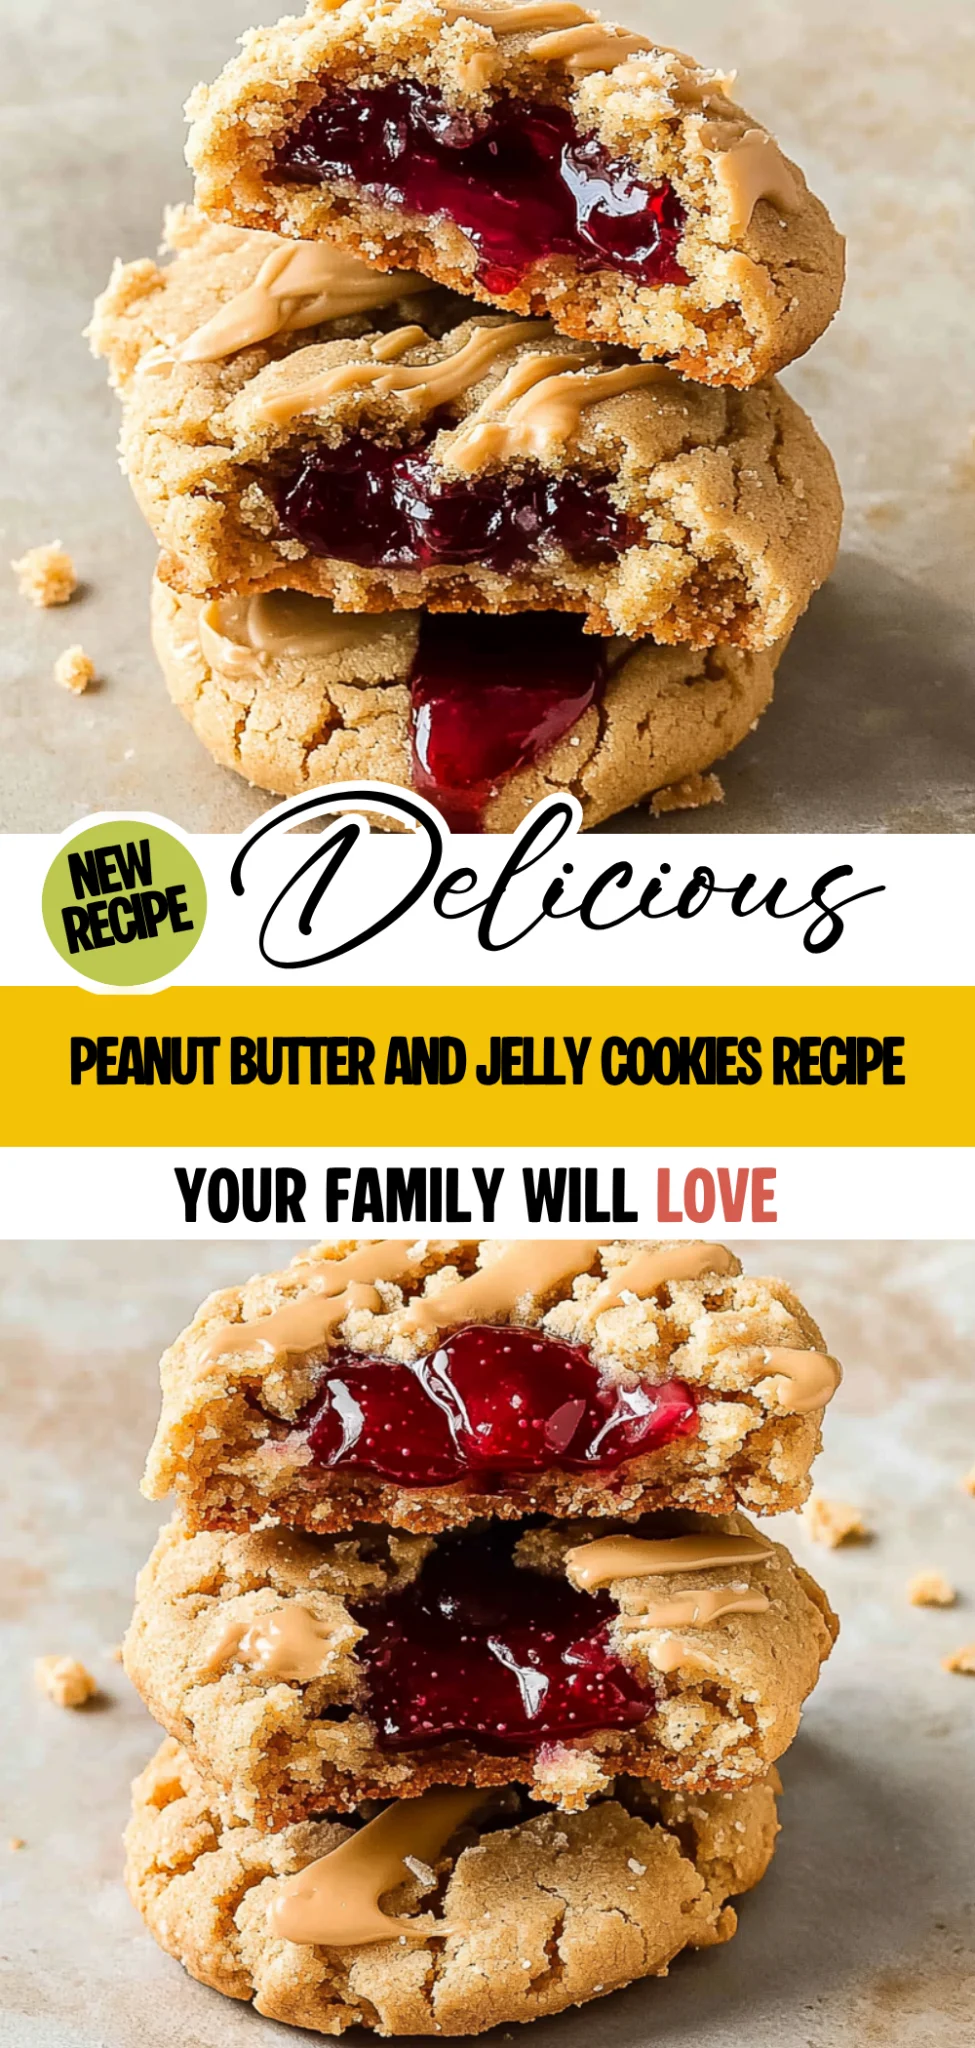
Are you ready to see how straightforward it is to make the Peanut Butter and Jelly Cookies of your dreams??
1. PREPARE THE DOUGH
Let’s get those flavors mixing!
1. Preheat – Preheat the oven to 350°F (175°C). This ensures the cookies bake evenly and reach that perfect softness inside while getting slightly crispy on the edges.
2. Combine – In a mixing bowl, combine 1 cup of peanut butter, 1/2 cup of granulated sugar, 1/2 cup of brown sugar (packed), 1 large egg, and 1 teaspoon of vanilla extract. Mix until smooth. The peanut butter acts as the base for your cookies, giving them that rich, nutty flavor.
3. Whisk – In another bowl, whisk together 1 cup of all-purpose flour, 1/2 teaspoon of baking soda, and 1/4 teaspoon of salt. Gradually add this dry mixture to the peanut butter mixture, stirring until just combined. This step is crucial to ensure even distribution of the leavening agent (baking soda) throughout your dough.
HANDY TIPS
- For a more intense peanut flavor, use crunchy peanut butter.
- If you choose not to use brown sugar, consider adding a splash more vanilla for sweetness.
2. FORM THE COOKIES
Time to shape these delightful treats!
4. Scoop – Scoop out tablespoon-sized portions of dough and roll them into balls. Make sure they are uniform in size for even baking—about 25 will do!
5. Place – Place the dough balls on a baking sheet lined with parchment paper, spacing them about 2 inches apart. This spacing allows for spreading as they bake.
6. Indent – Make a small indentation in the center of each dough ball using your thumb. This will hold your delicious jelly or jam filling later on!
HANDY TIPS
- Want smaller cookies? Roll the dough into smaller balls but keep an eye on them; they may need an extra minute or two in the oven.
- If you prefer a prettier presentation, use the back of a spoon instead of your thumb for a neat indentation.
3. ADD THE FILLING
The best part is here—let’s fill those cookies!
7. Fill – Fill each indentation with about 1 teaspoon of jelly or jam (your choice of flavor). Don’t be shy; this is what makes these cookies so special!
HANDY TIPS
- For a fun twist, try using flavored peanut butter alongside different jams—chocolate or berry-flavored jams pair beautifully!
- Make sure to not overfill; you want just enough jelly to stay put without spilling over during baking.
4. BAKE
Let’s bring these beauties to life!
8. Bake – Bake in the preheated oven for 10-12 minutes or until the edges are lightly golden but still soft in the center—this will give you that perfect chewy texture.
9. Cool – Remove from the oven and let cool on the baking sheet for a few minutes before transferring them to a wire rack to cool completely. This step helps them set perfectly without breaking apart.
HANDY TIPS
- For an added touch, sprinkle a little sea salt on top right after they come out for a sweet-salty combination that’s irresistible!
- If you’re preparing batches ahead of time, these cookies freeze well—just layer between parchment paper in an airtight container.
Make these once, and I wager they will invade your dreams every night too! – Nagi x
FAQ – Peanut Butter and Jelly Cookies
How long will these cookies keep?
These Peanut Butter and Jelly Cookies are best enjoyed fresh, but they can last for about 4-5 days when stored properly. If you keep them in an airtight container at room temperature, they’ll retain about 90% of their deliciousness on day 3 and about 80% by day 5. If you live in a humid area, consider refrigerating them to maintain texture and freshness. Just remember that refrigeration might slightly alter the texture, making them a bit firmer.
❄️ Do I really have to chill? YES YOU DO.
No, you don’t actually have to chill the dough for these cookies! The beauty of this recipe is that it comes together quickly without the need for chilling time. I’ve tested this multiple times, and skipping the chill didn’t affect the final cookie’s taste or texture—just bake them right after mixing!
🥶 Can I freeze these cookies?
Absolutely! You can freeze both the unbaked cookie dough and baked cookies. For unbaked dough, scoop the balls onto a baking sheet lined with parchment paper and freeze until solid. Then transfer to a zip-lock bag for up to 3 months. To bake from frozen, add an extra 1-2 minutes to your baking time. For baked cookies, let them cool completely, then place in an airtight container or freezer bag; they’ll stay great for about 2 months.
🌾 Can these be made gluten free?
Yes! To make these cookies gluten-free, simply substitute the all-purpose flour with a 1: 1 gluten-free flour blend that contains xanthan gum (like Bob’s Red Mill or King Arthur Flour). I’ve tested this substitution successfully myself, and the taste remains wonderfully similar—soft and chewy with that delightful peanut butter flavor!
Can I reduce the sugar or substitute with sweeteners?
No, you cannot reduce the sugar in this recipe without affecting the structure and texture of the cookies. Trust me; I tried several variations with less sugar, including using natural sweeteners like honey or agave syrup, but they just didn’t hold up as well. The granulated and brown sugars not only sweeten but also help create that perfect soft texture we love!
Why do I need to make an indentation in each cookie?
Making an indentation in each cookie is essential for holding the jelly or jam filling. It ensures that each bite has that delightful burst of flavor right in the center! When you bake them, the indentation helps keep the filling from spilling over while adding a nice visual appeal. Plus, it’s just fun to poke your cookies! 😄
💡 Can I customize my filling?
Definitely! While classic grape or strawberry jam works beautifully, feel free to experiment with your favorite flavors—raspberry preserves or even chocolate spread could be incredible alternatives! Just remember to fill each indentation with about 1 teaspoon, ensuring it doesn’t overflow during baking. Enjoy getting creative—it’s one of my favorite parts!
Troubleshooting
I will continue to add more to this Troubleshooting section as I start seeing questions coming through from people who have made the recipe.
Troubleshooting tips
“My cookies came out too flat! 😩”
- Your dough may have been over-mixed after adding the flour. Over-mixing can cause the cookies to spread too much while baking, resulting in a flatter shape.
- You might not have used enough flour; if you packed it down while measuring, you could end up with less flour than needed. This could lead to a dough that doesn’t hold its shape when baked.
- If your butter was too soft (or melted), it can also contribute to spreading. Make sure to use room temperature peanut butter, not melted.
I bet they were still YUM though!
“My cookies are too dry and crumbly! 😭”
- You might have added too much flour by accident. Always measure your flour correctly—scooping directly from the bag can pack it down and lead to excess.
- If you didn’t fully incorporate the egg into the mixture, your cookies may lack moisture. Make sure everything is well mixed before adding dry ingredients.
- Using crunchy peanut butter instead of creamy can create a drier texture; opt for creamy for a softer result.
I bet they were still YUM though!
“The surface of my cookies split and had massive crevices! 😱”
- If your dough was overworked or if you didn’t chill it beforehand, it may cause cracking during baking. Try letting your dough rest for about 30 minutes before forming the balls next time.
- Too high of an oven temperature can also lead to rapid rising, which causes cracks on the surface. Make sure your oven is properly calibrated at 350°F (175°C).
I bet they were still YUM though!
“My cookies are too dark on the bottom! 🔥”
- This could be due to using a dark baking sheet, which absorbs heat more than lighter ones. Consider using a light-colored or shiny baking sheet for more even baking results.
- If you placed your cookies too close to the bottom heating element, they might bake faster on the bottom. Try placing your baking sheet in the middle rack of your oven next time.
I bet they were still YUM though!