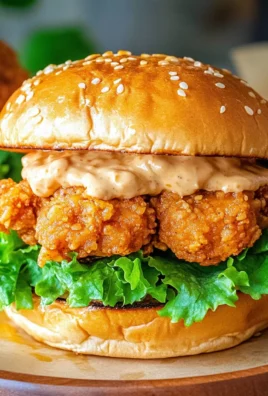
I’ve always been a sucker for that sweet and spicy combo, and it all started one fateful night at a local eatery where I first tasted hot honey chicken. The crunch of the perfectly fried chicken paired with that sticky, fiery glaze had my taste buds doing a happy dance! I knew I had to recreate this dish at home—not just because it was love at first bite, but also because let’s be real, eating out all the time can get pricey. Plus, I had this burning desire to make it even better than what I had at the restaurant.
After several attempts (and a few kitchen disasters that involved more smoke than I’d like to admit), I finally landed on my version of the Baked Crunchy Hot Honey Chicken Recipe. It took me about a week of trial and error—who knew getting that perfect crispy texture while baking would be such a challenge? Each iteration was an experiment in flavor balance and crunchiness, and let’s just say there were moments when I thought I might end up with a chicken-flavored brick instead of a succulent masterpiece!
But oh boy, was it worth every bit of effort! The final result is nothing short of spectacular: deliciously crispy baked chicken coated in a sweet and spicy hot honey glaze that leaves you wanting more. The texture is a glorious contrast between the crunchy exterior and juicy meat inside, while the flavor has just the right kick to keep things exciting. Trust me, once you try this recipe, you’ll be hooked! So roll up your sleeves and get ready to indulge in some serious deliciousness—I can’t wait for you to experience it!
These Baked Crunchy Hot Honey Chicken Recipe are…
…a flavor explosion that’s simply irresistible!
1. They deliver an explosive flavor with a perfect balance of sweet and spicy, thanks to the hot honey glaze that combines local honey and your favorite hot sauce. This unique blend not only elevates the chicken’s natural savoriness but also creates a delightful aroma that fills your kitchen as they bake.
2. Incredible crunch – achieving that satisfying crispy texture is all about using skin-on bone-in chicken thighs, which lock in moisture while the panko breadcrumbs create a thick, crunchy crust during baking. This combination ensures every bite has an addictive crunch that contrasts beautifully with the juicy chicken inside.
3. The baking technique used here is key—by using a high oven temperature and a wire rack, I’m able to achieve golden brown crispiness without frying. This method allows excess fat to drip away while ensuring even heat distribution, resulting in perfectly cooked chicken that’s not greasy but full of flavor.
4. Cost-effective indulgence – making this baked crunchy hot honey chicken at home is far more affordable than ordering takeout from your favorite restaurant. With minimal ingredients and simple preparation, you can feed a family of four without breaking the bank, while enjoying a meal that’s just as delicious if not more so than what you’d find out!
PS These chicken thighs are meant to be juicy and tender on the inside while achieving maximum crispiness on the outside—get ready for a truly satisfying meal!
Ingredients for the Baked Crunchy Hot Honey Chicken Recipe
Each ingredient in this dish plays an essential role in flavor and texture. Here’s what you’ll need:
- 4 pieces bone-in chicken thighs: These bring deep flavor and juicy texture.
- 1 cup panko breadcrumbs: Provides an irresistible crunch that enhances each bite.
- 1 cup all-purpose flour: Serves as a base coating to help the glaze adhere perfectly.
- 2 large eggs: Acts as a binder, ensuring the breading sticks well to the chicken.
- 1/2 cup honey: Adds a sweet richness that balances the heat of the hot sauce.
- 2 tablespoons hot sauce: Infuses the dish with a spicy kick that elevates the overall flavor.
- 1 teaspoon apple cider vinegar: Introduces a tangy brightness that cuts through sweetness.
- 1 teaspoon garlic powder: Enhances the savory depth with a subtle garlic essence.
- 1 teaspoon salt: Elevates all flavors, making each ingredient shine through.
- 1 teaspoon black pepper: Adds warmth and mild spice to round out the seasoning profile.
- 1 teaspoon paprika: Contributes vibrant color and a hint of smokiness to the dish.
The Secret to Irresistibly Crunchy Coating: Don’t Skip the Dredging!
I’ll be honest—I thought I could skip the dredging process when making my Baked Crunchy Hot Honey Chicken. I tried tossing the chicken straight into the panko, thinking I’d save some time. Spoiler alert: I was wrong! The difference in texture was so glaring that I had to admit defeat and go back to the classic three-step dredging method.
So, why is dredging essential? It’s like giving your chicken a crunchy armor that locks in moisture while creating a golden, crispy exterior. Imagine biting into a perfectly baked thigh and feeling that satisfying crunch before savoring the juicy meat inside—this is what proper dredging achieves!
What does dredging do?
- Texture — The multiple layers (flour, egg, panko) create a thicker coating that results in an ultra-crisp texture.
- Moisture retention — The flour layer helps seal in juices, keeping your chicken succulent even after baking.
- Flavor enhancement — Each layer absorbs seasoning and flavors from the spices, ensuring every bite is packed with deliciousness.
- Visual appeal — The golden-brown color of the panko breadcrumbs signals perfect crispiness, making your dish visually stunning.
- Even cooking — The coating helps ensure even heat distribution which promotes consistent cooking throughout the chicken.
Different dredging techniques
- Quick dip (good) — A fast pass through flour and panko; you’ll still get some crunch but it won’t be as impressive or sturdy.
- Standard dredge (better) — Fully coat with flour, dip in egg, and coat with panko; this gives you a decent crunch and flavor.
- Double coating (best) — Repeat the egg and panko step for an extra layer; this yields an exceptionally crispy exterior that rivals fried chicken.
- ⭐️ Triple dip ⭐️ — For the truly dedicated! A thorough double coat with a second egg dip adds an unbeatable crunch factor.
Just remember: skipping or rushing through the dredging process is a common mistake that can ruin your crunchy dreams. If you want that perfect texture and flavor combination in your Baked Crunchy Hot Honey Chicken, commit to all three steps—no shortcuts allowed!
How to make Baked Crunchy Hot Honey Chicken Recipe

Are you ready to see how straightforward it is to make the Baked Crunchy Hot Honey Chicken Recipe of your dreams??
1. PREPARE THE CHICKEN
Let’s get that oven preheating and prepare our chicken for an irresistible crunch!
1. Preheat – Preheat the oven to 400°F (200°C). This ensures your chicken will cook evenly and develop that perfect crispy exterior.
2. Mix – In a mixing bowl, combine the flour, salt, pepper, and paprika. This seasoned flour will give your chicken a flavorful base and enhance the overall taste.
3. Dredge – Dredge each chicken thigh in the flour mixture, ensuring it’s fully coated, then dip into the beaten eggs, allowing any excess to drip off. Finally, coat with panko breadcrumbs, pressing gently to adhere them well for that extra crunch.
HANDY TIPS
- Use skin-on chicken thighs for optimal crispiness! The fat from the skin renders during baking, keeping the meat juicy while achieving a golden-brown crust.
- Make sure to let excess egg drip off before coating with panko; this helps prevent sogginess.
2. BAKE THE CHICKEN
Now it’s time to bake and let those delightful aromas fill your kitchen!
4. Arrange – Place the coated chicken thighs on a baking sheet lined with parchment paper. This prevents sticking and makes cleanup easier!
5. Bake – Bake in the preheated oven for 35-40 minutes, or until the internal temperature reaches 165°F (75°C). You’ll know they’re done when they are golden brown and crispy on the outside while juicy inside!
HANDY TIPS
- If you have a meat thermometer, use it! It’s the best way to ensure your chicken is perfectly cooked without being dry.
- For even more crunch, you can broil the chicken for an additional 1-2 minutes at the end—just keep an eye on it!
3. MAKE THE HOT HONEY SAUCE
While your chicken is baking, let’s whip up that sweet and spicy hot honey sauce!
6. Combine – While the chicken is baking, combine honey, hot sauce, apple cider vinegar, and garlic powder in a small saucepan over low heat. Mixing these ingredients creates a delightful balance of sweetness and heat that will elevate your dish!
7. Heat – Heat over low heat until warmed through, stirring gently to combine into a slightly thickened sauce that’s fragrant and flavorful.
HANDY TIPS
- Adjust the amount of hot sauce according to your spice preference; you can even add more if you love a kick!
- For a unique twist, consider adding a pinch of cayenne pepper or some crushed red pepper flakes for added heat!
4. GLAZE THE CHICKEN
Now comes the best part—glazing our beautiful baked chicken with that hot honey goodness!
8. Drizzle – Once the chicken is done baking, remove it from the oven and drizzle the hot honey sauce generously over each thigh while they’re still hot so it seeps into every crevice!
9. Caramelize – Return to the oven for an additional 5 minutes to caramelize the sauce; this step adds depth of flavor and enhances that sticky glaze we all love.
HANDY TIPS
- If you’re using leftover sauce, save some aside before glazing for serving—it’s fabulous drizzled on top when plating!
5. SERVE
The moment has arrived—time to enjoy your creation!
10. Rest – Remove from the oven and let rest for a few minutes before serving; this allows juices to redistribute within the chicken for maximum juiciness!
11. Enjoy – Serve your baked crunchy hot honey chicken with your favorite sides—it pairs wonderfully with coleslaw or roasted veggies!
Make these once, and I wager they will invade your dreams every night too! – Nagi x
FAQ – Baked Crunchy Hot Honey Chicken Recipe
🥡 How long will leftovers keep in the fridge?
Leftovers of this Baked Crunchy Hot Honey Chicken can last in the refrigerator for up to 3 days. After that, the quality may start to decline—I’d say it’s about 85% as good on day 4 and drops to around 70% on day 5. Make sure to store it in an airtight container to keep it fresh and prevent any unwanted odors from mingling. When reheating, I recommend using the oven for best results; it helps maintain that crispy texture.
⏳ Can I skip letting the chicken rest before serving?
No, you cannot skip resting the chicken! Resting allows the juices to redistribute throughout the meat, which gives you a more succulent bite. I typically let mine rest for about 5-10 minutes after taking it out of the oven. If you cut into it immediately, you’ll likely end up with dry chicken—nobody wants that!
❄️ Can I freeze the baked hot honey chicken?
Yes, you can freeze this chicken! To freeze, allow it to cool completely and then wrap each piece tightly in plastic wrap or foil before placing them in an airtight container or freezer bag. It should keep well for up to 3 months. When you’re ready to enjoy it again, thaw it overnight in the fridge and reheat in the oven at 350°F (175°C) until warmed through—about 20-25 minutes should do!
🌾 Is there a gluten-free option for this recipe?
Absolutely! To make this dish gluten-free, simply substitute the all-purpose flour with a gluten-free all-purpose blend and use gluten-free panko breadcrumbs instead of regular ones. Just ensure that all other ingredients, including your hot sauce and honey, are certified gluten-free. Trust me; your taste buds won’t even notice a difference!
🔄 Can I replace honey with something else?
Nope! I’ve tried substituting honey with maple syrup and agave nectar while testing this recipe, but they just don’t provide that perfect balance of sweetness and stickiness that honey does here. If you’re looking for a lower-sugar option, consider using a sugar-free honey alternative like “honey” made from erythritol or monk fruit—but keep in mind that flavor profiles may vary.
🤔 Why do I need to coat the chicken in flour before dipping it in eggs?
Coating the chicken in flour first helps create a dry surface that allows the egg wash to adhere better during breading. This prevents your panko breadcrumbs from falling off during baking and ensures every bite is super crunchy! I’ve tested this method multiple times (yes, I’m a little mad 😅) and found that skipping this step leads to sad breadcrumbs clinging onto moist skin instead of creating that glorious crunch we all crave.
🌶️ Can I adjust the spiciness of the hot honey sauce?
Definitely! You can adjust the amount of hot sauce based on your personal heat preference. If you prefer milder flavors, start with just one tablespoon and taste test before adding more. Alternatively, if you’re feeling adventurous, try adding some crushed red pepper flakes or even cayenne pepper for an extra kick—just be careful; it’s easy to go overboard!
🍗 What if I want to use boneless chicken thighs instead?
If you prefer boneless chicken thighs, feel free to make that swap! Just note that boneless thighs will require less baking time—aim for around 25-30 minutes until they reach an internal temperature of 165°F (75°C). Keep an eye on them as they can dry out faster than bone-in options if overcooked!
Troubleshooting
I will continue to add more to this Troubleshooting section as I start seeing questions coming through from people who have made the recipe.
Troubleshooting tips
“My chicken came out too dry! 😭”
- You may have overcooked the chicken thighs. The key is to bake them just until they reach an internal temperature of 165°F (75°C). Use a meat thermometer for accuracy!
- If your oven runs hot, it can contribute to dryness. Consider checking the temperature with an oven thermometer to ensure it’s calibrated correctly.
- Not using enough oil or not letting the chicken rest after baking can also lead to dryness. A little drizzle of olive oil before baking can help keep it moist.
I bet they were still YUM though!
“The coating didn’t stick properly! 🤔”
- You might not have dredged the chicken thighs thoroughly in the flour mixture. Make sure to coat them completely before dipping in egg and panko.
- If your eggs were not beaten well enough, they may not adhere properly. Ensure they’re fluffy and well-mixed for better binding.
- Using wet or soggy panko breadcrumbs can prevent them from sticking as well. Make sure they’re dry and crunchy for optimal coating!
I bet they were still YUM though!
“My chicken didn’t turn out as crispy as yours! 😩”
- If you crowded the baking sheet, the chicken thighs will steam rather than crisp up. Give each piece some space on the pan!
- Not preheating the oven properly can also result in soggier skin. Always preheat until it reaches 400°F (200°C) before placing your chicken inside.
- Skipping oil when coating could also lead to less crispiness. A light spray or drizzle on top of the breaded chicken goes a long way!
I bet they were still YUM though!
“The glaze was too runny and didn’t caramelize! 🔥”
- If you added too much hot sauce or honey, it could make your glaze overly liquid. Stick to the specified measurements for best results.
- Not returning the coated chicken to the oven long enough may mean that the glaze doesn’t have time to thicken and caramelize properly. Ensure you give it that extra 5 minutes!
- Also, make sure you’re using good quality honey; some brands are thinner than others and may impact how thick your glaze gets.
I bet they were still YUM though!