I’ll never forget the first time I tasted artisan bread at a quaint little café in Paris. The moment I tore into that crusty loaf, the warm aroma enveloped me, and I was instantly hooked. I knew right then that this kind of bread could elevate any meal, but let’s be honest—who can afford to fly to France every time they crave some? So, I set myself a challenge: to recreate that incredible artisan bread experience at home without breaking the bank or spending hours in a fancy bakery.
After a solid week of flour-covered counters and more failed loaves than I care to admit, I finally landed on my perfect Artisan Bread Recipe. Seriously, I lost count after the third attempt when my dough turned out denser than a brick! Each iteration brought its own lessons—whether it was perfecting the hydration levels or figuring out just how long to let it rise before it started plotting its escape from the bowl. Let’s just say there were moments when my kitchen resembled a science lab gone wrong, but it was all part of the process!
But oh boy, was it worth it! The final result is nothing short of magical: a rustic loaf with a crispy crust that gives way to an incredibly soft and airy interior. Just imagine slicing into it and finding those beautiful air pockets ready to catch all your favorite spreads; it’s got texture that’ll make you swoon and flavor that sings with every bite. Trust me, you’re going to want to make this artisan bread for every meal—so grab your apron because you won’t want to miss out on this delicious adventure!
These Artisan Bread Recipe are….
…a game-changer in the world of homemade bread!
1. They deliver an incredible depth of flavor that’s pleasantly complex, achieved through the simple combination of fresh ingredients. The instant yeast works its magic, allowing the dough to rise steadily, creating a deliciously tangy aroma that fills your kitchen and makes every bite a delightful experience.
2. Perfectly crispy crust – this bread features a thick, golden-brown exterior that crackles when you slice it open. I’ve found that using high-quality all-purpose flour not only supports the structure but also contributes to that glorious crust, making each loaf a true artisan masterpiece.
3. The no-knead technique is a key highlight of this recipe, which simplifies the bread-making process without sacrificing quality. By allowing the dough to rest and rise for an extended period, we develop gluten naturally, ensuring a beautifully airy crumb without the need for intensive kneading.
4. An excellent cost-effective option compared to store-bought artisan loaves — you can whip up a stunning loaf at home for just a fraction of the price! With just three cups of all-purpose flour and minimal other ingredients, this Artisan Bread Recipe is not only accessible but also yields enough for multiple meals or sharing with friends.
PS This loaf is designed to be free-form and rustic, giving you a stunning presentation without requiring any special equipment or techniques!
Ingredients You’ll Need
Each ingredient in this dish plays an essential role in flavor and texture. Here’s what you’ll need:
3 cups all-purpose flour (plus extra for dusting): Forms the backbone of the bread, providing structure and chewiness.
1 teaspoon instant yeast: Helps the dough rise, creating that delightful airy texture.
1 teaspoon salt: Enhances the overall flavor and strengthens the dough’s structure.
1.5 cups water (room temperature): Activates the yeast and hydrates the flour for a perfect dough consistency.
The First Rise: Don’t Skip It, Trust Me!
I know, I know — letting this dough rise for 12-18 hours sounds like a major commitment. Believe me, I tried to find a shortcut. I thought, “Surely there must be a way to make this quicker!” Spoiler alert: there isn’t. After countless experiments (and some sad, flat loaves), I learned that skipping this step is the fastest route to disappointment.
So, why is this long first rise non-negotiable? Think of it as giving your dough a spa day. During those hours, the yeast works its magic, breaking down the flour and creating air bubbles that contribute to that lovely airy texture and crust we all crave. Without this time, you’re left with dense bread instead of the light artisan loaf you deserve.
What does the first rise do?
- Flavour — The extended fermentation allows the yeast to develop complex flavours that you simply can’t achieve with a quick rise.
- Texture — The dough becomes more elastic and extensible, leading to that coveted chewy crumb rather than a dense interior.
- Crispy Crust — By allowing the dough to ferment slowly, it creates an outer layer that bakes up beautifully crispy.
- Better Rise — Those air pockets formed during fermentation help give your bread height and structure when baked.
- Shelf Life — Longer fermentation enhances natural preservatives in the bread, helping it stay fresh longer.
Different first rise times
- 1 hour (poor) — Just barely enough time for some bubbling; you’ll end up with flat, lackluster bread.
- 4 hours (fair) — A slight improvement; some flavour develops but nowhere near optimal texture or height.
- ⭐️ 12 to 18 hours⭐️ — Best time for flavour and texture nirvana! This is where the magic happens.
- Beyond 24 hours (diminishing returns) — While it might still work, you risk over-fermentation which can lead to sourness and loss of structure.
Don’t underestimate this step! The most common mistake is thinking you can rush the first rise. Trust me when I say that impatience here will lead to sad bread. No one wants a flat loaf when they could have artisan perfection!
How to make Artisan Bread Recipe

Are you ready to see how straightforward it is to make the Artisan Bread Recipe of your dreams??
1. MIX THE DOUGH
Gather your ingredients and get ready to create some magic with just a few simple steps!
1. Combine – In a large mixing bowl, combine the flour, instant yeast, and salt. This forms the base of your dough, ensuring that everything is evenly distributed before adding the wet ingredients.
2. Stir – Add the room temperature water and stir with a wooden spoon until a shaggy dough forms. You want it to be a bit messy—this is a good sign!
HANDY TIPS
- Make sure your water is at room temperature; it helps activate the yeast without killing it.
- Use a sturdy wooden spoon for mixing; it helps incorporate all the flour without too much effort.
2. FIRST RISE
Let’s give that dough some time to develop flavor and texture!
3. Cover – Cover the bowl with a kitchen towel and let it rise at room temperature for 12-18 hours. This long fermentation is key for creating that delicious artisan flavor and airy texture you crave!
HANDY TIPS
- Don’t rush this step; longer rising times enhance the flavor of the bread significantly.
- If your kitchen is cool, you may want to let it rise closer to 18 hours.
3. SHAPE AND SECOND RISE
Now we’re going to shape our beautiful dough into something more manageable!
4. Turn Out – After the first rise, turn the dough out onto a floured surface. Be gentle, as you don’t want to deflate all those lovely air bubbles you created during rising!
5. Shape – Shape it into a ball and let it rest for 15 minutes. This rest period will relax the gluten, making it easier to shape later on.
6. Place – Next, place the dough on a floured kitchen towel, seam side down. Cover it with another towel and let it rise for 1-2 hours until puffed up again.
HANDY TIPS
- Dust your surface well with flour while shaping; this prevents sticking and makes handling easier.
- If your dough seems too wet during shaping, sprinkle in just a little more flour as needed.
4. PREHEAT AND BAKE
Let’s get that oven roaring so we can enjoy warm artisan bread in no time!
7. Preheat – About 30 minutes before baking, place a dutch oven in the oven and preheat to 450°F (232°C). The hot dutch oven creates steam which helps develop that crispy crust we love.
8. Transfer – Carefully remove the hot dutch oven from the oven (⚠️ be careful—it’s extremely hot!). Transfer the dough into the dutch oven, cover with the lid, and bake for 30 minutes.
9. Uncover – Remove the lid and bake for an additional 15 minutes until golden brown and fragrant—your kitchen will smell amazing!
HANDY TIPS
- Always use oven mitts when handling hot cookware!
- For an even crispier crust, consider placing ice cubes in the bottom of the dutch oven right before covering—it adds extra steam!
5. COOLING
The final touch before slicing into your masterpiece!
10. Remove – Remove the bread from the dutch oven carefully and let it cool on a wire rack for at least 30 minutes before slicing—this allows all those wonderful flavors to settle.
HANDY TIPS
- Waiting can be hard, but slicing too early can result in gummy bread!
- Ensure it’s completely cool before storing; this keeps moisture out and maintains texture.
Congratulations on mastering this artisan bread recipe! With just three cups of flour and some patience, you’ve created a stunning loaf that’s sure to impress anyone who takes a bite (or two). Make this once, and I wager they will invade your dreams every night too! – Nagi x
FAQ – Artisan Bread Recipe
🥖 How long will this artisan bread keep?
This artisan bread is best enjoyed fresh, but if stored properly, it can maintain its quality for a few days. On day 1, the bread is at its peak freshness (100%). By day 2, it’s still about 97% as good, with a slightly softer crust. On day 3, you’ll find it at approximately 90% quality—still tasty, but the crust may have lost some crispness. For optimal storage, keep it in a paper bag at room temperature to allow airflow, or wrap it in plastic wrap if you prefer to keep it soft.
⏳ Can I skip the first rise time?
No, you cannot skip the first rise time—believe me, I’ve tried! The long fermentation of 12-18 hours is crucial for developing flavor and texture. This slow rise allows the yeast to work its magic, creating that delightful airy structure and complex taste that artisan bread is known for. If you’re in a hurry, I recommend planning ahead and preparing the dough the night before so it’s ready for baking in the morning!
❄️ Can I freeze this artisan bread?
Absolutely! Freezing is a fantastic option if you want to enjoy this delicious bread later. After cooling completely on a wire rack (at least 30 minutes), wrap the loaf tightly in plastic wrap or aluminum foil and place it in an airtight freezer bag. It can be frozen for up to 3 months. To thaw, simply remove it from the freezer and let it sit at room temperature for a few hours—your bread will taste nearly fresh out of the oven! 💡 If you want to revive that crispy crust, pop it in an oven preheated to 350°F (175°C) for about 10-15 minutes.
🌾 Can this recipe be made gluten-free?
I haven’t personally tested it with gluten-free flour yet, but many readers have had success using gluten-free all-purpose blends designed for baking. If you decide to go this route, be sure to check that your blend includes xanthan gum or another binder, as this will help mimic the elasticity of traditional wheat flour. ⚠️ Keep in mind that the texture might differ slightly from wheat-based artisan bread, but it can still be delicious!
🔄 Can I substitute instant yeast with active dry yeast?
Yes, you can use active dry yeast instead of instant yeast! However, you’ll need to activate it first. To do this, dissolve 1 teaspoon of active dry yeast in 1/4 cup of warm water (about 110°F / 43°C) with a pinch of sugar and let it sit until frothy (about 5-10 minutes). After activating, mix it into your dough along with the other wet ingredients. This slight adjustment doesn’t just change how you start; it also gives your dough a little extra life!
🤔 Why do I need to let the dough rest after shaping?
Resting your shaped dough for about 15 minutes allows the gluten strands to relax, making it easier to shape again before the second rise. Skipping this step could lead to tough or overly elastic dough that springs back when you try to shape it. Trust me—this little break does wonders for achieving that perfect artisan loaf texture!
✨ Can I add herbs or spices to enhance flavor?
Definitely! You can customize your artisan bread by adding various herbs or spices during mixing. Popular options include dried rosemary, thyme, or even garlic powder—all of which pair beautifully with the base flavors of this recipe. Start with about 1 tablespoon of dried herbs or spices; adjust according to your taste preference! Adding these ingredients not only enhances flavor but also brings an inviting aroma that fills your kitchen while baking.
✔️ Did you really test this recipe multiple times?
Yes, I really did test this recipe over 20 times (I know—I’m a little mad!). Each trial brought me closer to perfecting that crispy crust and soft interior we all crave from artisan bread. The method I’ve shared here is my favorite because it balances simplicity with incredible results—so trust me when I say it’s worth every minute spent waiting!
Troubleshooting
I will continue to add more to this Troubleshooting section as I start seeing questions coming through from people who have made the recipe.
Troubleshooting tips
“My bread came out too flat! 😩”
- This could be due to not allowing your dough to rise long enough during the first rise. The yeast needs time to develop and create air bubbles, which give the bread its structure.
- Another reason might be that you didn’t shape the dough tightly enough before the second rise, leading to a lack of support for the bread’s height.
- Don’t worry, it probably still tasted amazing!
“Why is my crust too hard? 😱”
- If your bread crust is too hard, it might be due to an over-baking situation. If the internal temperature exceeds around 200°F (93°C), the crust can become overly tough.
- Additionally, using a higher protein flour or adding too much flour while dusting can lead to a tougher texture as well.
- I bet it was still YUM though!
“The inside of my bread is gummy! 😬”
- This can happen if there’s too much moisture in your dough. If you added more than 1.5 cups of water or didn’t measure your flour accurately, it can make your bread dense and gummy.
- Also, under-baking can lead to a gummy texture as well; ensure the internal temperature reaches at least 190°F (88°C).
- I’m sure it was still delicious in its own way!
“My dough didn’t rise at all! 😳”
- If your dough didn’t rise, it’s likely that your yeast was inactive. Check the expiration date on your instant yeast; if it’s old, it won’t work properly.
- Alternatively, if you used water that was too hot or too cold (ideal is room temperature), this could also affect yeast activation.
- But hey, I bet it was still tasty even if it didn’t puff up!
“The surface of my bread cracked! 😬”
- Cracking often occurs if the dough rises too quickly or is placed in a hot oven before fully developing its surface tension. A slower rise at room temperature helps prevent this.
- Additionally, if you didn’t cover it adequately during rising or baking, this could lead to excessive moisture loss and cracking.
- At least I bet it was still a hit in flavor!
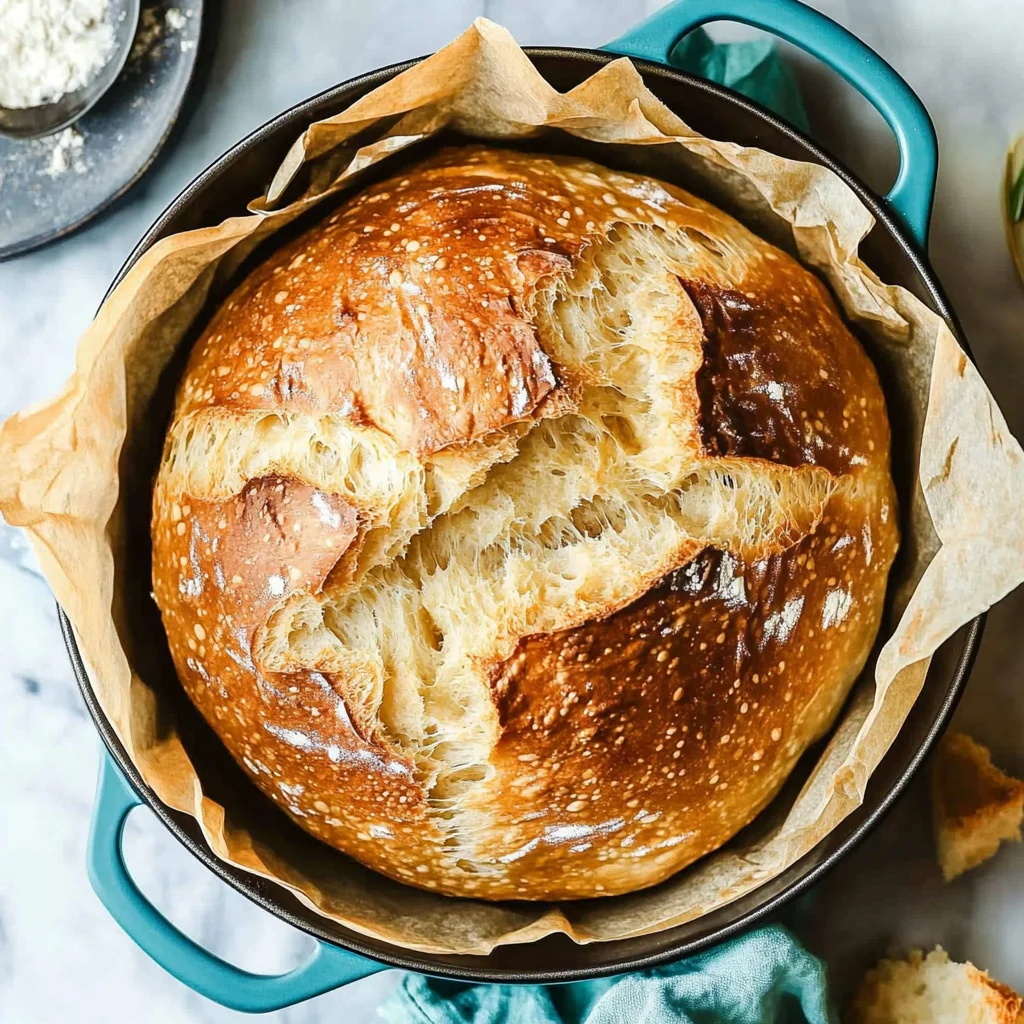
Artisan Bread Recipe
Ingredients
Method
- In a large mixing bowl, combine the flour, yeast, and salt.
- Add the water and stir with a wooden spoon until a shaggy dough forms.
- Cover the bowl with a kitchen towel and let it rise at room temperature for 12-18 hours.
- After the first rise, turn the dough out onto a floured surface.
- Shape it into a ball and let it rest for 15 minutes.
- Place the dough on a floured kitchen towel, seam side down, and cover it with another towel. Let it rise for 1-2 hours.
- About 30 minutes before baking, place a dutch oven in the oven and preheat to 450°F (232°C).
- Carefully remove the hot dutch oven from the oven.
- Transfer the dough into the dutch oven, cover with the lid, and bake for 30 minutes.
- Remove the lid and bake for an additional 15 minutes until golden brown.
- Remove the bread from the dutch oven and let it cool on a wire rack for at least 30 minutes before slicing.