When the leaves start to turn and the air gets that crisp bite, there’s nothing quite like the comforting aroma of apple cider wafting through the kitchen. My inspiration for this Apple Cider Pound Cake actually came from a quaint little bakery I stumbled upon during a fall road trip. They had a version of it that was so moist and flavorful, I knew I had to try recreating it at home. Plus, let’s be real—why should I have to drive an hour for a slice when I could whip one up myself? It’s not just about saving money; it’s about capturing that cozy feeling of fall right in my own kitchen.
Let me tell you, perfecting this recipe was no walk in the park. I lost count after my fifth attempt (I may or may not have been eating way too much cake in the process!). Each iteration was a little bit different as I fiddled with the apple cider ratio, trying to get that perfect balance of flavor without it being too dense. Spoiler alert: some were deliciously edible, while others… well, let’s just say they were better suited for compost than my dessert table!
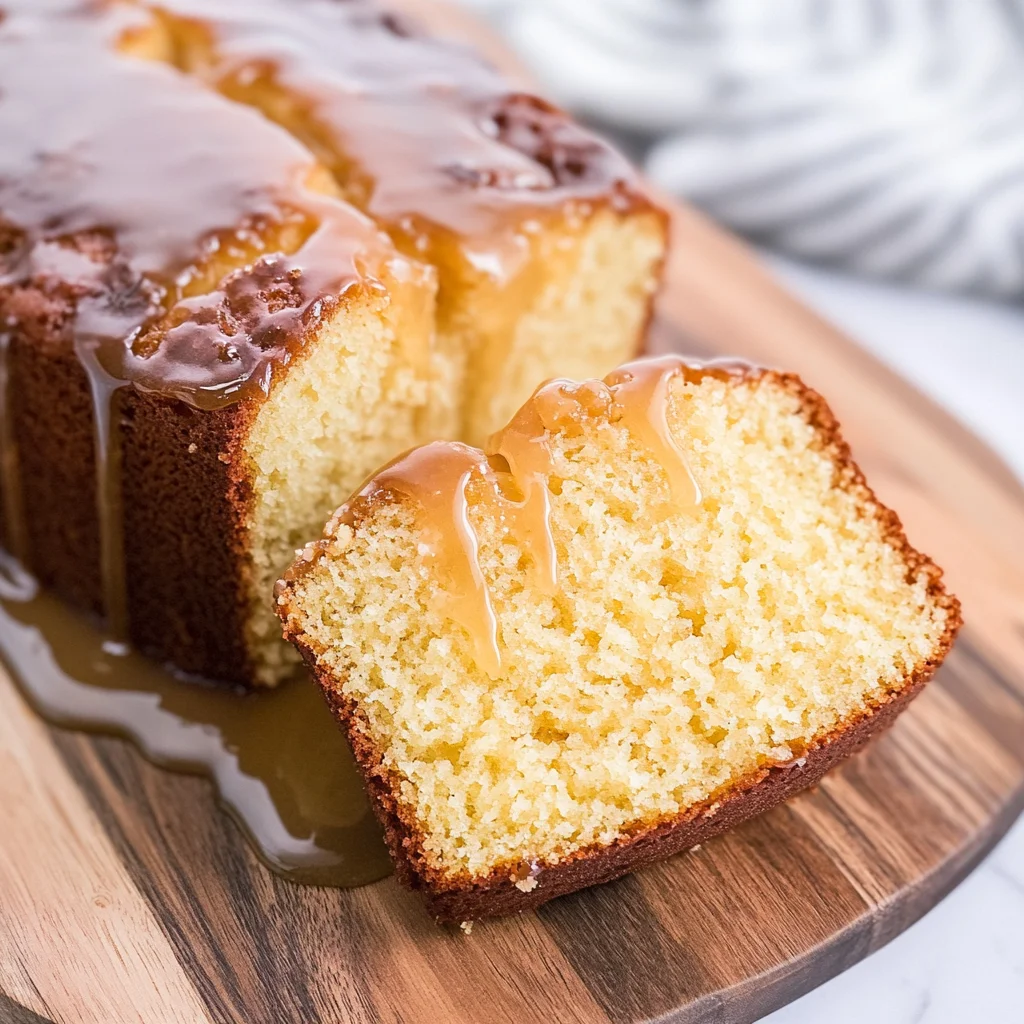
But boy, was it worth the effort! The final result is an Apple Cider Pound Cake that’s incredibly moist with a delightful crumb and a warm apple flavor that sings fall in every bite. It’s got this lovely golden crust that gives way to a tender interior, making it perfect for gatherings or just those cozy evenings at home. Trust me, you’re going to want to share this one—though, if you don’t, I won’t judge! So grab your ingredients and let’s make some fall magic happen!
These Apple Cider Pound Cake are…
…a delightful twist on a classic dessert that captures the essence of fall in every bite!
1. They deliver a wonderful apple aroma that instantly transports you to an autumn orchard. The infusion of fresh apple cider not only enhances the flavor profile but also adds a warm, inviting scent that fills your kitchen as it bakes, making it hard to resist slicing into this cake right away.
2. Incredibly moist texture – each slice feels like biting into a cloud! The combination of softened butter and room temperature eggs creates a rich batter that retains moisture during baking, resulting in a pound cake that’s tender and satisfying with every bite.
3. A unique blending technique elevates this recipe beyond the ordinary. By creaming the butter and sugar until fluffy before adding the dry ingredients, I ensure that air is incorporated into the mix, leading to a lighter cake with an airy crumb structure that perfectly balances its dense nature.
4. Cost-effective indulgence – this homemade Apple Cider Pound Cake is not only delicious but also budget-friendly! With simple ingredients like flour and sugar, you can create an impressive dessert at home for a fraction of the cost of gourmet bakery options, all while enjoying the satisfaction of baking it yourself.
PS This cake serves about 10-12 people, making it perfect for sharing at gatherings or cozy fall get-togethers!
Ingredients You’ll Need
Each ingredient in this dish plays an essential role in flavor and texture. Here’s what you’ll need:
2 cups all-purpose flour (sifted): Provides the structure and base for the cake.
1 teaspoon baking powder: Helps the cake rise for a light and fluffy texture.
1 teaspoon baking soda: Works with the apple cider to create a tender crumb.
1/2 teaspoon salt: Enhances the overall flavors of the cake.
1 cup unsalted butter (softened): Adds richness and moisture to every bite.
1 cup granulated sugar: Sweetens the cake while contributing to its delicate texture.
4 large eggs (room temperature): Binds the ingredients together and adds richness.
1 cup apple cider (preferably fresh): Infuses the cake with a warm, autumnal flavor.
1 teaspoon vanilla extract: Provides depth and enhances the sweetness.
1/2 cup powdered sugar (for dusting): Adds a touch of sweetness and a lovely presentation.
- 1 teaspoon cinnamon (optional): Offers a warm spice that complements the apple cider beautifully.
You Must Whisk the Dry Ingredients. No Skipping!
I know, I know—whisking the dry ingredients might seem like an extra step you can skip, but trust me, I tried to cut corners and ended up with a dense cake that tasted more like a brick than the fluffy pound cake of my dreams. It took a few trial-and-error attempts (and a few too many late-night baking sessions) before I realized that this step is absolutely non-negotiable.
So why is whisking so important? Think of it as giving your flour a little spa day! By incorporating air into the mixture and evenly distributing the baking powder, baking soda, and salt throughout the flour, you ensure that every bite of your Apple Cider Pound Cake has that perfect rise and balanced flavor. If you don’t whisk, those leavening agents won’t work their magic effectively, resulting in an uneven texture that no amount of apple cider can save.
What does whisking the dry ingredients do?
- Even distribution of leavening agents — Whisking ensures that baking powder and baking soda are evenly spread out, leading to consistent rising throughout the cake.
- Improved texture — Incorporating air gives the cake a light and fluffy texture instead of a dense one.
- Balanced flavor — Properly combined salt with flour prevents any salty bites, allowing for a harmonious taste with every slice.
- Moisture retention — Well-whisked flour creates a better structure for trapping moisture from the apple cider, making each bite decadent.
- Better blending with wet ingredients — When dry ingredients are thoroughly mixed beforehand, they integrate more smoothly when combined with wet ingredients, reducing lumps.
Different whisking times
- 10 seconds (fair) — Just enough to combine but may leave clumps; results in uneven texture and rise.
- 30 seconds (good) — A decent mix that helps distribute but might still leave some areas unblended; acceptable for average results.
- 1 minute (better) — Thoroughly mixed; noticeable improvement in texture and rise; ideal for most cakes.
- 2 minutes (best) — A fluffy mixture that’s perfectly aerated; this is where your cake starts to become bakery-quality!
If you think you can just toss everything together without whisking, think again! The most common mistake is underestimating how much of an impact this step has on your cake’s final outcome. Trust me, skipping it is not just a minor faux pas—it’s a recipe for disappointment!
How to make Apple Cider Pound Cake

Are you ready to see how straightforward it is to make the Apple Cider Pound Cake of your dreams??
1. PREPARE THE OVEN AND PAN
Let’s get started by prepping our oven and pan to ensure that everything bakes evenly and beautifully!
1. Preheat – Preheat your oven to 350°F (175°C). This temperature is perfect for a pound cake, allowing it to rise slowly and develop flavor.
2. Grease and Flour – Grease and flour a 9×5 inch loaf pan. This step prevents the cake from sticking, so you can enjoy every crumb without any mess! In a mixing bowl, whisk together the flour, baking powder, baking soda, and salt until well combined.
HANDY TIPS
- Make sure your flour is sifted before measuring; this helps incorporate air, making the cake lighter.
- You can use cooking spray instead of greasing and flouring the pan if you prefer — just make sure it’s a non-stick variety!
2. MIX THE BATTER
Now, let’s create that delicious batter that will be the star of your fall gatherings!
3. Cream – In a separate bowl, cream the softened butter and granulated sugar together until light and fluffy. This process incorporates air into the mixture, leading to a lighter texture in your cake.
4. Add Eggs – Add the eggs one at a time, mixing well after each addition. This ensures proper emulsification, giving your cake that lovely moist crumb.
5. Stir in Flavors – Stir in the apple cider and vanilla extract until combined. The apple cider adds moisture and a wonderful fall flavor—don’t skip it!
6. Combine – Gradually add the dry ingredients to the wet mixture, mixing until just combined. Be careful not to overmix; you want to keep that fluffy texture!
HANDY TIPS
- If you’re using fresh apple cider, it really enhances the flavor—just don’t use store-bought concentrate for best results!
- Room temperature eggs blend into the batter more easily; try letting them sit out for about 30 minutes before using.
3. BAKE THE CAKE
It’s time to bake! Get ready for your kitchen to smell amazing while this cake comes together.
7. Pour – Pour the batter into the prepared loaf pan and smooth the top with a spatula for an even bake.
8. Bake – Bake in the preheated oven for 60 minutes or until a toothpick inserted in the center comes out clean. You’ll know it’s done when it has risen nicely and is golden brown on top.
9. Cool – Let the cake cool in the pan for 10 minutes before transferring it to a wire rack to cool completely. This helps set its structure!
HANDY TIPS
- If your toothpick comes out with moist crumbs rather than wet batter, that’s perfectly fine—your cake will still be moist!
- If you’re short on time, consider slicing after it’s cooled for less than an hour; just be cautious as it may crumble slightly if too warm.
4. SERVE
Finally, let’s finish off this beauty with a simple yet delightful topping!
10. Dust – Once cooled completely, dust the top with powdered sugar and optional cinnamon if desired—this adds an extra touch of sweetness and spice! Slice and serve immediately for best enjoyment.
HANDY TIPS
- Pair slices with whipped cream or vanilla ice cream for an indulgent treat!
- Store leftover cake in an airtight container at room temperature for up to three days.
What an incredible Apple Cider Pound Cake you’ve just created! It’s moist, flavorful, and perfect for sharing with family or enjoying alone with your favorite mug of tea or coffee! I can’t wait for you to dig into this slice of fall bliss – happy baking! – Nagi x
FAQ – Apple Cider Pound Cake
🥧 How long will this pound cake keep?
This Apple Cider Pound Cake can be stored at room temperature in an airtight container for about 3 to 4 days. After that, it starts losing its moistness and flavor—by day 5, I’d say it’s about 85% as good! If you want to enjoy it longer, consider refrigerating it, but be aware that refrigeration can dry it out a bit. If you really want to keep it fresh, freezing is the best option!
⏲️ Can I skip resting the batter?
No, you can’t skip any resting time with this recipe! While there’s no formal resting period in the mixing instructions, allowing the batter to sit for just a few minutes before baking can help improve texture. This gives the flour time to hydrate fully and aids in creating that lovely moist crumb we all adore.
❄️ Can I freeze this pound cake?
Absolutely! To freeze your Apple Cider Pound Cake, allow it to cool completely after baking. Wrap the cake tightly in plastic wrap and then aluminum foil to prevent freezer burn. It can be frozen for up to 3 months. When you’re ready to enjoy it, simply thaw it in the fridge overnight or at room temperature for a few hours. Remember not to frost until you’re ready to serve!
🌾 Can this cake be made gluten-free?
Yes, you can make this Apple Cider Pound Cake gluten-free! Substitute the all-purpose flour with a 1: 1 gluten-free flour blend, ensuring it contains xanthan gum for proper structure. Keep in mind that gluten-free flours can absorb moisture differently; you might need to adjust liquid ingredients slightly or add an extra egg for better binding.
🍯 Can I substitute apple cider with something else?
While apple cider gives this cake its unique flavor profile, if you need a substitute, you could use unsweetened applesauce or even a mix of apple juice and a splash of vinegar (about ¾ cup juice + 2 teaspoons vinegar) for acidity. However, I really encourage trying the recipe with real apple cider first—it’s worth every sip!
🔍 Why do I need to sift the flour?
Sifting flour is crucial because it aerates the flour and removes any lumps that could ruin your cake’s texture. It also ensures that the leavening agents (baking powder and soda) are evenly distributed throughout your dry ingredients when mixed together. Trust me; I’ve tested both methods—sifted vs unsifted—and sifting wins every time!
🎉 Can I add nuts or other add-ins?
Definitely! Feel free to fold in about 1 cup of chopped walnuts or pecans into the batter before pouring it into the loaf pan for added crunch and flavor contrast. Dried cranberries or raisins also work beautifully if you’re looking for a fruity twist—but don’t overdo it; too many add-ins can affect baking time and texture!
Troubleshooting
I will continue to add more to this Troubleshooting section as I start seeing questions coming through from people who have made the recipe.
Troubleshooting tips
“My cake came out too flat! 😱”
- You may not have added enough baking powder. If you used less than the 1 teaspoon specified, your cake may lack the lift needed for a nice rise.
- Overmixing the batter can also lead to a flat cake. When you combine the wet and dry ingredients, mix until just combined to avoid activating too much gluten.
I bet it still tasted delicious though!
“My pound cake is super dry! 😢”
- This can happen if you overbaked the cake. If you leave it in the oven longer than 60 minutes, it might dry out before cooking through properly.
- Using flour that hasn’t been sifted well can lead to too much flour in the batter, resulting in a dry texture. Always ensure your flour is properly sifted before measuring!
I’m sure it was still YUM though!
“The top of my cake cracked and split! 😩”
- A sudden temperature change can cause cracking. Make sure your oven is fully preheated to 350°F (175°C) before putting in the cake.
- If your batter was overmixed, it could create too much air, causing it to rise rapidly and crack during baking. Mix gently when combining wet and dry ingredients.
Even with cracks, I bet it still made for a delightful treat!
“My cake turned out unevenly browned! 🔥”
- This might be due to your oven temperature being off. If it’s running hot, the outside can brown too quickly while the inside remains undercooked.
- Not positioning your pan in the center of the oven can lead to uneven cooking as well. Make sure your loaf pan is placed on the middle rack for even heat circulation.
I’m sure it was still tasty despite its looks!
Apple Cider Pound Cake
Ingredients
Method
- Preheat your oven to 350°F (175°C). Grease and flour a 9x5 inch loaf pan.
- In a mixing bowl, whisk together the flour, baking powder, baking soda, and salt.
- In a separate bowl, cream the softened butter and granulated sugar together until light and fluffy.
- Add the eggs one at a time, mixing well after each addition.
- Stir in the apple cider and vanilla extract until combined.
- Gradually add the dry ingredients to the wet mixture, mixing until just combined.
- Pour the batter into the prepared loaf pan and smooth the top.
- Bake in the preheated oven for 60 minutes, or until a toothpick inserted in the center comes out clean.
- Let the cake cool in the pan for 10 minutes, then transfer to a wire rack to cool completely.
- Once cooled, dust the top with powdered sugar and cinnamon if desired. Slice and serve.