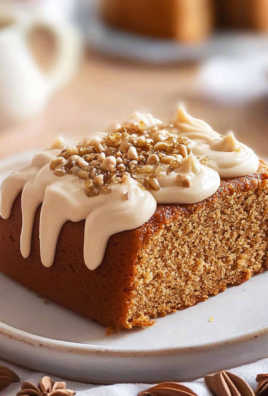
I first stumbled upon the idea for this Salted Caramel Cookie Recipe during a late-night sugar craving that had me rifling through my pantry. I remembered a visit to a quaint little café that served the most incredible salted caramel cookies—each bite was like a warm hug on a cold day. I left with my heart (and belly) full, but when I tried to replicate that experience at home, I quickly realized how much of a challenge it would be. Not only did I want to save some cash by making them myself, but I also had this burning desire to create something even better than the original!
After what felt like an eternity (okay, maybe it was just a week), and somewhere around five failed attempts, I finally nailed it. Each iteration was a hilarious disaster in its own right—too crumbly one day, not enough caramel the next, and let’s not even talk about the cookie dough explosion in my kitchen! But with every misstep, I learned something new about balancing flavors and achieving that perfect chewy texture. It became my mission to get these cookies just right, and trust me, I’ve got enough cookie dough stories to fill an entire blog post.
But oh boy, was it worth it! The final product is nothing short of divine: deliciously chewy cookies bursting with rich salted caramel flavor that’ll have you reaching for seconds (or thirds). They have that perfect golden-brown exterior with a soft center that melts in your mouth while leaving just the right hint of saltiness on your tongue. So grab your apron and get ready to dive into what just might be your new favorite treat—I can’t wait for you to try this Salted Caramel Cookie Recipe!
These Salted Caramel Cookie Recipe are….
….the ultimate indulgence that will elevate your cookie game to new heights!
1. They deliver a decadent caramel flavor that’s truly unforgettable, thanks to the perfect balance of brown and granulated sugar in the dough. The brown sugar adds a deep, molasses-like richness, while the granulated sugar contributes sweetness, creating a complex flavor profile that pairs beautifully with the salted caramel.
2. Irresistibly chewy texture – these cookies have a soft, pillowy center enveloped in a slightly crisp exterior. This delightful chewiness is achieved by using just the right amount of butter and flour, allowing them to bake to golden perfection without losing that essential gooeyness.
3. Expertly crafted technique – the secret lies in how we incorporate the ingredients, especially creaming the softened butter with sugars until light and fluffy. This crucial step not only aerates the mixture for a lighter texture but also enhances the overall flavor by ensuring even distribution of all ingredients.
4. They offer incredible value for your baking efforts, as you can whip up these delightful cookies at home for a fraction of the cost of gourmet bakery treats. With simple ingredients readily available in your pantry, you can impress family and friends without breaking the bank.
PS These cookies are best enjoyed fresh but can be stored for several days in an airtight container, maintaining their chewy goodness!
Ingredients for the Salted Caramel Cookie Recipe
Each ingredient in this dish plays an essential role in flavor and texture. Here’s what you’ll need:
- 1 cup unsalted butter (softened): Provides richness and a tender texture to the cookies.
- 3/4 cup brown sugar (packed): Adds moisture and a deep caramel flavor.
- 1/4 cup granulated sugar: Contributes sweetness and helps with browning.
- 1 large egg: Binds the ingredients together and adds richness.
- 1 teaspoon vanilla extract: Enhances the overall flavor with warmth and depth.
- 2 cups all-purpose flour: Forms the structure of the cookies for a chewy bite.
- 1 teaspoon baking soda: Acts as a leavening agent for lightness.
- 1/2 teaspoon salt: Balances sweetness and enhances all flavors.
You MUST make the salted caramel from scratch. No shortcuts!
I get it — making your own salted caramel seems like a daunting task that adds extra time to your baking adventure. Trust me, I tried to find a shortcut and ended up with a sugary disaster more than once! I learned the hard way that there’s simply no substitute for that deep, rich flavor you get from homemade caramel.
So why is this step so essential? The process of melting granulated sugar into a deep amber color isn’t just for show; it creates complex flavors that elevate your cookies from ordinary to extraordinary. Think of it like roasting vegetables — that caramelization brings out the natural sweetness and depth in ways that just tossing in some store-bought sauce never could. In these salted caramel cookies, the freshly made caramel truly transforms the dough, creating a deliciously chewy texture and a flavor profile that will have everyone begging for the recipe.
What does making salted caramel do?
- Flavor — Homemade caramel has a depth of flavor that’s unmatched, providing a rich, buttery sweetness that store-bought versions can’t replicate.
- Texture — The process creates a smoother, creamier consistency when mixed into the cookie dough, resulting in cookies that are chewy and melt-in-your-mouth delightful.
- Color — That beautiful golden hue of homemade caramel adds an inviting visual appeal to your cookies, making them more appetizing.
- Freshness — Using freshly made caramel means no preservatives or additives, ensuring you’re getting the purest taste possible—just like grandma used to make!
- Complexity — The layers of flavor add an unexpected sophistication to what might otherwise be a simple cookie recipe, impressing family and friends alike.
- Moisture — The addition of warm caramel keeps the cookie dough moist during baking, leading to softer centers and fewer dry edges.
Different salted caramel times
- Immediate Use (good) — If you’re in a hurry and use the caramel right after making it, you’ll still get great flavor but may miss out on some richness as it hasn’t had time to cool completely.
- 30 minutes (better) — Allowing it to rest for about half an hour gives it a chance to thicken slightly, enhancing its texture when incorporated into the dough.
- 1 hour (great) — This is ideal for letting flavors meld together; your cookies will be noticeably richer and more decadent.
- 2 hours+ (best) — At this point, you’ve hit peak flavor intensity! The cooled caramel will mix beautifully into the dough, giving you those divine chewy cookies we’re all after.
Beware of rushing this step! The most common mistake is using pre-made salted caramel or skipping this entire process altogether. It may save you time now, but it sacrifices flavor and texture in ways you won’t want to live with once you’ve tasted these cookies done right!
How to make Salted Caramel Cookie Recipe

Are you ready to see how straightforward it is to make the Salted Caramel Cookie Recipe of your dreams??
1. MAKE THE SALTED CARAMEL
Let’s kick things off with that luscious salted caramel that will elevate your cookies to heavenly status!
1. Melt Sugar – In a medium saucepan over medium heat, melt the granulated sugar while stirring constantly. Keep an eye on it as it transforms into a deep amber color; this usually takes about 5-7 minutes. This step is crucial because a perfectly caramelized sugar gives the cookies a rich flavor.
2. Add Butter – Once the sugar has reached that gorgeous color, carefully add the cut pieces of butter and stir until melted and fully combined with the sugar. The mixture should be smooth and glossy at this point.
3. Incorporate Cream – Slowly pour in the heavy cream while continuously stirring, being cautious as it may bubble up vigorously. This bubbling action is normal, but always keep your hands clear! You want a slightly thickened sauce at this stage.
4. Mix in Sea Salt – Remove the saucepan from heat and stir in the sea salt, allowing it to cool slightly before using it in your cookie dough. This cooling ensures that it’s warm but not hot enough to affect your cookie mixture.
HANDY TIPS
- Make sure to stir constantly during caramelization to avoid burning.
- If you want a more intense flavor, you can experiment with different types of sea salt for topping.
- Allowing the caramel to cool slightly helps prevent it from melting your cookie dough when mixed.
2. PREPARE THE COOKIE DOUGH
Now it’s time to prepare that delicious cookie dough that will hold all that caramel goodness!
5. Preheat Oven – Preheat your oven to 350°F (175°C) and line a baking sheet with parchment paper for easy cleanup later on.
6. Cream Ingredients – In a mixing bowl, cream together the softened butter, packed brown sugar, and granulated sugar until light and fluffy—aim for about 3-4 minutes of mixing for optimal texture! This step introduces air into the dough, ensuring chewy cookies rather than dense ones.
7. Add Egg and Vanilla – Beat in the large egg and vanilla extract until fully incorporated; this adds moisture and flavor to your dough. You’ll notice it becomes even fluffier!
8. Combine Dry Ingredients – In another bowl, whisk together the all-purpose flour, baking soda, and salt before gradually adding this dry mixture to the wet ingredients—mixing just until combined is key here; overmixing can lead to tough cookies.
HANDY TIPS
- For best results, ensure your butter is softened but still cool; this prevents greasy cookies.
- You can also add chocolate chips or nuts at this stage if you want extra texture!
- Remember not to skip sifting your dry ingredients for even mixing.
3. ASSEMBLE AND BAKE
We’re almost there—let’s get those cookies assembled and into the oven!
9. Fold in Caramel – Gently fold in the cooled salted caramel into the cookie dough, reserving some for drizzling on top later—this will create pockets of delightful caramel throughout each cookie!
10. Scoop Dough – Using a tablespoon-sized scoop, portion out the dough onto your prepared baking sheet, spacing them about 2 inches apart to allow for spreading during baking—this should yield about 25 cookies!
11. Bake Cookies – Bake in your preheated oven for 10-12 minutes or until the edges are golden brown while keeping an eye out for slight puffiness in the centers; they will continue cooking as they cool on the sheet! ⚠️ Be careful not to overbake; soft centers are what we’re looking for here!
12. Finish It Off – Remove from oven and let them cool on the baking sheet for about 5 minutes before transferring them to a wire rack—once they’re cooled slightly, drizzle with reserved salted caramel and sprinkle with additional sea salt for that perfect finishing touch!
HANDY TIPS
- If you like softer cookies, take them out at around 10 minutes; they will firm up as they cool.
- For an even more indulgent treat, consider adding more sea salt on top right before serving.
- Don’t skip letting them cool on the baking sheet first; this helps maintain their shape!
Congratulations! You’ve just crafted stunning salted caramel cookies that are bound to impress everyone around you (including yourself!). With their chewy texture and rich flavor profile coming from both caramel and buttery goodness—which I must say is pretty irresistible—you might find these cookies vanishing faster than expected! Enjoy every bite of these sweet creations! – Nagi x
FAQ – Salted Caramel Cookie Recipe
How long will these cookies keep?
These salted caramel cookies are best enjoyed fresh, but they can last for about 4-5 days when stored in an airtight container at room temperature. On day one, they’re at their peak – chewy and delicious! By day three, they’re still about 97% as good, but I find that the texture starts to change slightly. If you want to extend their life, consider freezing them!
❄️ Can I freeze these cookies for later?
Absolutely! You can freeze the baked cookies for up to 3 months. Just make sure they are completely cooled before placing them in a single layer on a baking sheet and then transfer them to an airtight container or freezer bag. To thaw, simply leave them at room temperature for about 30 minutes or pop them in the microwave for about 10 seconds each. Just remember, they might not be quite as chewy after freezing, but they’ll still be delicious!
🌾 Can these be made gluten-free?
Yes, you can definitely make these salted caramel cookies gluten-free! Substitute the all-purpose flour with a gluten-free flour blend that measures cup-for-cup like Bob’s Red Mill 1-to-1 Baking Flour. I’ve tried it this way and found that the cookies come out nearly indistinguishable from the original recipe. Just ensure your ingredients are certified gluten-free to avoid any cross-contamination.
Can I reduce the sugar or substitute with sweeteners?
No, you cannot reduce the sugar without significantly altering the texture and flavor of these cookies. Trust me, I’ve tested it more times than I care to admit! If you’re looking to substitute with sweeteners, I recommend using a granulated erythritol or monk fruit sweetener that measures like sugar; however, keep in mind that the texture may not be quite as chewy because sugar contributes to cookie structure and moisture.
Why do I need to let the caramel cool before adding it to the cookie dough?
Letting the salted caramel cool is crucial because hot caramel can affect the cookie dough consistency. If you add it while it’s still warm, it can melt the butter in your dough which leads to overly flat cookies upon baking. The ideal temperature is just warm enough that it’s pourable but cool enough not to alter your dough’s structure. A bit of patience here goes a long way!
What other mix-ins can I add for more flavor?
There are so many fun variations you could try! Here are a few ideas:
- Chopped nuts: Walnuts or pecans add a great crunch.
- Chocolate chips: Dark or milk chocolate chips complement the caramel beautifully.
- Sea salt flakes: Sprinkle more on top right before serving for a delightful salty-sweet contrast.
Experimenting with mix-ins can yield some truly delicious results – feel free to get creative!
Did you really test this recipe multiple times?
Yes, indeed! I’ve made these salted caramel cookies at least ten times to nail down the perfect balance of chewiness and flavor. Each trial was an adventure in cookie perfection (and yes, my kitchen has seen its fair share of caramel spills). If you follow my instructions closely, you’ll achieve cookie glory too!
Troubleshooting
I will continue to add more to this Troubleshooting section as I start seeing questions coming through from people who have made the recipe.
Troubleshooting tips
“My cookies were not as thick as yours!” 😭
- Your dough may have been over-mixed after adding the flour, causing excess gluten development which can lead to flatter cookies. Remember to mix only until just combined!
- You might have used too much flour or not measured correctly; a packed cup of flour will alter the cookie’s structure. Make sure to spoon and level your flour for accuracy.
- If your butter was too warm when you started creaming it with the sugars, it can lead to a thinner batter. Always use softened butter, not melted!
I bet they were still YUM though!
“The surface of my cookies split and had massive crevices!” 😱
- This can happen if your oven temperature is too high, causing the cookies to rise rapidly and crack on the surface. Check that your oven is accurately calibrated and consider using an oven thermometer.
- If you didn’t let your salted caramel cool enough before folding it into the dough, it could cause the cookies to spread unevenly. Make sure it’s slightly cooled but still pourable!
I bet they were still YUM though!
“My cookies came out wonky!” 🤔
- If you scooped uneven amounts of dough when placing them on the baking sheet, this can result in misshapen cookies. Use a cookie scoop for consistent sizing!
- You may not have chilled your cookie dough before baking. Chilling helps maintain their shape while baking, so don’t skip this step if you’re aiming for uniformity.
I bet they were still YUM though!
“My caramel turned grainy!” 😩
- This often happens if you stirred too aggressively while melting the sugar; it can cause crystallization. Stir gently and continuously until it’s fully melted into a smooth amber color.
- Pouring in the heavy cream too quickly can also shock the mixture and lead to graininess. Always add slowly while stirring constantly!
I bet they were still YUM though!