I first stumbled upon the idea of Pumpkin S’mores Cookies during a cozy fall outing with friends, where we indulged in some seasonal treats at a local café. As I took my first bite of their pumpkin-inspired dessert, I was struck by the perfect blend of spiced pumpkin, gooey chocolate, and melted marshmallow. It was one of those moments that makes you want to recreate it at home – not just for the joy of baking, but also because let’s face it, who wants to pay café prices for a cookie when you can whip up something even better in your own kitchen?
After several attempts (and quite a few cookie disasters that would’ve made great Instagram bloopers), I finally nailed down this recipe. It took me about a week of tinkering – I lost count after five rounds of tweaking ingredients and oven temperatures! Each batch taught me something new, whether it was about achieving that perfect chewy texture or ensuring the marshmallows didn’t go rogue and burn to a crisp. Let’s just say there were a few sessions where I seriously questioned my baking skills!
But oh boy, was it worth it! The final result? Deliciously spiced pumpkin cookies that are soft yet satisfyingly chewy, with an irresistible gooey chocolate and marshmallow filling that practically oozes with every bite. These Pumpkin S’mores Cookies are not only a treat for your taste buds but also bring the warmth and comfort of fall right into your kitchen. Trust me; you’re going to want these cookies in your life—so grab your apron and let’s get baking!
These Pumpkin S’mores Cookies are….
….the ultimate fall treat that will have you dreaming of cozy evenings by the fire!
1. They deliver a warm, spiced flavor that perfectly captures the essence of fall. With pumpkin puree and a medley of cinnamon, nutmeg, and ginger, each bite is like a hug in cookie form, making them irresistible for both pumpkin lovers and those who crave seasonal delights.
2. Incredible texture – these cookies strike the perfect balance between soft and chewy with a slight crisp on the edges. The inclusion of butter and brown sugar creates a beautifully rich base that ensures each cookie remains tender while providing the satisfying chew you want in a cookie.
3. Expert technique – using softened butter allows for easy creaming with sugars, enhancing the overall flavor and texture of the dough. This step is crucial; it not only incorporates air for leavening but also melds the flavors together beautifully, setting these cookies apart from basic recipes.
4. They offer great value – with simple, accessible ingredients like pumpkin puree and pantry staples, you can whip up these delightful treats without breaking the bank. Plus, they yield a generous batch that’s perfect for sharing or savoring over several days!
PS These Pumpkin S’mores Cookies are perfectly sized for sharing or enjoying solo — either way, they’re sure to bring warmth to your autumn gatherings!
Ingredients for the Pumpkin S’mores Cookies
Each ingredient in this dish plays an essential role in flavor and texture. Here’s what you’ll need:
Cookie Base
1 cup unsalted butter (softened): Provides richness and helps create a tender cookie.
1 cup brown sugar (packed): Adds moisture and a deep, caramel-like flavor.
1/2 cup granulated sugar: Contributes sweetness and aids in achieving a light texture.
1 cup pumpkin puree (canned or fresh): Infuses the cookies with moisture and seasonal pumpkin flavor.
1 large egg: Acts as a binder to hold the ingredients together.
2 teaspoons vanilla extract: Enhances overall flavor with a warm, aromatic note.
2 cups all-purpose flour: Forms the structure of the cookies for a perfect chewy texture.
1 teaspoon baking soda: Helps the cookies rise for a fluffy consistency.
1 teaspoon cinnamon: Adds a warm spice that complements the pumpkin beautifully.
1/2 teaspoon nutmeg: Introduces a subtle earthiness that enhances the fall flavors.
1/2 teaspoon ginger: Provides a zesty kick that brightens the cookie base.
1/4 teaspoon salt: Balances sweetness and amplifies the overall flavors.
Don’t Skip the Creaming Step! Trust Me on This!
I know, creaming butter and sugar together seems like an extra step that could be skipped. I tried to rush through it once, thinking I could save time, but my cookies turned out flat and sad. Trust me when I say this: if you want Pumpkin S’mores Cookies worthy of your fall festivities, don’t even think about skipping this crucial technique!
So, why is creaming so important? Imagine whipping air into a fluffy cloud; that’s what we’re doing with the butter and sugars. This process incorporates air, which creates a light and tender texture in your cookies. When you add the pumpkin puree, egg, and vanilla after creaming, you’re ensuring those ingredients blend seamlessly into a luscious batter that will bake up beautifully.
What does creaming do?
- Texture — Creates a light and airy cookie base that helps achieve that perfect soft chewiness.
- Flavor — Enhances sweetness by thoroughly combining the sugars with the butter, resulting in a more balanced taste.
- Rise — Incorporating air during creaming allows the cookies to rise well in the oven, preventing them from spreading too much.
- Moisture retention — A well-creamed mixture retains moisture better due to its fluffy structure, keeping your cookies soft longer.
- Even baking — Helps create a uniform dough consistency which bakes evenly throughout.
Different creaming times
- 1 minute (good) — The butter starts to mix with sugar but lacks fluffiness; cookies will be denser than desired.
- 2 minutes (better) — More air incorporated; cookies will have decent texture but still not ideal for ultimate fluffiness.
- 3 to 4 minutes (great) — Perfect! The mixture is light and fluffy, leading to cookies that are chewy with just the right amount of lift.
- Beyond 5 minutes (less optimal) — Too much aeration can lead to over-whipped butter; results may vary but could cause cookies to spread too thin.
Don’t underestimate this step—creaming is where magic happens! The most common mistake I see? People rush it or skip it entirely. If you want those perfect Pumpkin S’mores Cookies, take the time to cream until fluffy!
How to make Pumpkin S’mores Cookies

Are you ready to see how straightforward it is to make the Pumpkin S’mores Cookies of your dreams??
1. PREPARE THE COOKIE DOUGH
Let’s get that delicious dough ready for some serious cookie fun!
1. Preheat – Preheat the oven to 350°F (175°C) and line a baking sheet with parchment paper. This will prevent your cookies from sticking and make cleanup a breeze!
2. Cream – In a mixing bowl, cream together the softened butter, brown sugar, and granulated sugar until light and fluffy. You want this mixture to be airy, which helps create a tender cookie texture.
3. Mix – Add the pumpkin puree, egg, and vanilla extract to the mixture and mix until well combined. The pumpkin adds moisture and that irresistible fall flavor we all love!
4. Whisk – In another bowl, whisk together the flour, baking soda, cinnamon, nutmeg, ginger, and salt. This step ensures even distribution of the leavening agent and spices throughout your dough.
5. Combine – Gradually add the dry ingredients to the wet ingredients, mixing until just combined. Avoid over-mixing here; you want a slightly thickened dough that holds together beautifully.
HANDY TIPS
- If you’re using fresh pumpkin puree, ensure it’s well-drained to avoid excess moisture in your dough.
- For an extra flavor boost, consider adding some chopped nuts or chocolate chips to the dough!
2. ASSEMBLE THE COOKIES
Time to stuff these cookies with gooey goodness!
6. Scoop – Scoop a tablespoon of cookie dough and flatten it slightly in your hand. This makes it easier to form your cookie later!
7. Fill – Place a few chocolate chips and mini marshmallows in the center; then cover with another tablespoon of dough, sealing the edges tightly. Make sure there are no gaps so that all that delicious filling stays inside while baking!
8. Repeat – Repeat with the remaining dough and filling, placing the cookies on the prepared baking sheet spaced about 2 inches apart. These cookies will spread as they bake!
HANDY TIPS
- Smaller cookies? They work really well but roll into balls instead of discs for a cute bite-sized treat! Bake for 12 to 14 minutes.
- Want to prep ahead? You can shape these cookies and freeze them for up to three months before baking—just add an extra minute or two to the bake time!
3. BAKE THE COOKIES
Let’s bring these sweet treats to life in the oven!
9. Bake – Bake in the preheated oven for 10-12 minutes or until the edges are lightly golden while keeping an eye on those marshmallows—they should be melty but not burnt!
10. Cool – Allow the cookies to cool on the baking sheet for 5 minutes before transferring them to a wire rack to cool completely. This resting time helps them firm up without falling apart.
HANDY TIPS
- If possible, use a cooling rack; this allows air circulation around your cookies so they don’t become soggy on the bottom!
- Keep an eye out on those first batches—the perfect bake can vary depending on your oven!
You’ve just created a batch of absolutely delightful Pumpkin S’mores Cookies that will fill your kitchen with cozy autumn vibes! With each bite of these soft pumpkin cookies oozing with chocolate and marshmallow goodness, you’ll understand why they’re going to be your new favorite fall treat! Make these once, and I wager they will invade your dreams every night too! – Nagi x
FAQ – Pumpkin S’mores Cookies
How long will these cookies keep?
These Pumpkin S’mores Cookies can stay fresh for up to 5 days when stored in an airtight container at room temperature. You might notice they retain about 97% of their deliciousness on day 3, but by day 5, they’re still enjoyable, just a tad drier. If you want to keep them longer, you can refrigerate them for up to 2 weeks, though I recommend letting them come to room temperature or warming them slightly before enjoying.
❄️ Do I really have to chill? YES YOU DO.
Chilling the cookie dough is not necessary for this recipe; however, if you prefer a thicker cookie with a chewy center, I highly recommend chilling the dough for at least 30 minutes. This allows the flavors to meld together and prevents the cookies from spreading too much during baking. If you skip this step, your cookies may turn out flatter but still delicious!
❄️ Can I freeze these cookies?
Absolutely! To freeze these Pumpkin S’mores Cookies, it’s best to freeze them before baking. After you’ve assembled the cookies, place them on a baking sheet lined with parchment paper and freeze until solid (about 1-2 hours). Once frozen, transfer them to a zip-top freezer bag and store for up to 2 months. When you’re ready to bake, just pop them straight into the oven without thawing—add an extra minute or two to the baking time!
🌾 Can these be made gluten free?
Yes! You can easily make these cookies gluten-free by substituting all-purpose flour with a gluten-free flour blend that measures cup-for-cup. I’ve tested this with several brands, and they work beautifully! Just ensure that your chocolate chips and mini marshmallows are also gluten-free as some brands may contain gluten.
Can I reduce the sugar or substitute with sweeteners?
No, you cannot reduce the sugar without compromising the texture and flavor of these cookies. I’ve tried reducing it by 25%, and they came out too dry and crumbly—definitely not what we want! If you’re looking for a healthier option, you could try using coconut sugar instead of brown sugar; however, please note that this will slightly alter the taste.
Why do I need to cream the butter and sugars together?
Creaming butter with sugars is crucial because it incorporates air into the mixture, resulting in a light and fluffy texture in your cookies. This process also helps dissolve the sugars fully before adding other ingredients. If you skip this step or rush through it, your cookies may end up dense instead of soft and chewy—trust me; I’ve learned this lesson more times than I’d like to admit!
What add-ins can I include in my cookies?
You can customize these Pumpkin S’mores Cookies in so many ways! Here are some fun ideas:
- Add chopped nuts like pecans or walnuts for crunch.
- Swap semi-sweet chocolate chips for dark chocolate or white chocolate.
- Mix in spices such as cloves or allspice for a different flavor profile.
- For an extra gooeyness, try adding peanut butter chips along with the chocolate.
Experimentation is half the fun of baking—just remember that too many add-ins can affect how well your dough holds together!
Troubleshooting
- I will continue to add more to this Troubleshooting section as I start seeing questions coming through from people who have made the recipe.
Troubleshooting tips
“My cookies were too flat! 😭”
- Your butter may have been too warm or melted instead of softened, causing the dough to spread too much while baking. Aim for butter that is soft enough to make an indent with your finger, but not melted.
- You might have used too little flour. If your dough is too sticky, it can lead to flatter cookies. Make sure to measure flour accurately by spooning it into the measuring cup and leveling it off.
- You didn’t chill the dough before baking. Chilling helps solidify the fat in the dough, which can prevent excessive spreading. I bet they were still YUM though!
“My cookies are dry and crumbly! 😩”
- You may have overmixed your cookie dough after adding the flour, which can develop gluten and create a denser texture. Mix until just combined for a softer cookie.
- Using too much flour can also make your cookies dry. Be careful when measuring; it’s better to err on the side of slightly less than more!
- Your pumpkin puree might have been too thick or not measured precisely, affecting moisture levels in your cookies. Ensure you’re using a full cup of pumpkin puree for optimal moistness. I bet they were still YUM though!
“The surface of my cookies split and had massive crevices! 😱”
- Overbaking could be the culprit here; if your cookies bake longer than 12 minutes, they can dry out and crack on top. Keep an eye on them and pull them out when the edges are lightly golden.
- If you didn’t mix your wet ingredients thoroughly before adding them to the dry ingredients, it could lead to uneven moisture distribution, causing cracks. Make sure everything is well combined! I bet they were still YUM though!
“My cookies are unevenly browned! 🔥”
- You might have placed your baking sheet on a lower rack in the oven, which can cause uneven heat distribution. Try moving it to the center rack for more even baking next time.
- The size of your cookie scoops might vary; if some are larger than others, they will bake differently. Use a consistent tablespoon measurement when scooping out the dough for uniform sizes. I bet they were still YUM though!
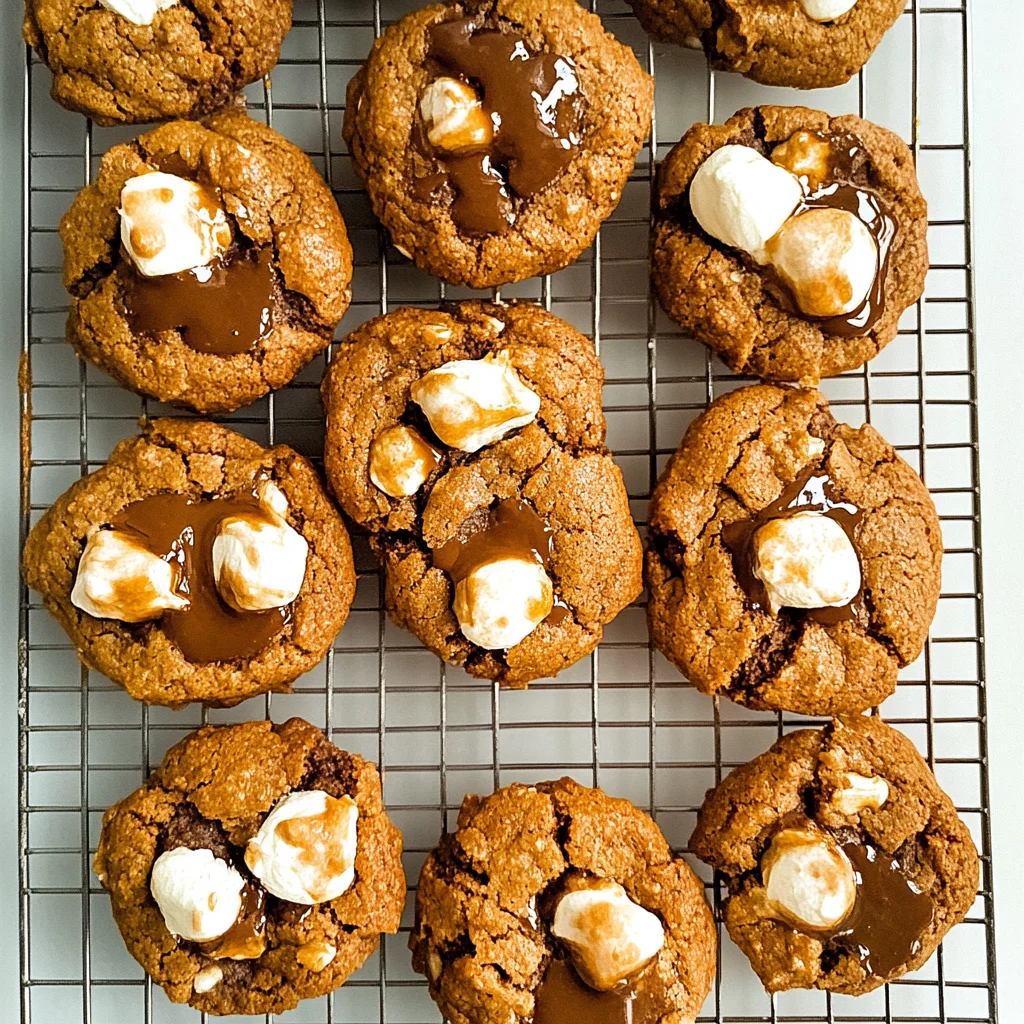
Pumpkin S'mores Cookies
Ingredients
Method
- Preheat the oven to 350°F (175°C) and line a baking sheet with parchment paper.
- In a mixing bowl, cream together the softened butter, brown sugar, and granulated sugar until light and fluffy.
- Add the pumpkin puree, egg, and vanilla extract to the mixture and mix until well combined.
- In another bowl, whisk together the flour, baking soda, cinnamon, nutmeg, ginger, and salt.
- Gradually add the dry ingredients to the wet ingredients, mixing until just combined.
- Scoop a tablespoon of cookie dough and flatten it slightly in your hand.
- Place a few chocolate chips and mini marshmallows in the center, then cover with another tablespoon of dough, sealing the edges.
- Repeat with the remaining dough and filling, placing the cookies on the prepared baking sheet.
- Bake in the preheated oven for 10-12 minutes, or until the edges are lightly golden.
- Allow the cookies to cool on the baking sheet for 5 minutes before transferring to a wire rack to cool completely.