I first fell in love with pumpkin cinnamon rolls at a charming little café that had a knack for turning seasonal flavors into heavenly pastries. One bite of their soft, fluffy rolls drizzled with a creamy glaze, and I was hooked! But let’s be real, my wallet couldn’t handle daily trips to that café, and the thought of making them at home felt like a delicious challenge I couldn’t resist. After all, how hard could it be to recreate that cozy autumn flavor in my own kitchen?
Well, let me tell you, it took me a whopping six attempts to nail down this recipe! Each round was filled with flour-covered counters and a few too many questionable taste tests (yes, I may have served some rather sad-looking rolls to unsuspecting friends). My goal was clear: I wanted pumpkin cinnamon rolls that were not just soft and fluffy but bursting with warm spices and an irresistible glaze that would make anyone forget about the original café version. Spoiler alert: I definitely learned more about yeast than I ever imagined!
But oh boy, was it worth every sticky moment! The final result? Deliciously soft and fluffy cinnamon rolls infused with pumpkin puree and warm spices that practically melt in your mouth, topped with a creamy glaze that brings everything together. These beauties are perfectly moist, packed with rich flavor, and have an impressive shelf life—if they last long enough to need one! So grab your apron and let’s get rolling; you’re going to absolutely love making these Pumpkin Cinnamon Rolls!
These Pumpkin Cinnamon Rolls are…
….the ultimate treat for fall enthusiasts, delivering warmth and comfort in every bite!
1. They offer an incredible flavor profile with the perfect blend of pumpkin and warm spices. The addition of pumpkin puree not only enhances the taste but also brings a natural sweetness that pairs beautifully with the earthy cinnamon and nutmeg, creating an aromatic experience that’s simply irresistible.
2. Unmatched softness – these rolls are pillow-like in texture, thanks to the combination of warm milk, melted butter, and eggs in the dough. This careful mixture allows for maximum moisture retention during baking, resulting in fluffy rolls that practically melt in your mouth.
3. A key technique is activating the instant yeast with warm milk, which ensures a rapid rise and contributes to that coveted fluffy texture. This method simplifies the process while ensuring your dough develops a wonderful structure without long waiting times.
4. They offer great value, as you can make a dozen delightful rolls at home for a fraction of the cost of store-bought versions. With simple ingredients like flour, sugar, and canned pumpkin puree, these Pumpkin Cinnamon Rolls are not only easy on your wallet but also allow you to enjoy fresh-baked goodness right from your own kitchen.
PS These rolls yield about 12 soft and fluffy treats, making them perfect for sharing (or keeping all to yourself!).
Ingredients for the Pumpkin Cinnamon Rolls
Each ingredient in this dish plays an essential role in flavor and texture. Here’s what you’ll need:
Dough
4 cups all-purpose flour (plus more for dusting): Provides structure and a fluffy texture to the rolls.
1 cup pumpkin puree (canned or homemade): Infuses moisture and a subtle sweetness with a hint of earthiness.
1/2 cup milk (warm): Activates the yeast and enriches the dough for a tender crumb.
1/4 cup granulated sugar: Sweetens the dough while enhancing browning during baking.
1/4 cup unsalted butter (melted): Adds richness and helps create a soft, tender roll.
1 packet instant yeast: Leavens the dough for that perfect rise and airy texture.
1 teaspoon salt: Balances flavors and strengthens the dough structure.
1 large egg: Binds ingredients together while adding moisture and richness.
Filling
1/2 cup brown sugar (packed): Brings caramel notes and moisture to the filling.
2 tablespoons ground cinnamon: Provides that warm, comforting spice flavor we love in cinnamon rolls.
1/4 cup unsalted butter (softened): Ensures easy spreading of the filling for even flavor distribution.
1/4 teaspoon nutmeg: Adds a warm, aromatic depth to the filling.
1/4 teaspoon ginger: Offers a slight peppery warmth that complements the cinnamon.
Glaze
1 cup powdered sugar: Creates a sweet, creamy finish to each roll.
2 tablespoons milk (adjust for consistency): Helps achieve the desired glaze thickness for drizzling.
1 teaspoon vanilla extract: Enhances sweetness with its fragrant aroma.
The Dough MUST Rise – No Skipping This Step!
I’ll be honest: I tried to rush the rising process of this dough, thinking I could save some time. Spoiler alert: it didn’t work. I ended up with dense, sad cinnamon rolls that were more like hockey pucks than fluffy pillows of deliciousness. If you’re as impatient as I was, trust me when I say that giving your dough the proper time to rise is non-negotiable.
So why does this rise matter? It’s all about fermentation and creating those lovely air pockets that make for soft and airy rolls. When the yeast in your dough gets to party (a.k.a. rise), it produces carbon dioxide, which gets trapped in the dough and helps it expand. Think of it like blowing up a balloon—without enough air (or rise), you’re left with a flat mess that won’t hold its shape or texture.
What does letting the dough rise do?
- Fluffiness — The yeast ferments and produces gases that create air pockets, leading to soft and pillowy rolls.
- Texture — A proper rise ensures a light, tender crumb that contrasts beautifully with the spiced filling.
- Flavor Development — As the dough rises, complex flavors develop through fermentation, giving your pumpkin rolls a delightful depth.
- Color — Proper fermentation leads to even browning during baking, resulting in a golden crust that’s as appealing as it is tasty.
- Shelf Life — Well-risen dough retains moisture better, keeping your cinnamon rolls fresher for longer after baking.
Different Rising Times
- 30 minutes (okay) — You’ll end up with decent rolls but they will be denser than optimal and lack that signature fluffiness.
- 1 hour (good) — This is the bare minimum; you’ll see some rise, but they won’t reach their full potential.
- ⭐️ 1.5 hours ⭐️ — Optimal! At this point, the dough should have doubled in size, resulting in airy rolls with great texture.
- Beyond 2 hours (risky) — Possible over-proofing; while they may still taste good, they risk collapsing during baking.
Don’t be tempted to skip or shorten this rising step! The most common mistake is thinking you can rush it because you’re hungry now. Trust me on this one: give your dough the time it needs to rise; otherwise, you’ll end up with disappointing results!
How to make Pumpkin Cinnamon Rolls
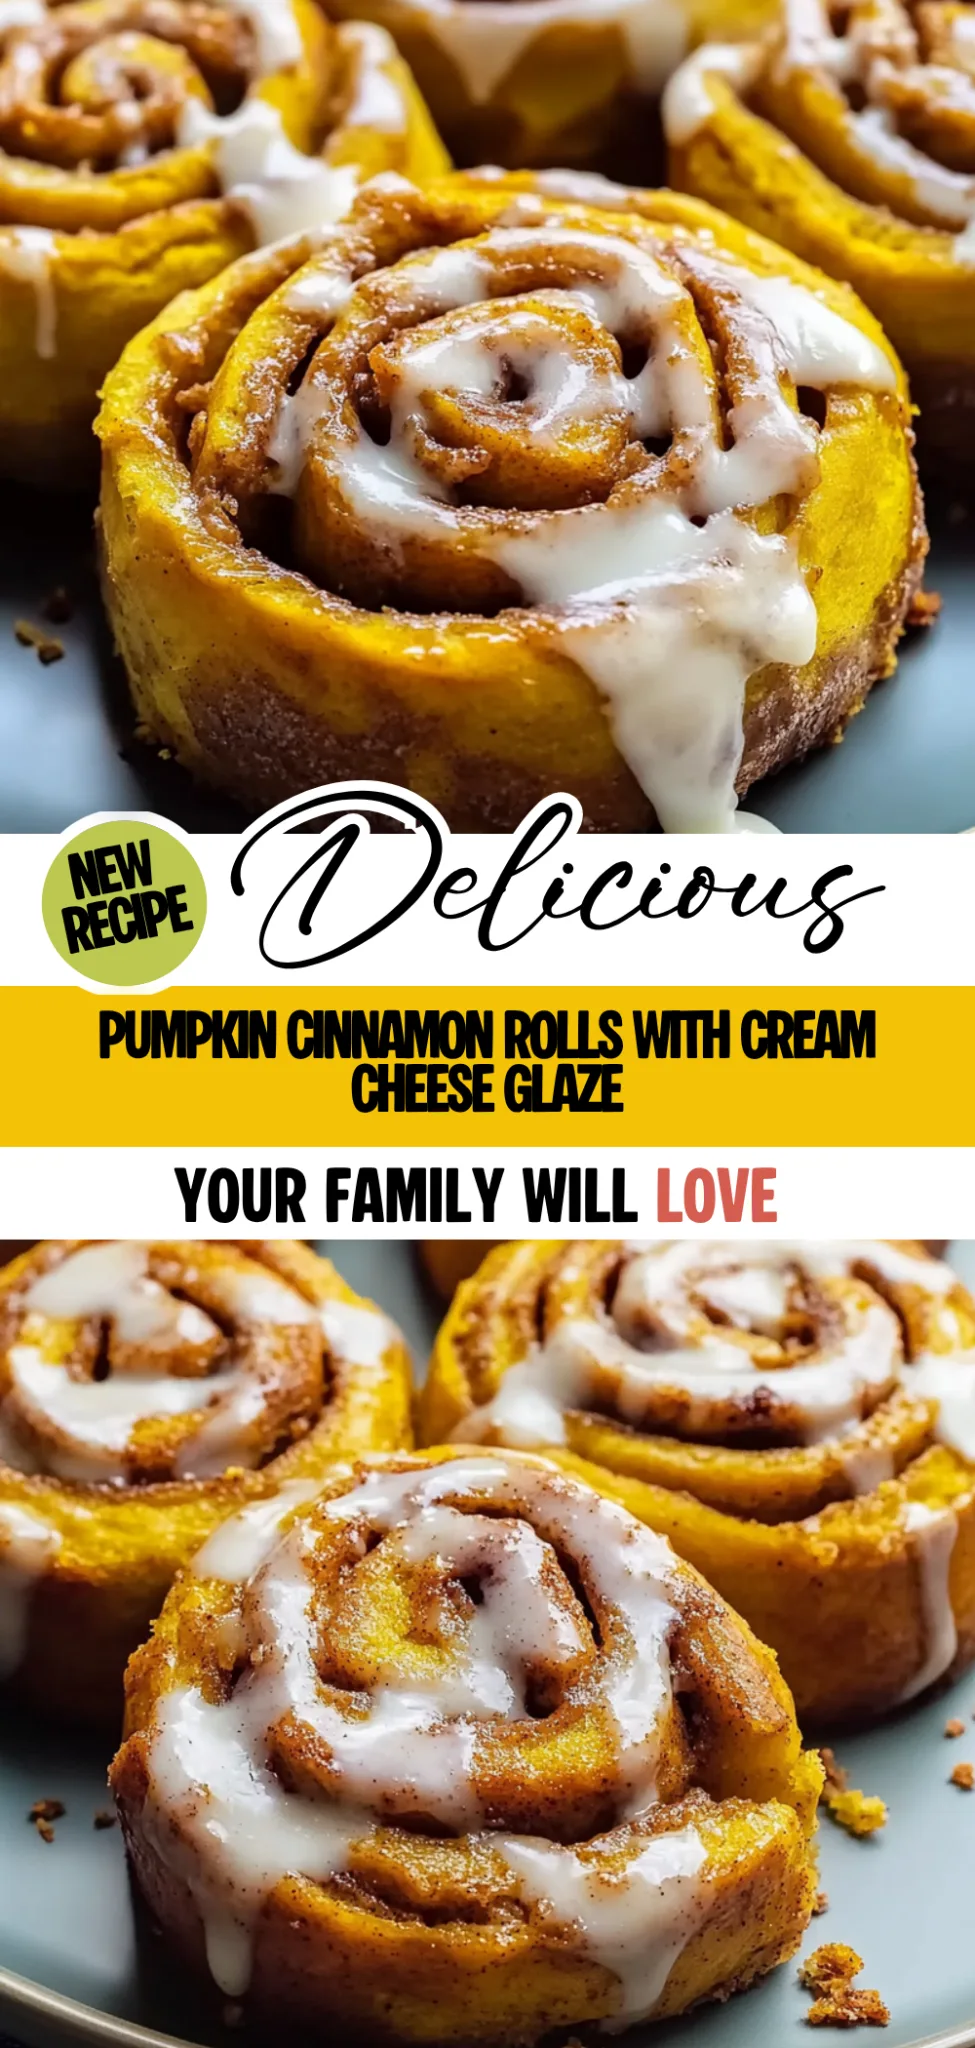
Are you ready to see how straightforward it is to make the Pumpkin Cinnamon Rolls of your dreams??
1. PREPARE THE DOUGH
Let’s start by creating a beautifully soft dough that will rise to cinnamon roll perfection!
1. COMBINE – In a large mixing bowl, combine warm milk, granulated sugar, and instant yeast. Let it sit for about 5 minutes until it becomes frothy. This step activates the yeast and ensures your rolls will rise properly.
2. MIX – Add the pumpkin puree, melted unsalted butter, large egg, and salt to the yeast mixture. Stir until everything is well combined.
3. ADD FLOUR – Gradually add the all-purpose flour, mixing until a soft dough forms. You want it to be slightly sticky but manageable. Knead the dough on a floured surface for about 5 minutes until it’s smooth and elastic.
4. LET RISE – Place the kneaded dough in a greased bowl, cover it with a towel, and let rise in a warm place for about 1 hour or until it has doubled in size. This rising time is crucial; it develops flavor and texture!
HANDY TIPS
- Use a thermometer to check that your milk is warm (about 110°F/43°C); this helps activate the yeast without killing it.
- If your kitchen is cool, try placing the dough in an oven preheated to 200°F (93°C) for a few minutes before turning it off — then let it rise there.
2. MAKE THE FILLING
Now it’s time to create that irresistible spiced filling that makes these rolls so special!
5. MIX FILLING – In a small bowl, mix together packed brown sugar, ground cinnamon, nutmeg, and ginger until well combined.
6. ROLL OUT DOUGH – Once the dough has risen, punch it down gently to release air bubbles and roll it out on a floured surface into a rectangle about 1/4 inch thick.
7. SPREAD BUTTER AND FILLING – Spread softened butter over the rolled-out dough evenly, then sprinkle your cinnamon filling mixture generously over the top.
HANDY TIPS
- Make sure your butter is softened but not melted; this helps keep the filling in place.
- Feel free to adjust spices based on your taste—adding more cinnamon or even some cloves can elevate those cozy flavors!
3. SHAPE AND BAKE
This is where your rolls start taking shape—literally!
8. ROLL UP – Starting from the long side of the rectangle, roll the dough tightly into a log shape. Pinch the seam to seal.
9. CUT ROLLS – Cut the log into 12 equal pieces using a sharp knife or dental floss (yes, really!). This creates perfectly shaped rolls!
10. SECOND RISE & BAKE – Place these rolls in a greased baking sheet, cover them again, and let rise for another 30 minutes while you preheat your oven to 350°F (175°C). Bake for 20-25 minutes or until they are golden brown and fragrant.
HANDY TIPS
- For more evenly sized rolls, use a ruler or kitchen scale to measure each piece!
- If you want gooey centers, place them closer together when rising—they’ll bake up soft and pillowy.
4. PREPARE THE GLAZE
Finish off these beauties with a drizzle of creamy glaze that takes them over the top!
11. WHISK GLAZE – In a bowl, whisk together powdered sugar, milk (adjust as needed for consistency), and vanilla extract until smooth.
12. DRIZZLE – Once your cinnamon rolls are out of the oven and slightly cooled but still warm, drizzle the glaze generously over them before serving.
HANDY TIPS
- If you like thicker glaze, use less milk; if you prefer it thinner for easier drizzling, add more gradually.
- You can add a pinch of cinnamon or even some maple syrup into the glaze for an extra flavor boost!
Make these once, and I wager they will invade your dreams every night too! – Nagi x
FAQ – Pumpkin Cinnamon Rolls
How long will these cinnamon rolls keep?
These pumpkin cinnamon rolls are best enjoyed fresh, but they can last for about 3 days when stored properly. When kept in an airtight container at room temperature, they should still be about 90% as good on day 2 and 80% on day 3. If you want to extend their shelf life, consider refrigerating them, where they can last up to a week. Just remember that refrigeration may slightly alter the texture, making them less fluffy.
❄️ Can I freeze these cinnamon rolls?
Yes, you can absolutely freeze pumpkin cinnamon rolls! To do this, I recommend freezing the unbaked rolls after shaping them and before the second rise. Simply wrap the rolls tightly in plastic wrap and place them in a freezer-safe bag or container. They can be frozen for up to 3 months. When you’re ready to bake them, let them thaw overnight in the fridge or at room temperature for about 2-3 hours before allowing them to rise again for about 30 minutes before baking.
🌾 Can I make these cinnamon rolls gluten-free?
While I haven’t tested a gluten-free version myself, many readers have reported success using a gluten-free all-purpose flour blend that contains xanthan gum. Be sure to check that your flour blend is suitable for yeast-based recipes. You might need to adjust the liquid slightly as some blends absorb more moisture than regular flour. If you give it a try, let us know how it turns out—I’m always curious about variations!
Can I reduce the sugar in the glaze?
Unfortunately, yes — but only by a little! I’ve tried reducing the powdered sugar significantly and found that it affects both flavor and consistency quite a bit. If you want to lower the sweetness without sacrificing texture, try reducing it by up to 25% while adding an extra splash of milk to maintain the glaze’s pourable consistency. Just keep in mind that the glaze is what really ties these rolls together!
Why do I need to let the dough rise?
Letting the dough rise is crucial because it’s during this time that yeast ferments and produces carbon dioxide, which makes your cinnamon rolls light and fluffy. Skipping this step will yield dense rolls that are more like bricks than soft pastries—trust me, I’ve been there! Allowing it to rise for 1 hour until doubled in size not only develops flavor but also improves texture.
Can I add nuts or chocolate chips to the filling?
Absolutely! Adding nuts like pecans or walnuts gives a lovely crunch and depth of flavor, while chocolate chips add a delightful sweetness. Just keep in mind that if you add additional ingredients, you might want to reduce the amount of brown sugar slightly so your filling isn’t overly sweet. A handful (about 1/2 cup) of chopped nuts or chocolate chips should work perfectly—just spread them evenly over the filling before rolling.
Did you really test this recipe multiple times?
Oh yes! 😅 I’ve made these pumpkin cinnamon rolls over 20 times just to get everything perfect—from rising times to achieving that ideal fluffy texture. Every time was an adventure filled with delicious results (and a few regrets). Trust me when I say this recipe has been thoroughly tested—it’s foolproof if you follow my instructions!
Troubleshooting
I will continue to add more to this Troubleshooting section as I start seeing questions coming through from people who have made the recipe.
Troubleshooting tips
“My rolls didn’t rise at all! 😱”
- Your yeast might have been expired or inactive, which means it didn’t create the necessary bubbles for rising. Always check the expiration date before use!
- If your milk wasn’t warm enough (ideally around 110°F/43°C), it may not have activated the yeast properly. Remember, too hot can kill the yeast, and too cold won’t wake it up!
- I bet they were still YUM though!
“My cinnamon rolls turned out too dense and heavy!”
- If you added too much flour while kneading, your dough could become dry and dense. Always add flour gradually until just combined for a soft, fluffy texture.
- Over-kneading can also lead to a dense result; aim for about 5 minutes of kneading to maintain softness.
- I bet they were still YUM though!
“The edges of my rolls are burnt while the centers are still pale! 🔥”
- If your oven temperature is too high, it can cause uneven baking. Always use an oven thermometer to ensure accurate temperatures!
- Placing your baking sheet too close to the heating element can also lead to this problem; position it in the center of the oven for even cooking.
- I bet they were still YUM though!
“My filling oozed out during baking!”
- If your dough was rolled too loosely or wasn’t tightly sealed at the edges when cutting, that could let the filling escape while baking. Make sure to roll tightly!
- Using too much filling can also lead to spillage; stick to the recommended amounts for best results.
- I bet they were still YUM though!