I first stumbled upon the idea of Hot Chocolate Cinnamon Rolls during one of those cozy winter afternoons where all you want is something warm and indulgent. I was at a charming little café that had a reputation for their unique twists on classic pastries, and their hot chocolate cinnamon rolls were the star of the show. As I savored each bite, the soft dough, rich chocolate flavor, and warm cinnamon made me feel like I was wrapped in a blanket of comfort. I knew I had to recreate that magic at home—not just because it would save me some cash (let’s be real, my wallet was screaming), but because I was determined to make them even better!
Let me tell you, perfecting my version of Hot Chocolate Cinnamon Rolls was no walk in the park. After what felt like an eternity—okay, maybe just five or six attempts—I finally cracked the code. Each trial brought its fair share of humorous mishaps: from dough that wouldn’t rise to filling that seemed more like a chocolate soup than a spread. With every batch, I adjusted the ratios, aiming for that perfect pillowy texture and deep chocolate flavor that danced with the cinnamon. By the end, I felt like a mad scientist in the kitchen, but hey, science is messy!
But oh boy, was it worth every minute! The final result? Deliciously soft cinnamon rolls infused with rich hot chocolate flavor and topped with a creamy chocolate glaze that just makes your taste buds do a happy dance. These rolls are not only fluffy and decadent but also have an irresistible melt-in-your-mouth quality that keeps you coming back for more. Trust me when I say you’ll want to whip these up for your next brunch or cozy night in—they’re absolutely divine! So grab your apron and let’s get rolling!
These Hot Chocolate Cinnamon Rolls are….
….a heavenly embrace of warmth and sweetness that will make your kitchen feel like a cozy café!
1. They deliver an irresistibly rich flavor that combines the essence of hot chocolate with warm cinnamon. The cocoa powder in the filling enhances the overall taste profile, creating a delightful balance between chocolatey goodness and aromatic spice that will have you coming back for seconds (or thirds!).
2. Incredible texture – soft, fluffy dough enveloping a gooey filling. This is achieved by using warm milk and melted butter in the dough, which not only helps activate the yeast but also creates a light and airy roll that stands up beautifully to the decadent glaze.
3. A simple yet effective technique – allowing the dough to rise properly ensures a perfect fluffiness. I’ve found that giving it time to rest after mixing allows the gluten to develop, resulting in rolls that are not just soft but also have a wonderful structure that holds all that delicious filling.
4. Exceptional value – easily made at home without breaking the bank! With ingredients like all-purpose flour and instant yeast readily available, these Hot Chocolate Cinnamon Rolls are not only economical but also a fun baking project you can enjoy with family or friends, making them far more affordable than store-bought options.
PS These rolls yield about 12 generous servings, perfect for sharing—or indulging all on your own!
Ingredients for the Hot Chocolate Cinnamon Rolls
Each ingredient in this dish plays an essential role in flavor and texture. Here’s what you’ll need:
- 2 cups all-purpose flour: Provides structure and tenderness to the rolls.
- 1 packet instant yeast: Helps the dough rise, creating a soft texture.
- 1/4 cup granulated sugar: Adds sweetness and enhances browning during baking.
- 1/2 teaspoon salt: Balances flavors and strengthens the dough’s structure.
- 1/2 cup milk (warm): Activates the yeast and enriches the dough’s flavor.
- 1/4 cup unsalted butter (melted): Contributes richness and moisture to the rolls.
- 1 large egg: Binds ingredients together while adding richness and color.
- 1/4 cup cocoa powder: Infuses a deep chocolate flavor into the filling.
- 1/4 cup brown sugar: Adds a rich sweetness and helps create a gooey filling.
- 1 tablespoon ground cinnamon: Offers warm spice that complements the chocolate.
- 2 tablespoons unsalted butter (softened): Ensures the filling spreads easily and adds creaminess.
- 1/2 cup powdered sugar: Creates a sweet, smooth glaze that finishes the rolls beautifully.
- 2 tablespoons cocoa powder: Enhances the chocolate flavor of the glaze.
- 2 tablespoons milk (adjust for consistency): Ensures the glaze reaches your desired creaminess.
- 1/4 teaspoon vanilla extract: Adds a warm, aromatic note to round out the glaze.
You Must Let the Dough Rise! No Shortcuts Here!
I know, I know—waiting for dough to rise feels like watching paint dry. I tried to find a shortcut because, let’s be honest, who has time for this? But after multiple attempts with less-than-stellar results (and more than a few eye-rolls), I can confidently say that skipping this step is not an option if you want those pillowy, decadent Hot Chocolate Cinnamon Rolls.
Allowing the dough to rise is essential because it activates the yeast, which creates those lovely air pockets that make your rolls soft and fluffy. Think of it like inflating a balloon: without enough air, it just deflates into a sad, flat mess. The warm milk and sugar create an ideal environment for the yeast to thrive, ensuring your dough doubles in size and gives you that irresistible texture.
What does letting the dough rise do?
- Fluffiness — The yeast produces carbon dioxide as it ferments, creating air pockets that give the rolls their light and airy structure.
- Texture — A well-risen dough has gluten strands that develop properly, resulting in soft, chewy rolls rather than dense hockey pucks.
- Flavor — The fermentation process enhances the flavor profile of the dough; you’ll taste subtle sweetness from the yeast working its magic.
- Moisture retention — A properly risen dough holds onto moisture better during baking, leading to rolls that stay fresh longer instead of becoming dry and crumbly.
- Uniform baking — When you allow the dough to rise adequately, it bakes more evenly; flat rolls are a sign of rushed rising or skipping this step altogether.
Different Rising Times
- 30 minutes (fair) — The rolls will rise slightly but remain dense; you’ll notice they don’t have much fluff or lift.
- 1 hour (good) — This is your sweet spot; the dough should roughly double in size and yield soft rolls.
- 1.5 hours (better) — If your kitchen is particularly cool, letting it rise longer ensures maximum fluffiness.
- 2 hours or more (best) — For peak flavor and texture; however, keep an eye on it to prevent over-proofing.
Don’t even think about cutting corners when it comes to letting your dough rise! The most common mistake is being impatient and trying to rush this crucial step. Trust me, if you skip it or don’t let it rise long enough, you will end up with heavy cinnamon rolls that won’t do justice to the delicious hot chocolate flavor you’re aiming for.
How to make Hot Chocolate Cinnamon Rolls
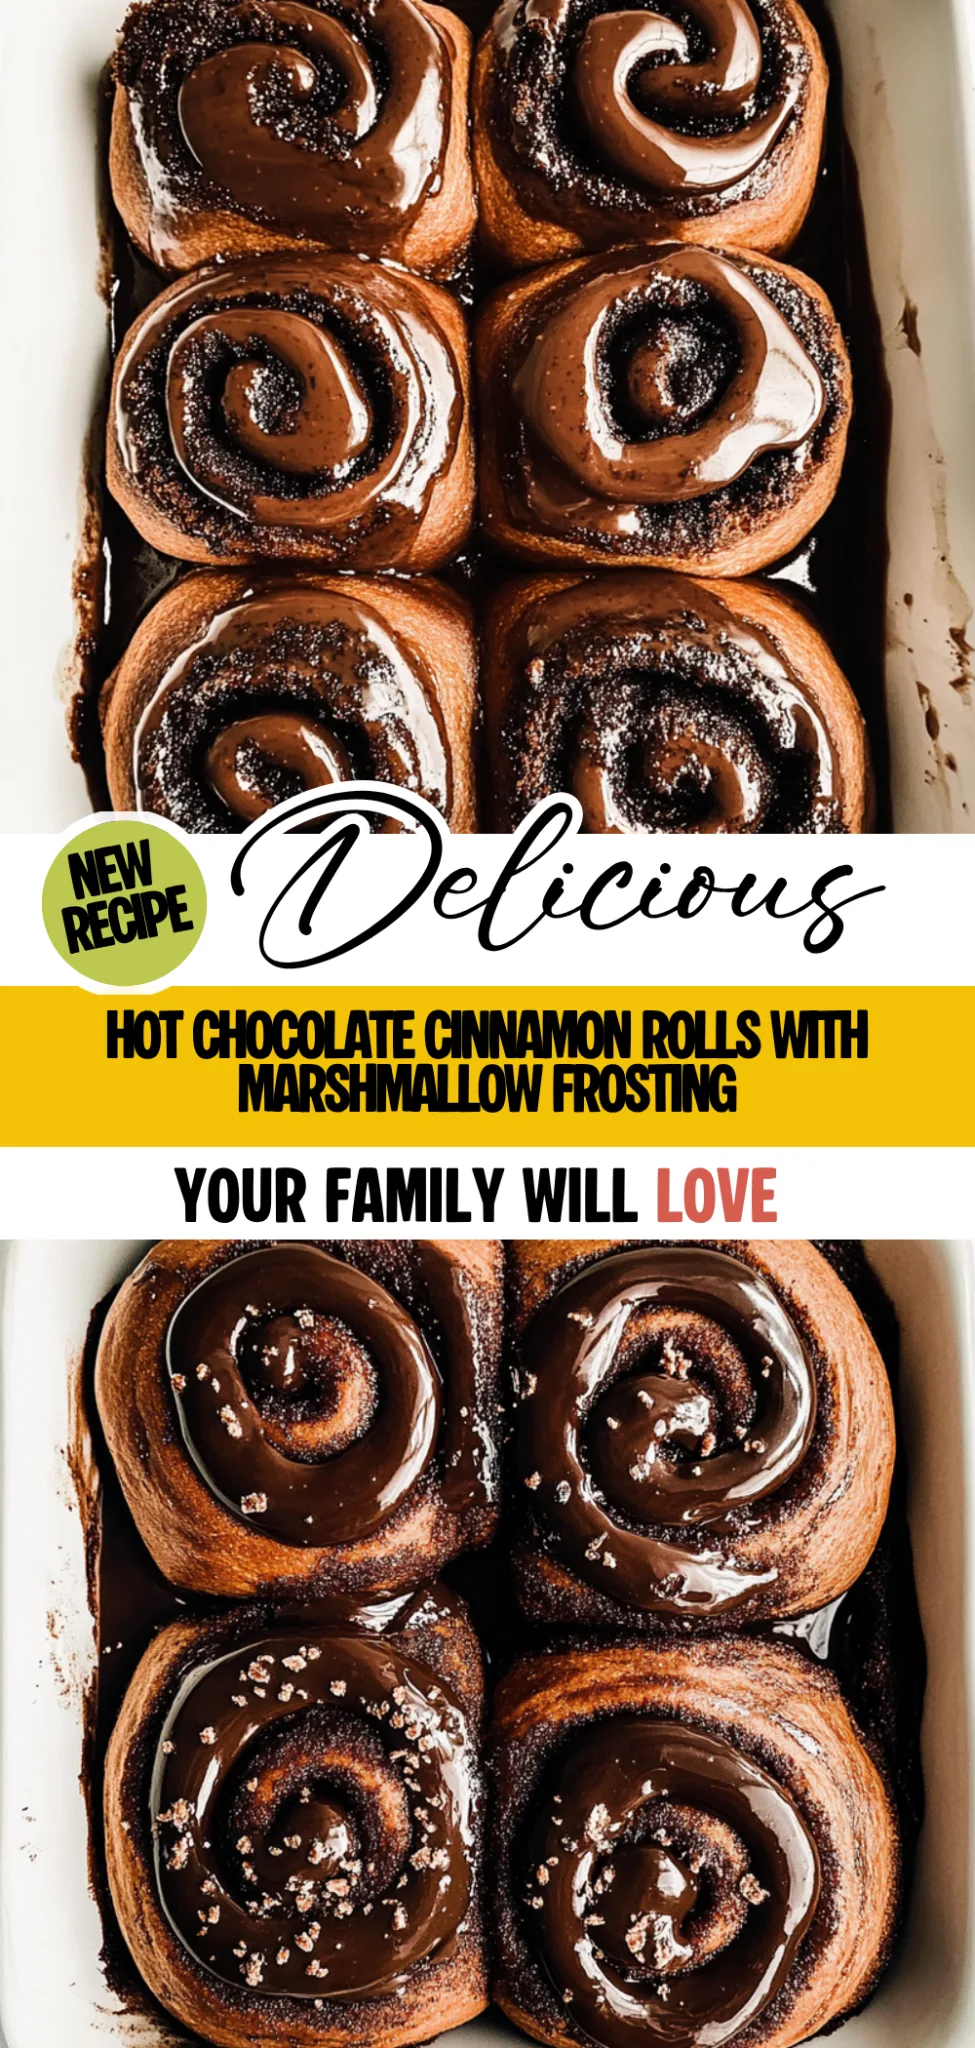
Are you ready to see how straightforward it is to make the Hot Chocolate Cinnamon Rolls of your dreams??
1. PREPARE THE DOUGH
Get ready to mix up a fluffy dough that will be the base of your delightful cinnamon rolls!
1. COMBINE – In a mixing bowl, combine flour, yeast, sugar, and salt. Mix well to ensure the yeast is evenly distributed throughout the dry ingredients.
2. ADD WET INGREDIENTS – Pour in warm milk, melted butter, and the egg. Mix until a dough forms; this should come together quickly into a shaggy mass.
3. KNEAD – Turn the dough onto a floured surface and knead for about 5 minutes until smooth. This step is crucial as it develops the gluten, giving your rolls that beautiful soft texture!
4. RISING – Place the dough in a greased bowl, cover with a cloth or plastic wrap, and let it rise for 1 hour or until doubled in size. You’ll know it’s ready when it’s puffy and has nearly doubled in volume!
HANDY TIPS
- 🌡️ Make sure your milk is warm but not hot — ideally around 110°F (43°C) — so you don’t kill the yeast!
- 💡 TIP: If your kitchen is cool, you can turn on the oven for a minute to warm it slightly then turn it off; place your covered dough inside for an optimal rising environment.
2. MAKE THE FILLING
This filling is where the magic happens with rich chocolate and warming spices!
5. MIX FILLING – In a small bowl, mix together cocoa powder, brown sugar, and ground cinnamon until well combined.
6. BUTTER UP – Once your dough has risen, spread softened butter evenly over its surface. This will help the filling stick!
7. SPRINKLE – Evenly sprinkle the cocoa mixture over the buttered dough, ensuring every inch is covered for maximum flavor.
HANDY TIPS
- 💡 TIP: If you prefer an extra chocolatey flavor, consider increasing the cocoa powder slightly—just don’t go too far off balance!
- ⚠️ Ensure that your butter is softened but not melted; this helps keep the filling in place during rolling.
3. ROLL AND CUT
Now we’re shaping these beauties into rolls!
8. ROLL UP – Roll the dough tightly into a log starting from one edge to create even spirals filled with that delicious cocoa mixture.
9. CUT LOG – Cut the log into 8 equal pieces using a sharp knife or dental floss (it works wonders!). Place these pieces on a greased baking sheet cut side up.
10. SECOND RISE – Cover with a cloth again and let them rise for another 30 minutes while you preheat your oven.
HANDY TIPS
- 💡 TIP: For perfectly even rolls, try using a ruler to measure each piece before cutting!
- 🕒 If you’re short on time, you can skip this second rise — just bake them right after cutting for a denser roll!
4. BAKE
Let’s get those rolls golden brown and fragrant!
11. PREHEAT OVEN – Preheat your oven to 350°F (175°C). This ensures they bake evenly once placed inside.
12. BAKE – Bake for 20-25 minutes until golden brown on top and smelling heavenly! They should be lightly browned; keep an eye on them toward the end.
HANDY TIPS
- 🍞 You want them golden brown but not overbaked — keep checking after about 20 minutes!
- 💡 TIP: For an extra touch of decadence, sprinkle some chocolate chips on top before baking!
5. PREPARE THE GLAZE
Finish these rolls off with a luscious glaze that takes them over the top!
13. WHISK TOGETHER – In a bowl, whisk together powdered sugar, cocoa powder, milk (adjusting for desired consistency), and vanilla extract until smooth and creamy.
14. DRIZZLE – Once your cinnamon rolls are out of the oven and still warm, drizzle this glaze generously over them before serving.
HANDY TIPS
- ⚠️ Be careful not to add too much milk at once; you want it thick enough to hold its shape when drizzled!
- 💡 TIP: For added texture, consider folding in some mini marshmallows into that glaze right before drizzling!
You’ve just created Hot Chocolate Cinnamon Rolls that will have everyone swooning! These pillowy treats are perfect for sharing or indulging all by yourself (no judgment!). Make these once, and I wager they will invade your dreams every night too! – Nagi x
FAQ – Hot Chocolate Cinnamon Rolls
🥯 How long will these cinnamon rolls keep?
These Hot Chocolate Cinnamon Rolls are best enjoyed fresh out of the oven, but they can be stored for up to 3 days. After that, their quality begins to decline significantly:
- Day 1: 100% delicious
- Day 2: 95% still quite good
- Day 3: 90% worth it if you warm them up a bit
To store them, place the rolls in an airtight container at room temperature. For maximum freshness, I recommend reheating them in the microwave for about 10-15 seconds before serving.
⏳ Can I skip the first rise time?
No, you cannot skip it! The first rise is crucial for developing flavor and texture in your dough. This is when the yeast does its magic, creating a soft and airy roll. I’ve tested this many times, and trust me: if you skip it, you’ll end up with dense rolls that won’t do justice to that hot chocolate flavor. So give it a solid hour to rise until doubled in size—your taste buds will thank you!
❄️ Can I freeze these cinnamon rolls?
Absolutely! You can freeze the uncooked rolls before the second rise or after baking. Here’s how:
- Before baking: After you cut the rolls and place them on the baking sheet, cover tightly with plastic wrap and place them in the freezer. Once frozen solid, transfer them to a freezer-safe bag for up to 2 months. When ready to bake, let them thaw in the fridge overnight and then allow them to rise for about 30 minutes before baking.
- After baking: Allow the rolls to cool completely, then wrap each one individually or place them in an airtight container. They’ll keep well for about 1 month in the freezer. Reheat directly from the freezer; just add a few extra minutes in the oven.
🌾 Can I make these cinnamon rolls gluten-free?
You can definitely make gluten-free Hot Chocolate Cinnamon Rolls! Use a high-quality gluten-free all-purpose flour blend that contains xanthan gum; this will help replicate some of the elasticity found in regular flour. Just remember:
- Start with 2 cups of gluten-free blend.
- Follow all other instructions as is.
I’ve tested this with brands like Bob’s Red Mill and King Arthur Flour, and they worked beautifully! Just be prepared for slightly different texture compared to traditional rolls.
🍯 Can I reduce the sugar or substitute it with sweeteners?
Nope, you can’t reduce the sugar! I’ve tried various combinations of reducing sugar or using sweeteners like stevia or monk fruit, but unfortunately, they affect both texture and rise negatively. The granulated sugar isn’t just for sweetness; it also helps feed the yeast during fermentation. If you’re looking for a healthier option, you could consider using coconut sugar instead of brown sugar in the filling—just keep everything else consistent.
🤔 Why do I need to knead the dough?
Kneading is essential because it develops gluten structure in your dough—a key factor for achieving those perfect soft and fluffy cinnamon rolls! While mixing combines ingredients together, kneading works that dough into a smooth ball which helps trap air bubbles produced by yeast during rising. If you skip this step or don’t knead enough (aim for about 5 minutes), your rolls might turn out dense instead of pillowy-soft. Think of it as giving your dough a little workout—after all, we want our rolls fit enough to rise beautifully!
🌟 What are some add-ins or variations I can try?
Feel free to get creative with these cinnamon rolls! Some popular variations include:
- Nutty addition: Add chopped nuts like walnuts or pecans into your filling for extra crunch.
- Chocolate chips: Mix in semi-sweet chocolate chips with your cocoa filling for double chocolate goodness!
- Flavor swaps: Instead of vanilla extract in your glaze, try using almond extract or orange zest for a unique twist.
Experimenting is half the fun—just remember not to overload on fillings; otherwise, rolling might become tricky! Enjoy every bite!
Troubleshooting
I will continue to add more to this Troubleshooting section as I start seeing questions coming through from people who have made the recipe.
Troubleshooting tips
“My cinnamon rolls turned out too flat! 😩”
- You might not have let your dough rise long enough after kneading, which can prevent it from gaining the necessary volume. Make sure to cover your bowl and place it in a warm area for about 1 hour until it doubles in size.
- Another cause could be that your instant yeast was expired or not stored properly, which would affect its ability to create lift. Always check the expiration date before use!
- If you rolled your dough too thin while preparing it, this could also lead to flat rolls as they won’t hold their shape during baking. Aim for an even thickness throughout when rolling!
I bet they were still YUM though!
“My rolls were too dry and tough! 😢”
- Over-kneading your dough can lead to tough cinnamon rolls because of the excess gluten development. Knead just until smooth for about 5 minutes — don’t overdo it!
- If you used too much flour while measuring or while kneading, it can absorb too much moisture and dry out the dough. Use a kitchen scale for accuracy or spoon flour into your measuring cup instead of scooping directly.
- Baking them for too long can also result in dry rolls. Keep an eye on them during the last few minutes of baking; they should be golden brown but not overly dark!
I bet they were still YUM though!
“The tops of my rolls are way too dark! 🔥”
- You may have baked your cinnamon rolls at too high of a temperature. Always preheat your oven to 350°F (175°C) and use an oven thermometer if you suspect yours runs hot.
- If your rolls are placed on a lower rack in the oven, they’ll likely brown faster on the bottom and top. Try positioning them in the center of the oven next time for even cooking!
- Using dark-colored bakeware can also lead to faster browning due to heat retention. Consider using lighter pans if you’re having consistent issues with burnt tops!
I bet they were still YUM though!
“Why do my chocolate glaze look lumpy? 🤔”
- If you’ve added cocoa powder directly without sifting, lumps can form in your glaze. Sift it before combining with powdered sugar for a smoother texture.
- Not mixing thoroughly enough after adding milk could also leave lumps behind. Whisk well until everything is fully combined and smooth.
- Lastly, if your milk was cold instead of at room temperature, it can cause clumping when mixed with sugar and cocoa. Always ensure all ingredients are at room temperature for best results!
I bet they were still YUM though!
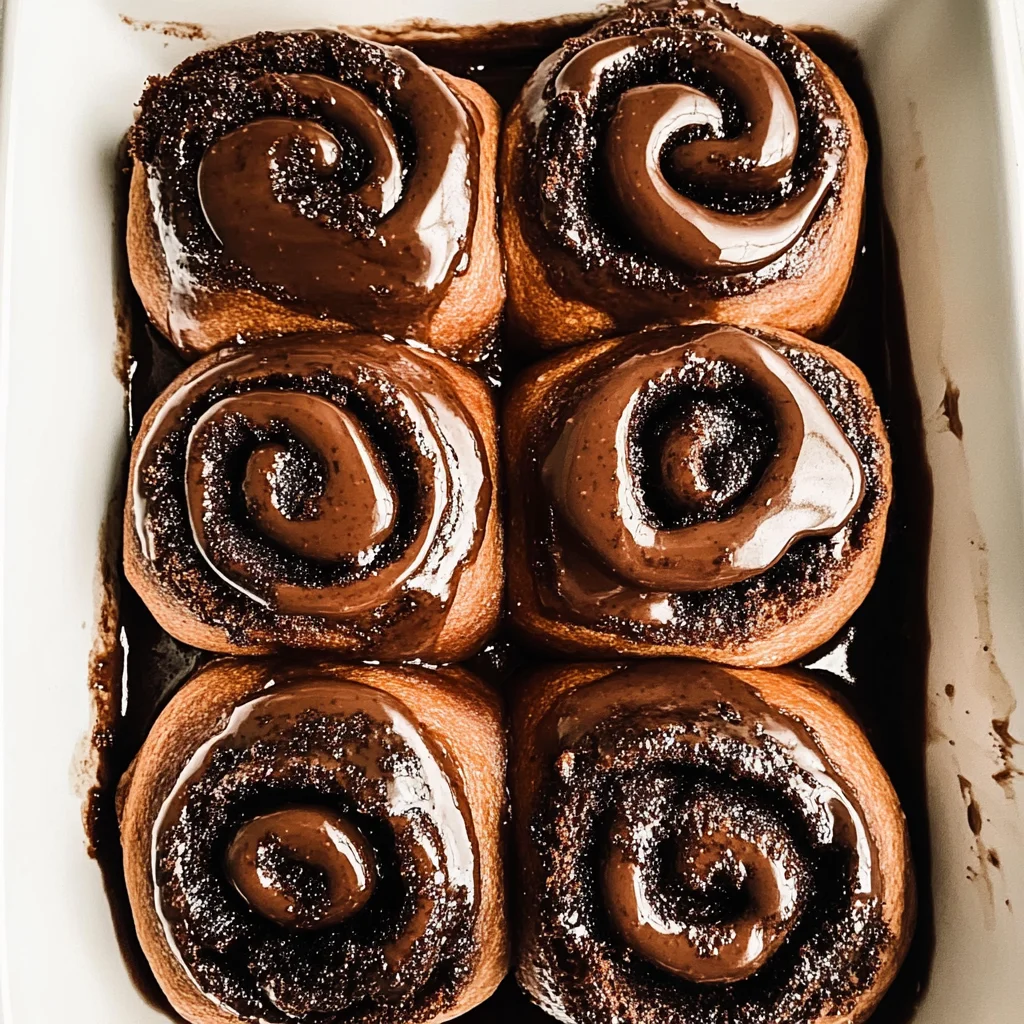
Hot Chocolate Cinnamon Rolls
Ingredients
Method
- In a mixing bowl, combine flour, yeast, sugar, and salt. Mix well.
- Add warm milk, melted butter, and egg. Mix until a dough forms.
- Knead the dough on a floured surface for about 5 minutes until smooth.
- Place the dough in a greased bowl, cover, and let it rise for 1 hour or until doubled in size.
- In a small bowl, mix cocoa powder, brown sugar, and cinnamon.
- Spread softened butter over the dough once it has risen.
- Sprinkle the cocoa mixture evenly over the buttered dough.
- Roll the dough tightly into a log, starting from one edge.
- Cut the log into 8 equal pieces and place them on a greased baking sheet.
- Cover and let rise for another 30 minutes.
- Preheat the oven to 350°F (175°C).
- Bake the rolls for 20-25 minutes until golden brown.
- In a bowl, whisk together powdered sugar, cocoa powder, milk, and vanilla until smooth.
- Drizzle the glaze over the warm rolls before serving.