I first stumbled upon the delightful concept of Harissa Chickpeas during a meal at a cozy little Moroccan restaurant that had my taste buds dancing. The moment I took that first bite, the spicy harissa mingling with tender chickpeas was an explosion of flavor that I couldn’t shake off. It was one of those dishes that made me think, “I’ve got to recreate this at home,” especially since dining out can get pricey, and let’s be honest, sometimes it’s just nicer to wear pajamas while devouring a bowl of spicy goodness!
After several (okay, maybe more than several) attempts that ranged from bland mush to a fiery inferno that could wake the neighbors, I finally cracked the code after what felt like an eternity—about two weeks of experimenting! Each try had me tweaking the ratios of harissa paste and seasoning because I was determined to achieve that perfect balance of spice without overwhelming the delicate chickpeas. And trust me, there were moments where my kitchen looked like a war zone; it’s hard to keep things clean when you’re wrestling with spices like they’re in a wrestling ring!
But let me tell you, all those trials were absolutely worth it! The final result is a vibrant dish bursting with flavor and just the right amount of heat—these Harissa Chickpeas are both saucy and satisfying, making them perfect as a side or a main event on your plate. With their creamy texture and zesty kick, they’ve become one of my go-to recipes for impressing friends or just treating myself on a cozy night in. So grab your pan and get ready; you’re going to love these!
These Harissa Chickpeas are…
…a flavor explosion that will make your taste buds dance with joy!
1. They deliver an explosive flavor with a perfect balance of heat and depth, thanks to the harissa paste. This North African chili paste infuses the chickpeas with a rich, complex profile that elevates the dish from ordinary to extraordinary, making each bite a delightful experience.
2. Irresistible texture – tender yet slightly firm chickpeas that soak up all those delicious spices while maintaining their shape. The combination of sautéed onions and garlic adds a lovely softness, creating a satisfying contrast when paired with the vibrant red bell peppers.
3. The cooking technique of sautéing the vegetables first is key to building layers of flavor. By cooking the onion and garlic in olive oil, I developed a sweet and aromatic base that enhances the overall taste of these Harissa Chickpeas, allowing them to shine in every mouthful.
4. An incredible value – this dish is not only budget-friendly but also quick and easy to whip up at home. With just two cans of chickpeas as the star ingredient, you can create a nutritious and filling meal that rivals any restaurant offering without breaking the bank.
PS These Harissa Chickpeas make about 4 servings, perfect for sharing or enjoying as leftovers throughout the week!
Ingredients for the Harissa Chickpeas
Each ingredient in this dish plays an essential role in flavor and texture. Here’s what you’ll need:
2 cans chickpeas (drained and rinsed): Provides a hearty base with a creamy texture.
1 tablespoon olive oil (for cooking): Adds richness and helps sauté the vegetables.
1 medium onion (diced): Offers sweetness and depth to the overall flavor.
3 cloves garlic (minced): Infuses the dish with aromatic warmth.
1 medium red bell pepper (diced): Contributes sweetness and vibrant color.
2 tablespoons harissa paste (adjust to taste): Delivers bold, spicy flavor that defines the dish.
1 teaspoon cumin (ground): Adds earthy notes that complement the spices beautifully.
1 teaspoon paprika (smoked or sweet): Enhances the flavor profile with a hint of smokiness.
1 cup vegetable broth (or water): Provides moisture and helps meld all the flavors together.
1 tablespoon lemon juice (freshly squeezed): Brightens the dish and balances the spice.
2 tablespoons fresh cilantro (chopped): Offers a fresh, herbaceous finish.
2 tablespoons yogurt (optional, for serving): Adds creaminess and coolness to counteract the heat.
You MUST Sauté the Base! No Skipping This Step!
I know, I know—sautéing the onion and peppers feels like an extra step that you might be tempted to skip. I tried to shortcut it once, thinking I could just throw everything in the pan together, and let’s just say my Harissa Chickpeas ended up tasting more like a sad bowl of mush than vibrant and spicy deliciousness. Lesson learned: some things are worth the extra effort!
Sautéing creates a beautifully aromatic base that transforms simple chickpeas into a flavor-packed dish. Think of it like building a house; if you don’t lay a solid foundation, everything on top will crumble. By cooking the onions until they’re translucent and softening the bell peppers, you’re unlocking their natural sweetness and enhancing their flavors. This is essential for your chickpeas to absorb all those delightful tastes from the harissa paste and spices.
What does sautéing the base do?
- Flavour — The caramelization of onions creates depth and sweetness, adding layers of flavor that elevate your dish.
- Aroma — The fragrant garlic and sautéed vegetables release enticing aromas that make your kitchen smell irresistible.
- Texture — Softening the bell pepper gives it a tender bite that contrasts beautifully with the creamy chickpeas.
- Color — A golden-brown base adds visual appeal, making your dish as appetizing to look at as it is to eat.
- Moisture — Sautéing helps release moisture from vegetables, preventing your final dish from being too watery when you add the broth.
Different sauté times
- 1 minute (good) — You’ll get some aroma but minimal flavor development; it’s basically just warmed ingredients.
- 3 minutes (better) — Onions start to soften and become slightly sweet; still not enough for optimal depth.
- 5 minutes (great) — Perfectly translucent onions with good flavor; this is where your base starts to shine!
- 7 minutes or more (best) — Onions become richly caramelized, creating maximum flavor that will truly permeate your chickpeas.
The most common mistake? Underestimating how long to sauté! If you rush through this step, you risk bland flavors and lackluster textures in your Harissa Chickpeas. Trust me, this is not where you want to cut corners!
How to make Harissa Chickpeas
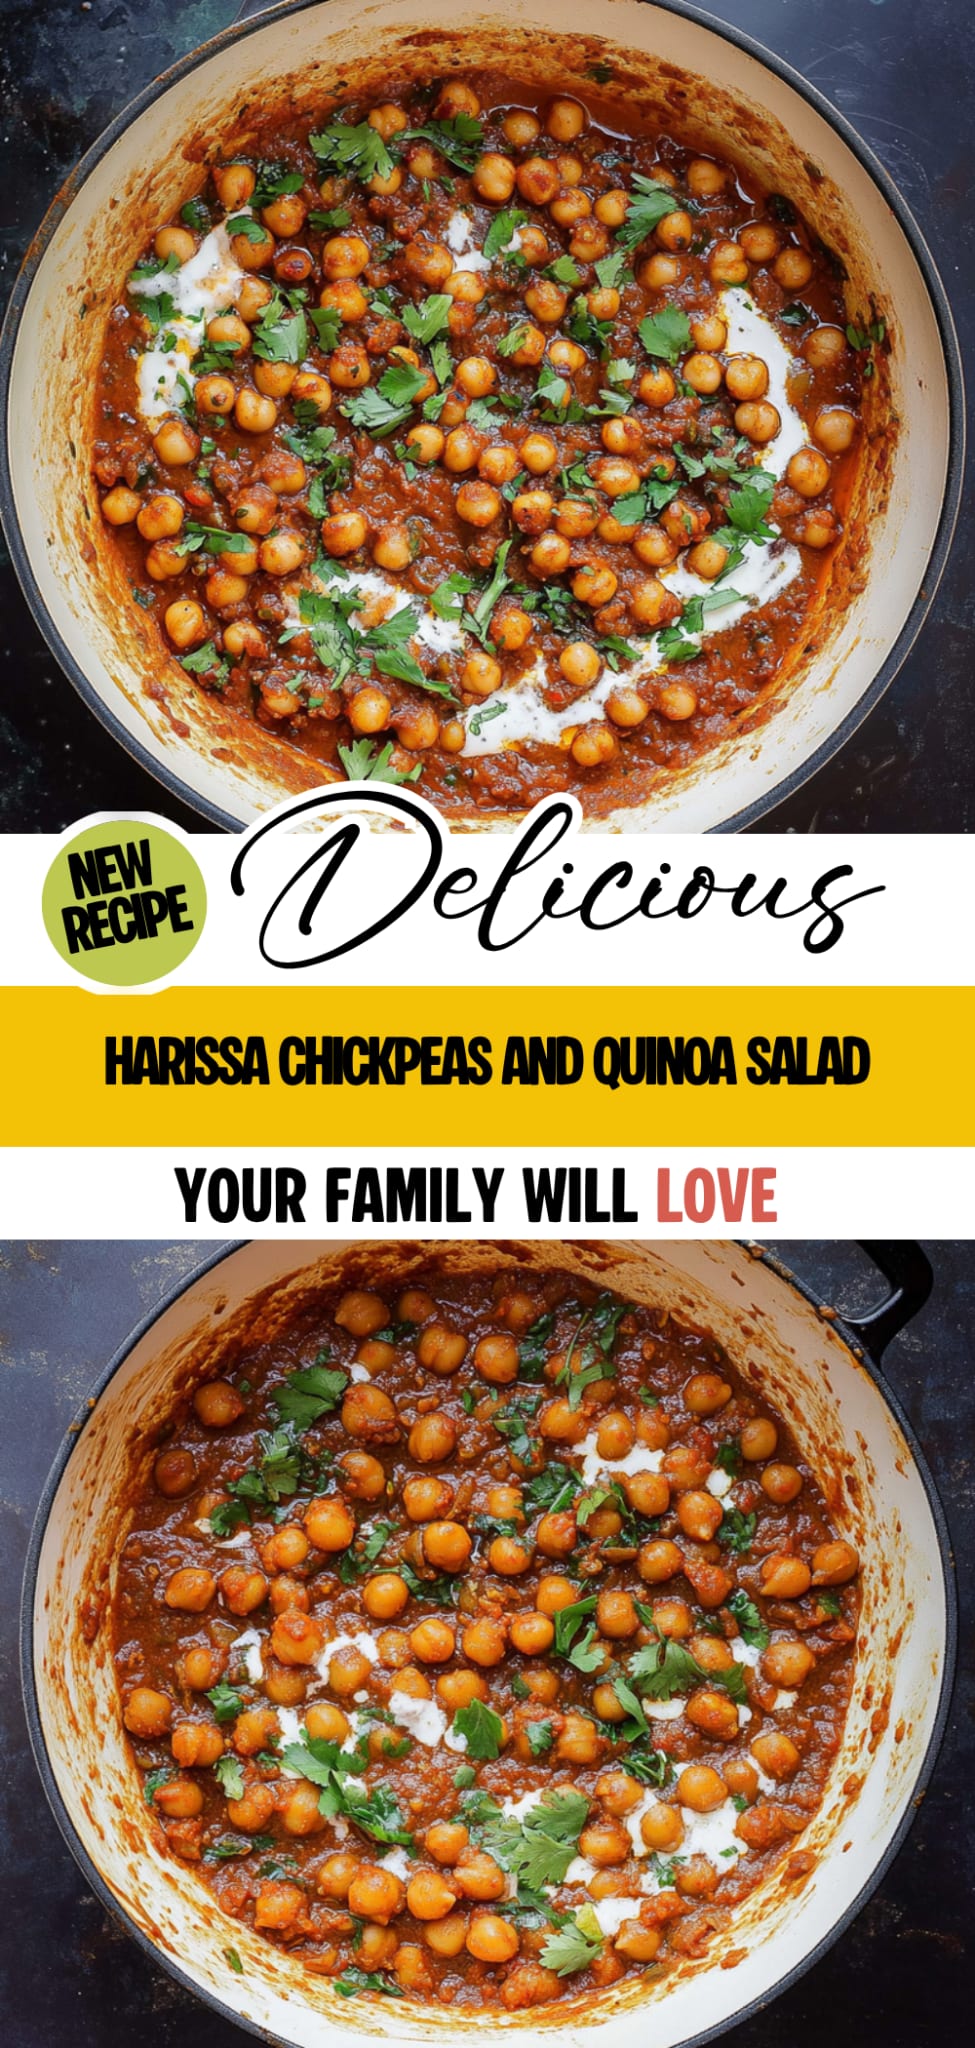
Are you ready to see how straightforward it is to make the Harissa Chickpeas of your dreams??
1. PREPARE THE BASE
Let’s kick things off by creating a flavorful base!
Sauté – Heat the olive oil in a large skillet over medium heat. Once hot, add the diced onion and sauté until it becomes translucent, which should take about 5 minutes. This step builds a sweet, aromatic foundation for your dish!
Add – Next, toss in the minced garlic and diced red bell pepper. Cook for an additional 3-4 minutes until softened. You want the peppers to have a vibrant color and a slightly tender texture!
HANDY TIPS
- If you prefer extra spice, try adding a pinch of red pepper flakes when sautéing the onions.
- To save time, you can use pre-diced onions and bell peppers from the store!
2. COOK THE CHICKPEAS
Now it’s time to infuse those chickpeas with flavor!
Mix – Stir in the harissa paste, cumin, and paprika, cooking for 1 minute until fragrant. This is where the magic happens—those spices will elevate your chickpeas to another level!
Combine – Add the drained chickpeas and vegetable broth into the skillet, stirring well to combine everything. Bring the mixture to a simmer and allow it to cook for 10-15 minutes; this will help meld all those delicious flavors together.
HANDY TIPS
- Feel free to adjust the amount of harissa paste based on your personal heat tolerance!
- For added creaminess, consider using vegetable broth instead of water—it makes a difference!
3. FINISH AND SERVE
We’re almost there—let’s finish up this delightful dish!
Stir – Add the freshly squeezed lemon juice into the skillet and taste for seasoning adjustments; you may find you want just a pinch more salt or a dash more harissa. Remove from heat once everything is perfectly seasoned!
Serve – Serve warm in bowls, garnished with chopped cilantro and a dollop of yogurt if desired. The yogurt adds a lovely creaminess that pairs beautifully with the spicy chickpeas.
HANDY TIPS
- If you have leftovers (which I doubt!), they can be stored in an airtight container in the fridge for up to 3 days.
- This dish also works wonderfully as a filling for wraps or pita pockets!
Make these Harissa Chickpeas once, and I wager they will invade your dreams every night too! – Nagi x
FAQ – Harissa Chickpeas
🌱 Can I make this dish vegan?
Absolutely! This Harissa Chickpeas recipe is already vegan as it contains no animal products. If you choose to omit the optional yogurt garnish or use a dairy-free yogurt alternative, you’re all set! I love using coconut yogurt for a creamier texture without any dairy. It’s a fantastic way to keep the dish plant-based while still enjoying a touch of creaminess.
🥫 How long will leftovers keep in the fridge?
Leftovers of Harissa Chickpeas can be stored in an airtight container in the fridge for up to 4 days. However, I found that they taste best within the first 2 days when they are still vibrant and flavorful—about 95% as good on day 3 and 90% on day 4. Just give them a good stir before reheating, as flavors might settle at the bottom.
❄️ Can I freeze these chickpeas for later use?
Yes, you can freeze Harissa Chickpeas! Allow them to cool completely before transferring them to a freezer-safe container or bag. They can be frozen for up to 3 months. When you’re ready to enjoy them, simply thaw overnight in the fridge and reheat on the stove with a splash of water or broth to keep them moist. Easy peasy!
🔄 What can I substitute for harissa paste if I can’t find it?
If you don’t have harissa paste, you can create a substitute by mixing equal parts of chili paste (like Sriracha or sambal oelek) with spices such as cumin, coriander, and paprika. Alternatively, you can use red pepper flakes mixed with olive oil and a bit of garlic for that spicy kick. Just remember that each substitute will alter the flavor profile slightly—so adjust according to your taste preferences.
🥗 Can I add other vegetables to this recipe?
Absolutely! Feel free to customize this recipe by adding other veggies like spinach, zucchini, or carrots for extra nutrition and flavor. Just sauté them along with the onion and bell pepper until they’re tender. You could also toss in some canned diced tomatoes for additional moisture and flavor—you know I’m all about maximizing deliciousness!
⏲️ Do I really need to simmer the chickpeas for that long?
Yes, simmering is crucial! Cooking the chickpeas allows them to absorb all those wonderful flavors from the spices and harissa paste. If you rush this step, you’ll miss out on that rich depth of flavor we’re aiming for. Trust me; it’s worth those extra minutes—your taste buds will thank you!
✨ Is there a way to make this dish spicier?
Definitely! If you want more heat, consider adding extra harissa paste or incorporating fresh chopped chilies during cooking. For an added layer of spice, try sprinkling some cayenne pepper or red pepper flakes at the end. Just be cautious—it’s easier to add heat than it is to take it away! 😅
Troubleshooting
- I will continue to add more to this Troubleshooting section as I start seeing questions coming through from people who have made the recipe.
Troubleshooting tips
“My chickpeas turned out too mushy! 😩”
- You may have overcooked them during the simmering stage. Chickpeas only need about 10-15 minutes to absorb the flavors, and cooking them longer can lead to a mushy texture.
- If you used canned chickpeas, they are already cooked; therefore, they require less time in the pan. Keep an eye on them to avoid overcooking!
- I bet they were still YUM though!
“My dish ended up too spicy! 🔥”
- You might have added too much harissa paste without tasting it first. Start with 1 tablespoon, then gradually add more if you prefer a spicier kick.
- Different harissa pastes can vary wildly in heat levels, so just be mindful of how spicy yours is — taste as you go!
- I bet they were still YUM though!
“My chickpeas don’t have enough flavor! 😕”
- You might not have let the spices cook long enough before adding the chickpeas. Cooking harissa, cumin, and paprika for at least a minute helps release their flavors more effectively.
- Also, ensure you’re using a good quality vegetable broth or water; bland liquids can lead to a dull-tasting dish!
- I bet they were still YUM though!
“The texture of my chickpeas is uneven! 🤔”
- If you didn’t rinse and drain your canned chickpeas well enough, excess liquid could cause some to become soggy while others remain firm. Make sure to drain and rinse thoroughly next time.
- Stirring gently while simmering can also help evenly distribute heat and flavor, avoiding hot spots that may lead to uneven textures.
- I bet they were still YUM though!
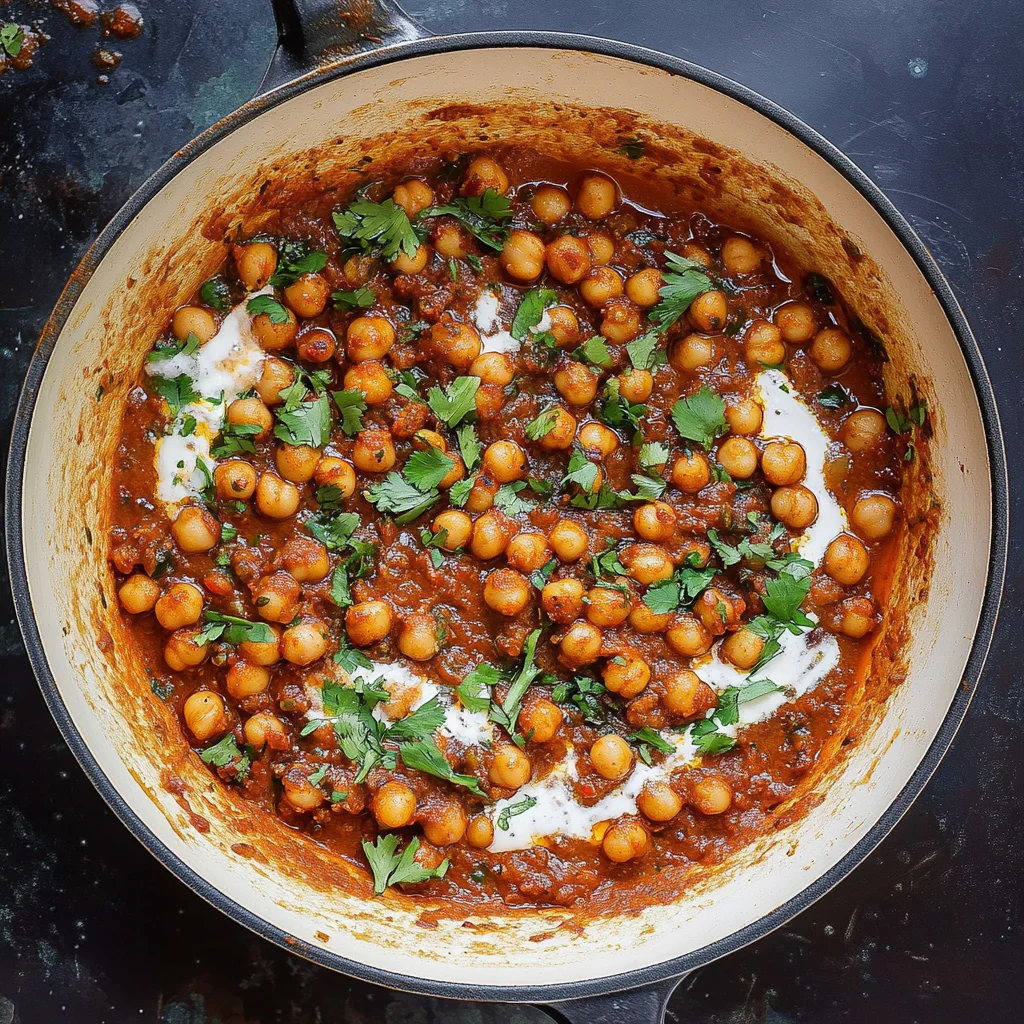
Harissa Chickpeas
Ingredients
Method
- Heat the olive oil in a large skillet over medium heat. Add the diced onion and sauté until translucent, about 5 minutes.
- Add the minced garlic and diced red bell pepper, cooking for an additional 3-4 minutes until softened.
- Stir in the harissa paste, cumin, and paprika, cooking for 1 minute until fragrant.
- Add the drained chickpeas and vegetable broth, stirring to combine. Bring to a simmer and cook for 10-15 minutes, allowing the flavors to meld.
- Stir in the lemon juice and adjust seasoning if necessary. Remove from heat.
- Serve warm, garnished with chopped cilantro and a dollop of yogurt if desired.