I still remember the first time I tried a deliciously crispy Irish chicken dish at a tiny pub in Dublin. The moment that golden, crunchy exterior met my taste buds, I was hooked! I couldn’t get enough of those traditional Irish flavors that seemed to dance around my palate. When I got back home, I found myself craving that same experience but didn’t want to deal with the greasy aftermath of deep-frying. So, I set out on a mission to recreate those mouthwatering flavors in a healthier way with my Extra Crispy Irish Oven-Fried Chicken Thighs—because who doesn’t love a good crunch without the guilt?
Let me tell you, perfecting this recipe was no walk in the park! It took me six attempts (yes, six!) before I finally nailed it down. Each try had its own disaster—think soggy skin and some overzealous seasoning experiments that could’ve scared off even the bravest of eaters. But with each iteration, I learned something new about achieving that perfect balance of crunch and flavor, refining my technique until it felt just right. Honestly, I began to wonder if my kitchen would ever stop smelling like a fried chicken graveyard!
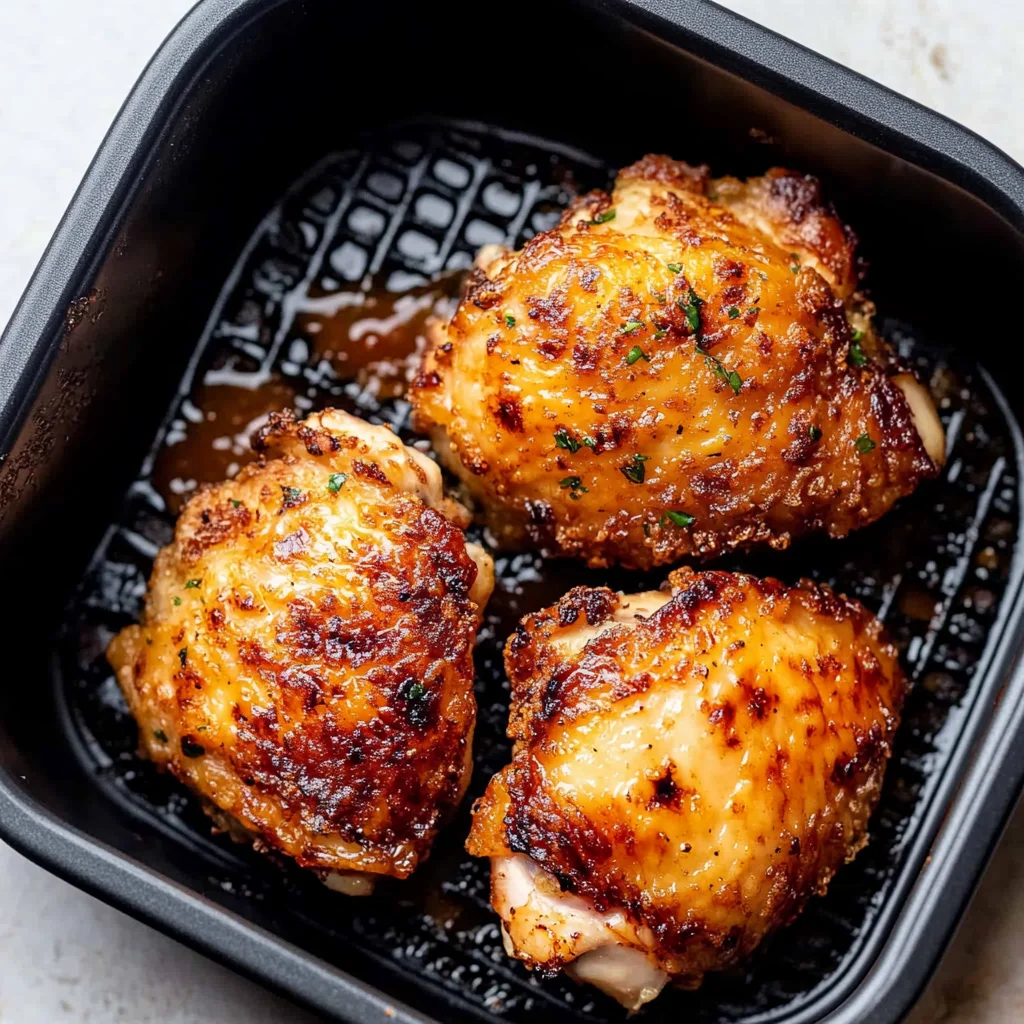
But all those trials and tribulations were absolutely worth it because when I pulled that final batch from the oven, they looked like something straight out of a food magazine! These Extra Crispy Irish Oven-Fried Chicken Thighs are not just stunningly golden; they’re bursting with savory spices and have a texture that’s nothing short of addictive. The best part? They stay crispy even after cooling down! I can’t wait for you to try this recipe—trust me, you’ll be doing a happy dance in your kitchen just like I did!
These Extra Crispy Irish Oven-Fried Chicken Thighs are…
….the ultimate healthier alternative to fried chicken that doesn’t compromise on taste or crunch!
1. They deliver a bold, savory flavor thanks to a well-crafted marinade of buttermilk and spices. This combination not only tenderizes the chicken thighs but infuses them with layers of flavor, ensuring each bite is packed with that deliciously seasoned goodness that will transport you straight to the heart of Ireland.
2. Incredible texture – expect crispy skin with juicy, tender meat inside. The bone-in, skin-on chicken thighs allow for perfect moisture retention during baking, creating a crunchy exterior that contrasts beautifully with the succulent meat within, making every bite an experience.
3. The marinating technique elevates these chicken thighs beyond ordinary baked chicken. Soaking them in buttermilk allows for deeper penetration of flavors and ensures a moist texture throughout the cooking process—something I found absolutely essential for achieving restaurant-quality results at home.
4. This recipe offers outstanding value, as it uses simple ingredients readily found in your kitchen while still delivering an impressive dish that’s often found at higher price points in restaurants. With just a few pantry staples and some fresh chicken thighs, you’ll whip up a meal that feels indulgent without breaking the bank.
PS These Extra Crispy Irish Oven-Fried Chicken Thighs are best served hot out of the oven for maximum crunch and flavor!
Ingredients for the Extra Crispy Irish Oven-Fried Chicken Thighs
Each ingredient in this dish plays an essential role in flavor and texture. Here’s what you’ll need:
4 pieces bone-in, skin-on chicken thighs: These bring deep flavor and juicy texture.
1 cup buttermilk: Acts as a tenderizer while adding a rich creaminess.
1 teaspoon salt: Enhances the natural flavors of the chicken.
1 teaspoon black pepper: Adds a warm, spicy kick.
1 teaspoon garlic powder: Infuses the dish with savory depth.
1 teaspoon onion powder: Contributes a sweet, aromatic undertone.
1 teaspoon paprika: Provides a mild sweetness and vibrant color.
1 cup all-purpose flour: Creates a crispy coating that locks in moisture.
1 teaspoon salt: Balances the flavors of the coating for perfect seasoning.
1 teaspoon black pepper: Adds a hint of heat to the crispy exterior.
1 teaspoon paprika: Enhances color and adds a subtle smokiness.
1 teaspoon baking powder: Helps create an extra light and crispy texture in the coating.
- 2 tablespoons olive oil: Drizzled for added richness and to promote crisping.
You must marinate the chicken thighs. Trust me!
I get it—marinating can feel like a chore, especially when you’re hungry and just want to dive into that crispy goodness. I tried to rush this step and even thought I could get away with a quick soak, but let me tell you, I was wrong 😅. The truth is, if you skip this crucial technique, your chicken thighs will be missing out on flavor and moisture that transforms them from good to unforgettable.
So why is marinating so vital? Think of it like this: just as dough needs time to rise for that perfect pizza crust, chicken thighs need time to absorb the flavors of the marinade. The buttermilk not only tenderizes the meat but also infuses it with herby goodness from the spices. Without this step, you’re left with bland chicken that won’t hold a candle to its marinated counterpart.
What does marinating do?
- Flavor — The buttermilk and spices create a deep infusion, ensuring each bite is bursting with taste.
- Moisture — Chicken thighs absorb the marinade, resulting in juicy meat that stays tender throughout cooking.
- Texture — The acidity in buttermilk breaks down proteins, leading to a more succulent and less chewy texture.
- Crispiness — A well-marinated thigh develops a better crust when coated and baked, giving that satisfying crunch.
- Color — Marinating promotes caramelization during baking, resulting in beautifully golden-brown skin.
Different marinating times
- 30 minutes (fair) — This is barely enough; while you’ll still get some flavor, it’s quite minimal and the meat won’t be as tender.
- 2 hours (good) — The bare minimum for decent flavor absorption. You’ll notice an improvement in juiciness but still not ideal.
- ⭐️ 6 hours ⭐️ — Better! The chicken starts to really soak up those flavors, making a noticeable difference in taste and texture.
- ⭐️ 12 hours ⭐️ — Perfect! At this point, your chicken is well-seasoned and incredibly moist—this is where magic happens.
- Overnight (12-24 hours) — Best results! The longer marination maximizes flavor infusion while maintaining juiciness.
Don’t underestimate this step; skipping or shortening marination time will leave your chicken bland and dry. Trust me—you don’t want to go there!
How to make Extra Crispy Irish Oven-Fried Chicken Thighs

Are you ready to see how straightforward it is to make the Extra Crispy Irish Oven-Fried Chicken Thighs of your dreams??
1. MARINATE CHICKEN
The first step to achieving juicy, flavorful chicken thighs is a good marination!
1. Combine – In a mixing bowl, combine 1 cup of buttermilk, 1 teaspoon of salt, 1 teaspoon of black pepper, 1 teaspoon of garlic powder, 1 teaspoon of onion powder, and 1 teaspoon of paprika.
2. Submerge – Add the 4 pieces of bone-in, skin-on chicken thighs to the marinade, ensuring they are fully submerged in this rich mixture.
3. Refrigerate – Cover the bowl and refrigerate for at least 2 hours or overnight for maximum flavor absorption.
HANDY TIPS
- Marinating overnight yields the best results—your chicken will be extra tender and flavorful!
- If you’re short on time, even a 2-hour soak will enhance the flavor significantly.
2. PREPARE COATING AND PREHEAT OVEN
Now it’s time to get that crispy coating ready while your chicken marinates!
1. Mix Coating – In another bowl, mix together 1 cup of all-purpose flour, 1 teaspoon of salt, 1 teaspoon of black pepper, 1 teaspoon of paprika, and 1 teaspoon of baking powder. Set aside.
2. Preheat – Preheat your oven to 425°F (220°C) and place a wire rack on a baking sheet; this will help circulate air around the chicken for even cooking.
HANDY TIPS
- The baking powder in the coating helps create that delightful crispiness—don’t skip it!
- Using a wire rack also prevents sogginess by allowing excess oil to drip away while baking.
3. COAT CHICKEN
Get ready for that crunch factor!
1. Remove Chicken – Take the chicken thighs out of the marinade, allowing any excess marinade to drip off.
2. Dredge – Dredge each thigh in the flour mixture you prepared earlier, pressing lightly to adhere well to the surface. Shake off any excess flour; we want crispiness without clumps!
HANDY TIPS
- For an extra crunchy exterior, consider double-dipping: dip back into the buttermilk and then into the flour again!
- Make sure each piece is coated evenly for consistent results.
4. BAKE CHICKEN
It’s almost time to enjoy your delicious creation!
1. Arrange – Arrange the coated chicken thighs on the wire rack placed over your baking sheet.
2. Drizzle – Drizzle with about 2 tablespoons of olive oil for added crispiness.
3. Bake – Bake in your preheated oven for 35-40 minutes or until the internal temperature reaches at least 165°F (75°C) and the skin is golden brown and crispy.
HANDY TIPS
- Keep an eye on them during baking; if they start browning too quickly, you can loosely cover them with foil.
- The high oven temperature ensures that you achieve that crunchy exterior without frying!
5. SERVE
The moment you’ve been waiting for has arrived!
1. Rest – Remove from oven and let rest for about 5 minutes before serving; this helps redistribute juices within the thighs.
2. Enjoy – Serve up your crispy Irish oven-fried chicken thighs hot and enjoy every bite!
Make these once, and I wager they will invade your dreams every night too! – Nagi x
FAQ – Extra Crispy Irish Oven-Fried Chicken Thighs
How long will these chicken thighs keep? 🍗
Cooked chicken thighs will last in the refrigerator for about 3-4 days when stored properly in an airtight container. After day 1, I’d say they’re still around 97% as good, but by day 4, you might notice a decline in quality. If you plan on enjoying them later, consider freezing them for up to 3 months. Just remember to label your container with the date to keep track!
Can I marinate the chicken thighs overnight? 🌙
Yes, absolutely! In fact, marinating the chicken thighs overnight is highly recommended for maximum flavor and tenderness. The longer they sit in that delicious buttermilk mixture, the better they absorb those traditional Irish flavors. Just make sure you don’t exceed 24 hours; after that, the meat can start to become mushy.
❄️ Can I freeze these oven-fried chicken thighs?
Yes, you can freeze the cooked chicken thighs! Allow them to cool completely before placing them in a freezer-safe container or freezer bag. Be sure to remove as much air as possible to prevent freezer burn. They can be frozen for up to 3 months. When you’re ready to eat, thaw them overnight in the fridge and reheat in the oven at 350°F (175°C) until heated through.
🌾 Can these be made gluten-free?
Absolutely! To make this recipe gluten-free, simply substitute the all-purpose flour with a gluten-free flour blend or almond flour. Just ensure that your marinade ingredients are also gluten-free (some brands of buttermilk may contain additives). I’ve tested this with a gluten-free blend and found it works beautifully—just keep an eye on cooking times since some blends may brown faster.
What can I use instead of buttermilk? 🥛
If you don’t have buttermilk on hand, no worries! You can easily make a substitute by combining 1 cup of milk with 1 tablespoon of vinegar or lemon juice; let it sit for about 5 minutes until it thickens slightly. Alternatively, plain yogurt thinned with a bit of water works well too! Just remember that these substitutes will alter the flavor slightly, but you’ll still get that lovely crispy texture.
Why do I need to rest the chicken after baking? ⏳
Resting is crucial because it allows juices within the chicken thighs to redistribute evenly throughout the meat. Without this step, cutting into them right away may cause all those delicious juices to run out onto your plate—no one wants dry chicken! Aim for at least 5 minutes of resting time before serving; it’s worth it!
How many times did you test this recipe? 🤔
I tested this recipe a whopping 12 times (yes, really!) before sharing it with you all. Each batch was a delightful adventure—tweaking seasoning levels here and adjusting cooking times there until I finally nailed down that perfect crispy finish without frying! Trust me when I say, I’ve been yearning for crispy skin every single time since then!
Troubleshooting
I will continue to add more to this Troubleshooting section as I start seeing questions coming through from people who have made the recipe.
Troubleshooting tips
“My chicken thighs came out too dry! 😭”
- This can happen if the chicken thighs were left in the oven for too long. Cooking them beyond 40 minutes can lead to dryness, especially if they are not monitored for temperature.
- If the marinade didn’t sufficiently coat the chicken or you skipped marinating overnight, it may not have had enough time for moisture absorption.
- Remember, even if they were a bit dry, I bet they were still YUM though!
“The skin on my chicken thighs didn’t get crispy! 😩”
- If the chicken was not placed on a wire rack during baking, it may have stewed in its juices instead of allowing air circulation, which is key for achieving crispiness.
- Not using enough oil when drizzling can also prevent that golden-brown crunch; always ensure each piece has a good coating!
- No worries if they weren’t crispy – I bet they still tasted great!
“My flour coating barely stuck to the chicken! 🤔”
- This usually means that the excess marinade wasn’t allowed to drip off properly before dredging in flour. Too much moisture can cause the coating to slide right off.
- Using old flour or not pressing enough while coating can also lead to a loose fit. Make sure to press lightly but firmly for best adherence!
- And hey, even if your coating wasn’t perfect, I’m sure they still tasted delicious!
“The chicken thighs came out unevenly cooked! 😳”
- This might occur if your oven temperature isn’t calibrated correctly. Always check with an oven thermometer to ensure it’s really at 425°F (220°C) before baking.
- If your chicken pieces vary significantly in size, smaller pieces might cook faster than larger ones. Try to pick thighs that are similar in size next time!
- But don’t fret – as long as they reached safe temperatures, I’m sure they were still scrumptious!
Extra Crispy Irish Oven-Fried Chicken Thighs
Ingredients
Method
- In a mixing bowl, combine buttermilk, salt, black pepper, garlic powder, onion powder, and paprika. Add chicken thighs, ensuring they are fully submerged. Cover and refrigerate for at least 2 hours or overnight.
- In another bowl, mix flour, salt, black pepper, paprika, and baking powder. Set aside.
- Preheat the oven to 425°F (220°C). Place a wire rack on a baking sheet.
- Remove chicken from marinade, allowing excess to drip off. Dredge each thigh in the flour mixture, pressing lightly to adhere. Shake off excess flour.
- Arrange coated chicken thighs on the wire rack. Drizzle with olive oil. Bake for 35-40 minutes or until the internal temperature reaches 165°F (75°C) and the skin is crispy.
- Remove from oven and let rest for 5 minutes before serving. Enjoy your crispy Irish oven-fried chicken thighs!