I still remember the first time I had fish tacos at this little beach shack during a sunny getaway. Those perfectly crispy bites of fish, nestled in warm tortillas and topped with fresh salsa, were nothing short of heavenly! I could never shake the craving for those delicious crispy fish taco bowls, and I thought, why not try to recreate that magic at home? Not only would it save me a few bucks, but I could tinker with the toppings and sauce to make it just how I like it—because honestly, who doesn’t want to be the master of their own taco destiny?
After a few less-than-stellar attempts (let’s just say my first fish went from crispy to soggy faster than you can say “taco”), I finally nailed down my technique. It took several tries—okay, more than I’d like to admit—to find that perfect balance of crunch and flavor while keeping things healthy. I was on a mission to craft crispy fish that didn’t just taste good but also maintained its texture when piled high with all those glorious toppings. Spoiler alert: there may have been a few kitchen disasters involving overly ambitious seasoning experiments!
But trust me, all that effort paid off! The final result is a bowl that’s bursting with flavor and texture—the fish is light and crunchy, paired with zesty sauce and fresh veggies that pop with every bite. Plus, these crispy fish taco bowls are not only delicious but also healthy enough to make you feel good about indulging. I’m so excited for you to dive into this recipe; I promise it’ll bring a little bit of that beachy bliss right into your kitchen!
These Crispy Fish Taco Bowls are…
…a vibrant explosion of flavors and textures that will make your taste buds dance with joy!
1. They offer a deliciously seasoned fish that shines through every bite, thanks to the harmonious blend of paprika and garlic powder. This careful seasoning not only enhances the natural sweetness of the fish but also adds a depth of flavor that elevates each taco bowl, making it irresistible.
2. Incredible crunch – the panko breadcrumb coating delivers a satisfyingly crispy texture that contrasts beautifully with the tender fish. This unique choice of breadcrumbs ensures an extra layer of crispiness, creating a delightful crunch that you won’t find in ordinary fish tacos.
3. A key coating technique – double-dipping the fish in flour and beaten eggs before coating with panko ensures that every piece is perfectly enveloped. This method locks in moisture while providing a sturdy foundation for the crunchy exterior, resulting in fish that is both juicy and crispy.
4. Cost-effective deliciousness – making these Crispy Fish Taco Bowls at home is not only fun but also budget-friendly compared to dining out. With just a pound of white fish and some pantry staples, you can whip up generous servings that rival any restaurant dish without breaking the bank.
PS These taco bowls serve 4 and are perfect for meal prep, so you can enjoy them throughout the week!
Ingredients for the Crispy Fish Taco Bowls
Each ingredient in this dish plays an essential role in flavor and texture. Here’s what you’ll need:
1 lb white fish fillets (such as cod or tilapia): Provides a mild flavor and flaky texture as the base of the tacos.
1 cup panko breadcrumbs: Delivers an irresistible crunch for that crispy coating.
1 cup all-purpose flour: Acts as a base layer that helps the egg adhere to the fish.
2 large eggs (beaten): Binds the coating together and adds moisture to the fish.
1 tsp paprika: Infuses a subtle warmth and color to the crispy coating.
1 tsp garlic powder: Adds a savory depth that enhances the overall flavor profile.
1 tsp salt: Enhances all the flavors, ensuring each bite is deliciously seasoned.
1/2 tsp black pepper: Provides a gentle kick that balances the other seasonings.
The Secret to Extra Crispy Fish? Don’t Skip the Panko Coating!
I’ll be honest—I tried to cut corners by skipping the panko breadcrumbs, thinking it wouldn’t make a huge difference. But let me tell you, I learned the hard way that crispy fish without that crunchy coating is just sad and soggy. No one wants a floppy fish taco bowl, trust me!
Why is this panko coating so crucial? Think of it like building a fortress around your fish fillets. The flour mixture creates a barrier that locks in moisture while the egg acts as glue for those crunchy panko breadcrumbs. When baked at high heat, this combination transforms into a golden, crispy exterior that elevates your fish from ordinary to extraordinary.
What does the panko coating do?
- Increased Crispiness — The panko breadcrumbs create a light and airy crunch that’s far superior to regular breadcrumbs, giving each bite that satisfying texture.
- Improved Moisture Retention — The flour and egg coating helps seal in the fish’s natural moisture, keeping it tender and flaky inside while remaining crisp outside.
- Enhanced Flavor — The seasoning in the flour mixture (paprika, garlic powder, salt, and pepper) infuses the fish with extra flavor that you just can’t achieve without this step.
- Gorgeous Golden Color — Baking at 425°F allows the panko to crisp up beautifully, providing an appealing golden-brown hue that makes your dish look gourmet.
- Longer Lasting Crispness — A well-coated fish retains its crunch longer than uncoated varieties—even after baking! Perfect for meal prep or leftovers.
Different coating times
- Immediate bake (good) — You can bake right after coating, but the coating may not adhere as well during baking, leaving you with less crunch.
- 10 minutes resting (better) — Allowing the coated fish to rest for about 10 minutes helps set the coating and enhances adherence during cooking.
- 30 minutes resting (best) — This gives time for the flavors to meld and allows moisture from the fish to slightly penetrate the coating for enhanced taste while still achieving maximum crisp.
- ⭐️ 1 hour chilling⭐️ — Excellent! Chilling lets everything firm up nicely which results in an even sturdier crust after baking.
Beware: The most common mistake people make is rushing through the dredging process. If you don’t coat your fillets properly with flour, egg, and panko—especially skipping any of those steps—you’ll end up with sad-looking fish. Don’t let your crispy dreams turn into soggy realities!
How to make Crispy Fish Taco Bowls
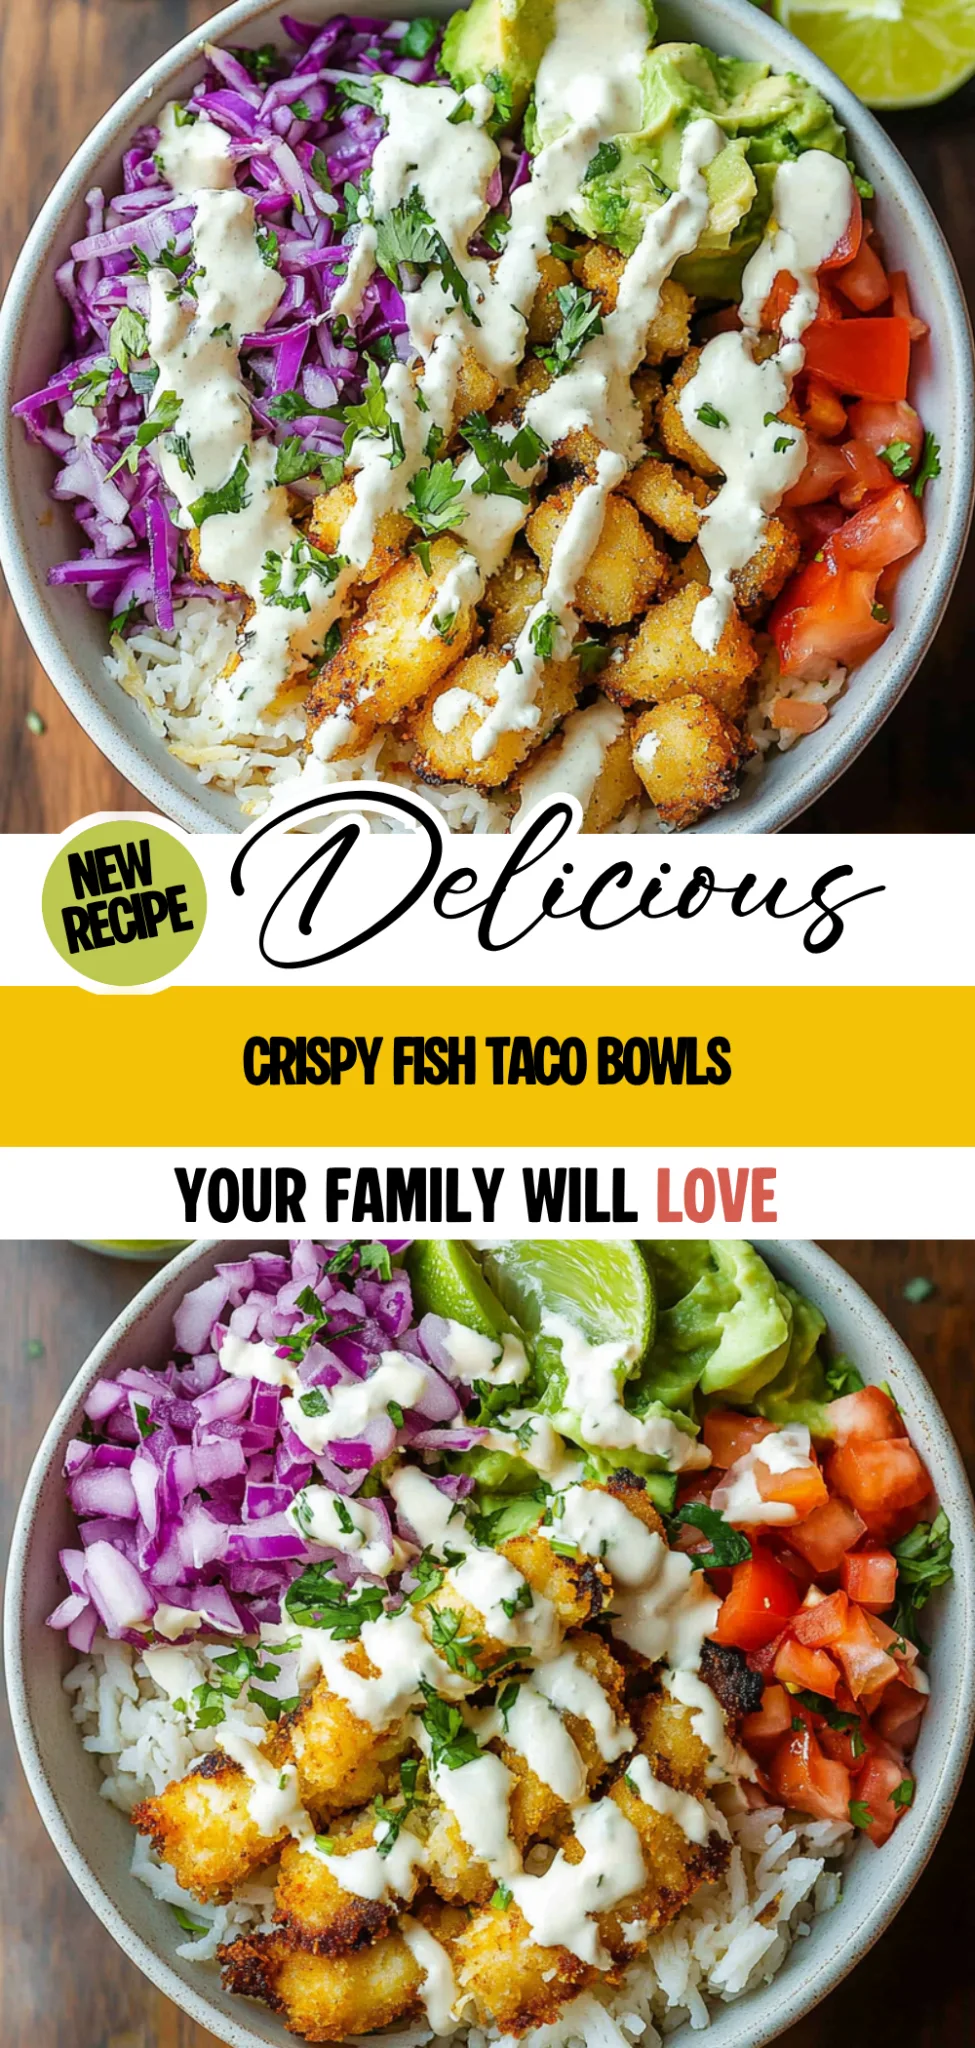
Are you ready to see how straightforward it is to make the Crispy Fish Taco Bowls of your dreams??
1. PREPARE THE FISH
Let’s get that fish crispy and golden!
1. Preheat – Preheat your oven to 425°F (220°C). This high temperature will help achieve that perfect crispy finish on your fish!
2. Mix – In a bowl, combine the flour, paprika, garlic powder, salt, and black pepper. This seasoning blend not only flavors the fish but also helps create a delicious crust when baked.
3. Dredge – Take each fish fillet and dredge it in the flour mixture, ensuring it’s well coated. Next, dip it into the beaten eggs, allowing any excess to drip off before coating it with panko breadcrumbs. This three-step process builds layers of flavor and texture that will make your fish irresistible!
4. Bake – Place the coated fish on a baking sheet lined with parchment paper for easy cleanup. Bake in the preheated oven for 12-15 minutes, or until the fish is golden brown and cooked through. It should flake easily with a fork—this is when you know it’s done!
HANDY TIPS
- Use panko breadcrumbs instead of regular breadcrumbs for extra crunch.
- If you prefer lighter options, tilapia is a great choice as it cooks quickly and stays moist.
2. MAKE THE ZESTY SAUCE
This sauce will add a burst of flavor to your bowls!
5. Whisk – In a small bowl, whisk together mayonnaise, lime juice, hot sauce (if using), and minced garlic until smooth. This zesty sauce brings all the elements of your taco bowl together with its creamy tang.
HANDY TIPS
- Adjust the amount of lime juice based on how tangy you like your sauce; more juice means more brightness!
- For a spicy kick, don’t skip the hot sauce—it elevates the entire dish!
3. ASSEMBLE THE BOWLS
Time to put everything together for a delightful meal!
6. Layer – In each bowl, start by layering your cooked rice at the bottom—this will be the hearty base for your toppings! Add in shredded lettuce, diced tomatoes, corn, and sliced avocado on top.
7. Top – Finally, place pieces of the crispy baked fish over the top of your layered ingredients. Drizzle generously with that zesty sauce you made earlier and garnish with freshly chopped cilantro and a squeeze of lime juice for an extra pop!
HANDY TIPS
- Use either white or brown rice according to your preference; both work well as a base.
- Feel free to mix up toppings—add black beans or pickled jalapeños for added flavor!
Now you’ve created these vibrant Crispy Fish Taco Bowls packed with flavor and texture! Each bite delivers crunchy fish along with fresh vegetables and zesty sauce—a perfect combination that’s sure to impress! Make these once, and I wager they will invade your dreams every night too! – Nagi x
FAQ – Crispy Fish Taco Bowls
❄️ How long can I store the crispy fish taco bowls in the fridge?
The crispy fish taco bowls can be stored in the fridge for up to 2 days. However, I recommend consuming them within 24 hours for the best quality—after that, the fish may lose its crispiness and freshness. Here’s a quick rundown:
- Day 1: 100% as good
- Day 2: 85% as good
- Day 3: 70% as good (the fish texture will be noticeably affected)
⏳ Can I skip letting the fish rest after coating it?
No, you shouldn’t skip resting the coated fish! Resting for about 10 minutes allows the coating to adhere better, ensuring it stays crispy during baking. If you don’t let it rest, you risk having the breadcrumbs fall off or become soggy during cooking. Trust me, this little step makes a big difference!
❄️ Can I freeze the fish and taco bowl components?
Yes, you can freeze certain components! Here’s how:
- Fish Fillets: Coat and freeze uncooked fillets on a baking sheet first; once frozen solid, transfer to a freezer-safe bag. They’ll keep for up to 3 months.
- Cooked Rice & Toppings: Cooked rice can be frozen in airtight containers for up to 6 months. Fresh toppings like lettuce and tomatoes are best enjoyed fresh but can be prepped and stored separately in the fridge until you’re ready to assemble.
To thaw, simply place everything in the fridge overnight before cooking.
🌾 Can I make these taco bowls gluten-free?
Absolutely! To make these crispy fish taco bowls gluten-free, substitute all-purpose flour with a gluten-free flour blend and use gluten-free panko breadcrumbs. Just ensure your other ingredients (like mayonnaise) are also labeled gluten-free if you have a severe sensitivity. You won’t miss out on any of that delicious crispiness!
🥚 What can I use instead of eggs for coating the fish?
If you’re looking for an egg substitute for coating, I recommend using aquafaba (the liquid from canned chickpeas) or unsweetened applesauce. Use about 3 tablespoons of aquafaba or applesauce per egg. This helps with adhesion but do note that it may not create quite as crisp of a coating as eggs do—still tasty though!
🐟 Why do we coat the fish in flour before eggs and breadcrumbs?
Coating the fish in flour first helps create a barrier that keeps moisture in while allowing the egg wash to adhere better to the surface of the fillet. This method results in a crunchier crust when baked because it prevents sogginess from moisture escaping during cooking. Plus, it gives you that beautiful golden color we all love!
🌶️ Can I customize the toppings in my taco bowl?
Of course! One of my favorite things about these taco bowls is their versatility. You can add or swap out toppings based on your preferences:
- Protein Options: Try shrimp or grilled chicken.
- Vegetable Choices: Add diced bell peppers, jalapeños, or radishes.
- Sauce Variations: Swap out sour cream for guacamole or a creamy avocado dressing.
Get creative—these bowls are as customizable as your imagination allows!
Troubleshooting
I will continue to add more to this Troubleshooting section as I start seeing questions coming through from people who have made the recipe.
Troubleshooting tips
“My fish came out too dry! 😭”
- If you baked the fish for longer than 15 minutes, it may have overcooked and dried out. Fish cooks quickly, so even an extra minute can make a difference.
- Another culprit could be using a thicker fillet; thicker pieces require a longer cooking time, which might lead to dryness if not monitored closely.
- Remember, I bet they were still YUM though!
“The coating on my fish didn’t get crispy! 🔥”
- If your panko breadcrumbs were stale or you didn’t coat them evenly, it can prevent that delightful crunch. Fresh breadcrumbs are key for the best texture!
- Not spraying the fish with cooking spray or olive oil before baking can also lead to a less crispy result. A light coating helps achieve that golden brown finish.
- I bet they were still YUM though!
“My fish is unevenly browned! 😟”
- If your baking sheet was overcrowded with fish fillets, they might not brown evenly due to steam. Give them space to breathe!
- Also, ensure your oven is properly preheated to 425°F (220°C). An oven that’s not hot enough can lead to uneven cooking.
- I bet they were still YUM though!
“My tacos look all wonky and messy! 😅”
- If you used too much filling in each bowl, it can cause everything to spill out and look unappealing. Be mindful of portion sizes when layering your ingredients.
- Additionally, if your rice was too wet, it might make it harder for everything to hold together neatly in the bowl.
- I bet they were still YUM though!