I first discovered the magic of coffee rolls during a cozy brunch outing at a charming little café that just so happened to serve the most divine version I’d ever tasted. The moment I bit into that soft, pillowy roll, infused with rich coffee flavor and topped with a sweet glaze, I knew I had to recreate it at home. Not just because I was dreaming about them at ungodly hours (yes, I am that obsessed), but also because let’s be real: making these beauties myself would save me some serious cash and give me the added joy of customization.
After many hilarious attempts—let’s just say my kitchen looked like a flour bomb exploded—I finally nailed this recipe after roughly ten tries. Each round was a new lesson in patience and persistence; from over-proofing disasters to rolls that could double as hockey pucks, I was determined to get it right. I experimented with everything from different coffee blends to adjusting the dough hydration until I could finally achieve that perfect balance of flavor and texture. Spoiler alert: there were more than a few moments where I questioned my life choices while scraping dough off my countertops!
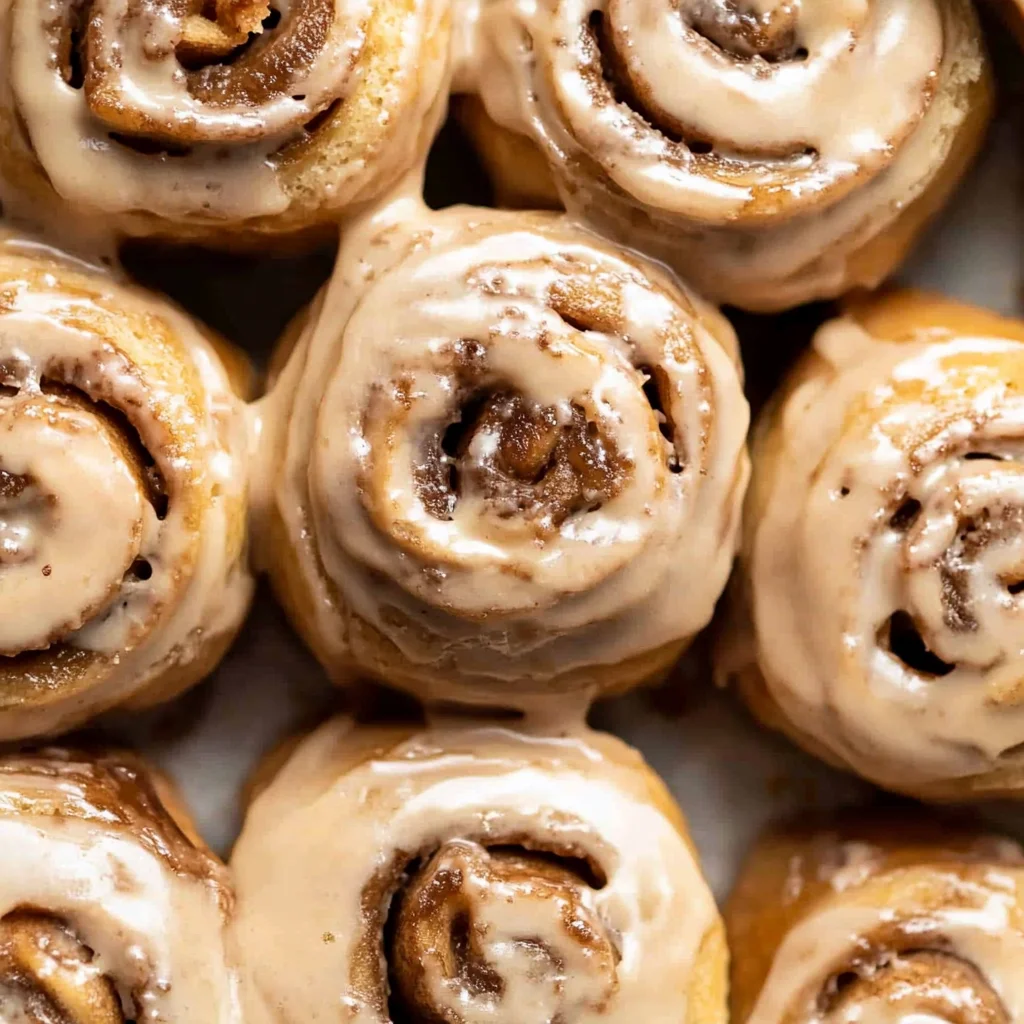
But oh boy, was it worth every sticky misstep! These coffee rolls turned out deliciously soft and fluffy, with a rich coffee flavor that dances on your palate, all beautifully complemented by that sweet glaze that drips down the sides. They’re not just pretty—they’ve got an irresistible texture that makes you want to devour them all in one sitting! Trust me, once you’ve sunk your teeth into these heavenly creations, you’ll be hooked. So grab your apron and let’s get rolling—your taste buds are in for a treat!
These Coffee Rolls are….
….the ultimate indulgence for coffee lovers looking for a sweet treat!
1. They deliver an irresistible coffee flavor that truly shines through each bite. This is achieved by using a full cup of strong brewed coffee in the filling, which infuses the dough with rich aromas and depth that will make your taste buds dance with joy.
2. Incredibly soft and fluffy texture – these rolls are a dream to bite into! The combination of warm milk and melted butter in the dough creates an airy structure that ensures each roll is delightfully light, making them perfect for pulling apart and sharing.
3. Expert kneading technique – I can’t emphasize enough how important it is to knead the dough just until it’s smooth and elastic. This step activates the gluten from the all-purpose flour, resulting in a beautifully risen dough that holds its shape and has a satisfying chew.
4. They offer exceptional value for your time and ingredients, making them perfect for home bakers. With simple pantry staples like flour, sugar, and instant yeast, you can whip up these Coffee Rolls at a fraction of the cost you’d pay at a bakery, all while enjoying the fresh-baked aroma wafting through your home.
PS These Coffee Rolls yield about 12 rolls, so they’re perfect for sharing — or keeping all to yourself if you’re feeling indulgent!
Ingredients You’ll Need
Each ingredient in this dish plays an essential role in flavor and texture. Here’s what you’ll need:
Dough
2 cups all-purpose flour (plus extra for dusting): Provides the structure and base for soft, fluffy rolls.
1 packet instant yeast (about 2 1/4 teaspoons): Helps the dough rise and creates a light texture.
1/4 cup granulated sugar: Balances the flavors and contributes to a tender crumb.
1/2 cup milk (warm): Activates the yeast and adds moisture for softness.
1/4 cup unsalted butter (melted): Enriches the dough, providing richness and flavor.
1 large egg: Binds the ingredients together while adding richness.
1/2 teaspoon salt: Enhances the overall flavor of the rolls.
Filling
1 cup strong brewed coffee (cooled): Infuses the rolls with rich coffee flavor.
1/4 cup brown sugar: Adds a hint of caramel sweetness and moisture to the filling.
1 tablespoon cinnamon: Imparts warm spice notes that complement the coffee.
1/4 cup unsalted butter (softened): Creates a luscious texture in the filling.
Glaze
1 cup powdered sugar: Provides sweetness and a smooth finish to the glaze.
2 tablespoons strong brewed coffee (cooled): Intensifies the coffee flavor in the sweet glaze.
1 teaspoon vanilla extract: Adds depth and warmth to balance the sweetness.
You Must Let the Dough Rise. No Skipping!
I know, I know—waiting for dough to rise can feel like watching paint dry. I was tempted to skip this step, thinking I could just power through and bake those coffee rolls right away. But let me tell you: after many trials (and a few sad, flat rolls), I realized that letting the dough rise is absolutely non-negotiable if you want the pillowy softness these rolls are known for.
The science behind this is simple yet fascinating. When you let the dough rise, you’re allowing the yeast to work its magic, producing carbon dioxide that gets trapped in the gluten structure. Think of it like blowing up a balloon; without inflation, it’s just a deflated piece of rubber! That rising time is essential for achieving a light and fluffy texture in your coffee rolls—trust me, your taste buds will thank you.
What does letting the dough rise do?
- Fluffiness: The yeast produces carbon dioxide bubbles that expand during baking, creating an airy and fluffy texture.
- Flavor Development: Extended fermentation allows for deeper flavors to develop as yeast breaks down sugars in the flour—this is why store-bought bread can’t compare!
- Texture Improvement: The gluten structure strengthens during rising, resulting in a chewy yet tender bite that melts in your mouth.
- Better Color: A well-risen dough leads to even browning while baking because of the caramelization of sugars—goodbye pale rolls!
- Shelf Life: Allowing the dough to rise properly helps retain moisture during baking, keeping your coffee rolls soft and fresh longer.
Different Rising Times
- 30 minutes (okay) — This is the bare minimum; the rolls will rise slightly but will be denser than desired.
- 1 hour (good) — A more optimal time; you’ll get decent fluffiness and better flavor development.
- 1.5 hours (great) — An excellent option for richer flavor and noticeable lightness in texture.
- 2+ hours (best) — If you’re feeling adventurous, a longer rise (even overnight in the fridge) can enhance flavor complexity like you wouldn’t believe!
Let me be clear: if you skimp on rising time, you’re setting yourself up for dense and sad rolls. It’s tempting to rush through this process, but trust me when I say that patience pays off deliciously!
How to make Coffee Rolls

Are you ready to see how straightforward it is to make the Coffee Rolls of your dreams??
1. PREPARE THE DOUGH
Let’s get that dough rising and ready for some delicious rolls!
1. COMBINE – In a mixing bowl, combine warm milk, sugar, and yeast. Let it sit for 5 minutes until frothy. This step is crucial as it activates the yeast, ensuring fluffy rolls!
2. MIX – Add melted butter, egg, and salt to the yeast mixture. Gradually add flour while mixing until a dough forms. You want a soft, slightly sticky dough that will hold together well.
3. KNEAD – Knead the dough on a floured surface for about 5 minutes until smooth. Place in a greased bowl, cover, and let rise for 1 hour until doubled in size.
HANDY TIPS
- Make sure your milk is warm (not hot) to avoid killing the yeast.
- If the dough feels too sticky while kneading, sprinkle a little extra flour as needed.
2. MAKE THE FILLING
The rich coffee filling will take these rolls to the next level!
4. MIX – In a small bowl, mix softened butter, brown sugar, and cinnamon until well combined. This filling should be spreadable yet thick enough to stay on the dough when rolled.
HANDY TIPS
- Use freshly brewed strong coffee for maximum flavor in your filling.
- If you prefer a sweeter roll, feel free to adjust the brown sugar according to your taste.
3. ASSEMBLE THE ROLLS
Now comes the fun part – rolling them up!
5. PREHEAT – Preheat the oven to 350°F (175°C). Roll out the dough on a floured surface into a rectangle about ½ inch thick.
6. SPREAD – Spread the filling evenly over the rolled-out dough, ensuring every bite will be deliciously infused with flavor!
7. ROLL & CUT – Roll it tightly into a log from one end to another and then cut into 8 equal pieces using a sharp knife or dental floss (it works wonders!). Place them on a greased baking sheet and let them rise for another 30 minutes.
HANDY TIPS
- For even baking, ensure that all pieces are roughly equal in size.
- Covering rolls with a clean kitchen towel during their second rise helps retain moisture.
4. BAKE THE ROLLS
The aroma will be irresistible as they bake!
8. BAKE – Bake in the preheated oven for 20-25 minutes until golden brown and fragrant.
9. COOL – Remove from the oven and let cool slightly before glazing; this will allow them to set properly without becoming soggy.
HANDY TIPS
- Keep an eye on them in the last few minutes of baking; you want that perfect golden hue!
- If you like your rolls extra fluffy, try not to overcrowd them on the baking sheet.
5. PREPARE THE GLAZE
Finish these delightful rolls with a sweet touch!
10. WHISK – In a bowl, whisk together powdered sugar, coffee, and vanilla until smooth and slightly thickened.
11. DRIZZLE – Drizzle the glaze over the warm rolls before serving for that sweet finish that ties everything together beautifully!
HANDY TIPS
- Adjust glaze thickness by adding more coffee or powdered sugar depending on your preference.
- For added flair, sprinkle some crushed nuts or chocolate chips on top of the glaze while it’s still wet!
These coffee rolls are not just any treat; they’re soft clouds of joy infused with rich coffee flavor topped with sweet glaze—perfect for breakfast or an afternoon snack! Make these once, and I wager they will invade your dreams every night too! – Nagi x
FAQ – Coffee Rolls
☕ How long will these coffee rolls keep?
These coffee rolls will stay fresh at room temperature for about 2-3 days in an airtight container. After that, their quality starts to decline significantly. On day four, they’re about 75% as good, and by the fifth day, you’re looking at around 50%. If you want them to last longer, I recommend freezing them; they can maintain their deliciousness for up to 3 months when properly wrapped.
⏳ Can I skip the resting time after mixing the dough?
No, you can’t skip it! The resting time is crucial for allowing the yeast to work its magic. This step helps the dough rise and develop that fluffy texture we all love. I’ve tested it multiple times — even a little reduction in rising time results in denser rolls. So be patient and let it rise for the full hour!
❄️ Can I freeze these coffee rolls?
Absolutely! To freeze, once they are shaped but before baking, place them on a baking sheet lined with parchment paper and freeze until solid. Then transfer them to a freezer bag or airtight container. When you’re ready to bake, simply take them out and let them thaw at room temperature for about 1-2 hours before baking as directed. You’ll still get that lovely fluffiness!
🌾 Can I make these coffee rolls gluten-free?
Yes, you can! For gluten-free coffee rolls, I recommend using a high-quality gluten-free all-purpose flour blend that contains xanthan gum. This will help mimic the elasticity of wheat flour. Keep in mind that gluten-free dough may not rise quite as much, so don’t be surprised if your rolls are not as fluffy as traditional ones — but they’ll still be delicious!
🍯 Can I substitute the brown sugar in the filling?
You can replace brown sugar with granulated sugar if needed, though it will change the flavor slightly. Brown sugar adds moisture and a hint of caramel flavor due to its molasses content. If you’re looking for an alternative sweetener, coconut sugar works well too! Just remember that using granulated sugar may result in a less moist filling.
🤔 Why do I need to knead the dough for 5 minutes?
Kneading develops gluten in the dough, which gives your coffee rolls their structure and chewiness. If you don’t knead enough, your rolls might turn out flat or dense rather than soft and fluffy. Trust me; I’ve tried skipping this step just to see what happens (spoiler alert: it wasn’t pretty). So roll up your sleeves and give it a good knead!
🎉 Can I add nuts or chocolate chips to the filling?
Yes! Feel free to customize your filling by adding chopped walnuts or pecans for a delightful crunch or even chocolate chips if you’re feeling indulgent. Just keep in mind that adding too many extras might alter the moisture content of your filling slightly, so adjust accordingly! Enjoy getting creative with these rolls; they’re very forgiving!
Troubleshooting
I will continue to add more to this Troubleshooting section as I start seeing questions coming through from people who have made the recipe.
Troubleshooting tips
“My coffee rolls were flat and didn’t rise! 😭”
- You might have used milk that was too hot, which can kill the yeast. The milk should be warm, around 110°F (43°C), to activate the yeast properly.
- If your dough didn’t sit long enough, it won’t have had sufficient time to develop air bubbles. Be sure to let it rise for a full hour.
- Did you check the expiration date on your yeast? Old yeast can lose its potency, leading to disappointing results.
I bet they were still YUM though!
“The texture of my coffee rolls was too dense! 😩”
- It’s possible you added too much flour while kneading. Flour measurements can vary, so make sure to only add enough flour to keep the dough slightly sticky.
- Over-kneading can also create a tough texture. Aim for about 5 minutes of kneading until smooth but not overly elastic.
I bet they were still YUM though!
“My rolls came out unevenly baked and some were too dark! 🔥”
- If your oven temperature was too high, this could cause the outside to brown too quickly while the inside remains undercooked. Make sure your oven is calibrated correctly to 350°F (175°C).
- Not placing your rolls in the center of the oven can lead to uneven baking. Always use the middle rack for optimal heat distribution.
I bet they were still YUM though!
“My rolls split on top and look wonky! 😕”
- If you rolled your dough too tightly when forming the log, it may have created pressure that caused them to split while baking. Try rolling more gently next time!
- Additionally, if your dough was over-proofed during the second rise, it could expand too much in the oven and result in cracks. Keep an eye on that rising time!
I bet they were still YUM though!
Coffee Rolls
Ingredients
Method
- In a mixing bowl, combine warm milk, sugar, and yeast. Let it sit for 5 minutes until frothy.
- Add melted butter, egg, and salt to the yeast mixture. Gradually add flour and mix until a dough forms.
- Knead the dough on a floured surface for about 5 minutes until smooth. Place in a greased bowl, cover, and let rise for 1 hour.
- In a small bowl, mix softened butter, brown sugar, and cinnamon until well combined.
- Preheat the oven to 350°F (175°C). Roll out the dough on a floured surface into a rectangle.
- Spread the filling evenly over the dough, then roll it tightly into a log.
- Cut the log into 8 equal pieces and place them on a greased baking sheet. Let them rise for another 30 minutes.
- Bake in the preheated oven for 20-25 minutes until golden brown.
- Remove from the oven and let cool slightly before glazing.
- In a bowl, whisk together powdered sugar, coffee, and vanilla until smooth.
- Drizzle the glaze over the warm rolls before serving.