I first stumbled upon a Chocolate Cream Cheese Danish at my favorite local café, and let me tell you, it was love at first bite. The way the buttery pastry cradled that luscious, rich chocolate cream cheese filling had me daydreaming about it for days. I couldn’t shake the craving and figured, why not try recreating this little piece of heaven at home? Not only is it a great way to save some cash (because let’s face it, those café prices can add up!), but I also wanted to see if I could make it even better than the original.
After a rather embarrassing number of attempts—let’s just say my kitchen looked like a pastry battleground—I finally found the perfect balance of flavors and texture. I lost count after six tries, each one teaching me something new about working with dough and that oh-so-tempting cream cheese filling. From overbaking to underfilling, I made nearly every mistake in the book, all while aiming for that ideal flaky exterior and rich, creamy interior. But hey, if I didn’t laugh at myself along the way, I’d have cried over so much wasted chocolate!
But oh boy, was it worth every mishap! The final Chocolate Cream Cheese Danish emerged from the oven golden-brown and smelling divine. It’s got that incredible flaky texture on the outside while being filled with an indulgent chocolate cream cheese mixture that melts in your mouth. Trust me when I say that once you take a bite, you’ll be hooked—it’s perfect for breakfast or dessert (or both!). So roll up your sleeves and let’s get baking; you won’t regret diving into this deliciousness!
These Chocolate Cream Cheese Danish are….
…a heavenly blend of rich flavors and textures that will elevate your breakfast or dessert game!
1. They offer a decadent chocolate flavor that’s simply irresistible. The combination of creamy chocolate cream cheese and semi-sweet chocolate chips creates a luscious filling that sings with every bite, ensuring a delightfully rich taste experience that’s hard to resist.
2. Perfectly flaky texture – each Danish has a crisp, golden exterior that gives way to a soft, tender center. This delightful contrast comes from using high-quality puff pastry, which puffs beautifully during baking, resulting in layers that are both airy and satisfying to chew.
3. Elevated technique – the secret lies in the egg wash applied before baking. This simple step not only gives the pastries an attractive shine but also helps achieve that beautiful golden-brown color while sealing in moisture for a fresher taste.
4. Budget-friendly indulgence – making these Chocolate Cream Cheese Danish at home is cost-effective compared to purchasing them from a bakery. With just a few simple ingredients, you can whip up a batch that rivals any café offering, allowing you to enjoy gourmet pastries without breaking the bank.
PS These delightful pastries yield about 6 servings, making them perfect for sharing with family or friends—or keeping all to yourself!
Ingredients for the Chocolate Cream Cheese Danish
Each ingredient in this dish plays an essential role in flavor and texture. Here’s what you’ll need:
1 sheet puff pastry (thawed): Provides a flaky, buttery base that envelops the rich filling.
8 oz cream cheese (softened): Creates a creamy, tangy layer that balances the sweetness and chocolate.
1/2 cup powdered sugar: Adds sweetness and helps achieve a smooth filling consistency.
1/4 cup cocoa powder (unsweetened): Infuses deep chocolate flavor without extra sweetness.
1 tsp vanilla extract: Enhances the overall flavor profile with its warm, aromatic notes.
1/2 cup chocolate chips (semi-sweet): Delivers bursts of melted chocolate goodness throughout the pastry.
1 egg (beaten for egg wash): Gives the pastry a beautiful golden-brown finish when baked.
1 tbsp milk (for egg wash): Helps achieve a glossy and rich color on the pastry’s surface.
Don’t Skip the Cream Cheese Mixing Step! Trust Me!
I’ll be honest—I tried to cut corners with the filling for this Chocolate Cream Cheese Danish. I thought, “Surely, I can just dump everything in and mix it quickly!” Spoiler alert: that was a mistake. The smooth, creamy texture I was hoping for turned into a lumpy mess, and let’s just say my Danish dreams were dashed.
Mixing your cream cheese filling until it’s perfectly smooth is non-negotiable. Think of it like making a rich frosting; you wouldn’t want bits of sugar or butter lurking around, would you? A well-mixed filling ensures that the chocolate and cream cheese marry harmoniously, giving you that luxurious richness in every bite of your flaky pastry.
What does mixing the cream cheese do?
- Texture — A smooth filling creates a luscious mouthfeel, while lumps can lead to uneven bites.
- Incorporation — Proper mixing ensures all ingredients (sugar, cocoa, vanilla) are evenly distributed for consistent flavor.
- Airiness — Mixing well introduces air into the cream cheese, resulting in a lighter filling that complements the crispy pastry.
- Stability — A blended mixture holds together better when baked, preventing any unsightly leaks during cooking.
- Flavor Fusion — Emulsifying the ingredients enhances the depth of flavor, creating a decadent chocolate experience.
Different mixing times
- 1 minute (acceptable) — Filling is mixed but still has some lumps; it will bake okay but lacks creaminess.
- 2 minutes (good) — Most lumps are gone; the filling is better but not as airy or cohesive as it could be.
- 3 to 4 minutes (great) — Achieves smoothness and lightness; perfect for that creamy indulgence you crave!
- Beyond 5 minutes (overmixing risk) — Potentially too airy or might start incorporating water from over-mixing; proceed with caution.
Don’t make the common mistake of under-mixing your filling! You want that rich chocolate cream cheese goodness to shine through without any rogue lumps ruining your perfect Danish. Trust me—your taste buds will thank you!
How to make Chocolate Cream Cheese Danish

Are you ready to see how straightforward it is to make the Chocolate Cream Cheese Danish of your dreams??
1. PREPARE THE FILLING
Let’s start with that luscious chocolate cream cheese filling that will have everyone coming back for more!
1. Combine – In a mixing bowl, combine softened cream cheese, powdered sugar, cocoa powder, and vanilla extract. Mix until smooth and creamy, ensuring there are no lumps for a velvety texture.
2. Fold in – Gently fold in the chocolate chips until evenly distributed throughout the mixture, adding delightful pockets of chocolate in every bite.
HANDY TIPS
- Ensure your cream cheese is softened to room temperature for easy mixing.
- For an extra rich flavor, use high-quality cocoa powder.
2. PREPARE THE PASTRY
Now it’s time to get that puff pastry ready for some delicious filling!
3. Preheat – Preheat your oven to 375°F (190°C) so it’s hot and ready to create that golden crust when we bake our danishes.
4. Roll out – On a lightly floured surface, roll out the puff pastry to smooth out any creases; this ensures even baking and a beautiful finish.
5. Cut – Cut the rolled pastry into 4 equal squares, making sure they are ample enough to hold the filling without spilling.
HANDY TIPS
- If your puff pastry feels too soft or sticky, chill it briefly in the fridge before cutting.
- Make sure your squares are even; it helps them bake uniformly.
3. ASSEMBLE THE DANISHES
This is where the magic happens as we bring together our filling and pastry!
6. Place – Take a generous spoonful of the chocolate cream cheese filling and place it in the center of each pastry square, being careful not to overfill them.
7. Fold – Fold the corners of the pastry over the filling to create a pocket shape, pinching the edges tightly to seal them; this keeps all that deliciousness inside while baking!
8. Brush – Mix the beaten egg with milk and brush this mixture over the tops of the pastries for a beautiful golden sheen once baked.
HANDY TIPS
- If you want a fancier look, try crimping or twisting the edges instead of just pinching them.
- Using a fork can help seal those edges securely!
4. BAKE
The final step is baking these beauties until they are golden brown and irresistible!
9. Place – Carefully place the assembled danishes on a baking sheet lined with parchment paper; this prevents sticking and makes cleanup easier.
10. Bake – Bake in your preheated oven for about 20-25 minutes or until they are beautifully golden brown and puffed up; keep an eye on them towards the end!
11. Cool – Once baked, remove from the oven and let cool slightly before serving – this allows them to set perfectly without burning your tongue!
HANDY TIPS
- If you’re feeling adventurous, sprinkle some extra chocolate chips on top before baking!
- These danishes are best enjoyed warm but can be stored in an airtight container for up to two days.
Make these delightful Chocolate Cream Cheese Danishes once, and I guarantee they’ll become a regular feature at your breakfast table or dessert spread! Enjoy every gooey morsel—happy baking! – Nagi x
FAQ – Chocolate Cream Cheese Danish
How long will these pastries keep?
Chocolate Cream Cheese Danishes are best enjoyed fresh, but they can be stored in an airtight container in the refrigerator for up to 3 days. However, I found that their quality diminishes over time:
- Day 1: 100% delicious
- Day 2: 90% as good — still tasty, but the pastry may lose some flakiness
- Day 3: 80% as good — they still taste great, but the texture might be a bit chewy.
For optimal enjoyment, I recommend reheating them briefly in the oven to restore some of that lovely crispiness.
❄️ Can I freeze these danishes?
Yes! You can freeze the assembled, unbaked danishes. Simply place them on a baking sheet lined with parchment paper and freeze until solid. Then transfer them to an airtight container or freezer bag and store for up to 2 months. When you’re ready to bake, there’s no need to thaw; just add a few extra minutes to your baking time. They’ll taste just as fresh as when you made them!
🌾 Can I make this recipe gluten-free?
Absolutely! You can use gluten-free puff pastry instead of regular puff pastry. Many brands offer frozen options that perform similarly in texture and flavor. Just be sure to check the package instructions for baking times, as they may vary slightly from traditional puff pastry. Enjoy your delicious chocolate treats without the gluten guilt!
Can I reduce the sugar or substitute it with sweeteners?
Nope! I really tried reducing the sugar in this recipe multiple times (I think it was at least 10 experiments), and trust me, it just doesn’t work. The balance of sweetness is crucial for complementing the rich chocolate flavor, and using sweeteners instead often results in a weird aftertaste or alters the consistency of the filling. Stick with powdered sugar for the best results!
Why do I need to roll out the puff pastry?
Rolling out the puff pastry helps to smooth out any creases and ensures even thickness throughout each square. This is essential because unevenly rolled pastry can lead to inconsistent baking — some parts may burn while others remain undercooked. Plus, rolling it out gives you a little more surface area to work with when filling and sealing — and who doesn’t want a generous serving of that chocolate cream cheese goodness?
What if I don’t have chocolate chips?
You can absolutely substitute chocolate chips with chopped chocolate bars or even cocoa nibs if you want an extra crunch! If you’re feeling adventurous, try adding some nuts or even dried fruit for added texture and flavor variation. Just remember that any substitutions should complement the rich cream cheese filling without overpowering it.
Did you really test this recipe that many times?
Yes! You could say I’ve gone a bit mad over these danishes 😅. Each iteration taught me something new about how different ingredients interact — from adjusting baking times based on how flaky I wanted my pastry to be, to finding that perfect balance between creaminess and richness in the filling. Trust me when I say this recipe is tested and approved for maximum deliciousness!
Troubleshooting
I will continue to add more to this Troubleshooting section as I start seeing questions coming through from people who have made the recipe.
Troubleshooting tips
“My danishes came out flat and sad! 😭”
- Your puff pastry may not have been cold enough before baking. Puff pastry relies on steam to rise, so if it’s too warm, it won’t puff up properly. Make sure your pastry is chilled before you cut it into squares and handle it minimally.
- You might not have rolled the pastry out evenly, resulting in uneven thickness. Aim for uniform squares of about 1/8 inch thick to ensure they rise consistently. I bet they were still YUM though!
“The filling was too runny and oozed everywhere! 😱”
- If your cream cheese wasn’t softened enough, it can be difficult to incorporate the powdered sugar and cocoa powder smoothly, leading to a runnier consistency. Ensure that your cream cheese is at room temperature for easy mixing.
- Using too much cocoa powder without balancing with an extra bit of cream cheese or powdered sugar can also cause a loose filling. Stick to the specified measurements for best results! I bet they were still YUM though!
“My pastries are darker on one side than the other! 🔥”
- Uneven baking can occur if your oven has hot spots. To combat this, rotate the baking sheet halfway through baking to ensure even heat distribution.
- Placing the pastries too close to the heating element can also lead to browning on one side. Try positioning your baking sheet in the center of the oven next time. I bet they were still YUM though!
“The tops of my danishes split open during baking! 😳”
- If you didn’t seal the edges well when folding over the pastry, steam can escape during baking and cause splitting. Make sure to pinch those edges tightly!
- Alternatively, if your filling was overstuffed, that can also lead to bursting seams. Use only a generous spoonful as indicated in the instructions for perfect pockets! I bet they were still YUM though!
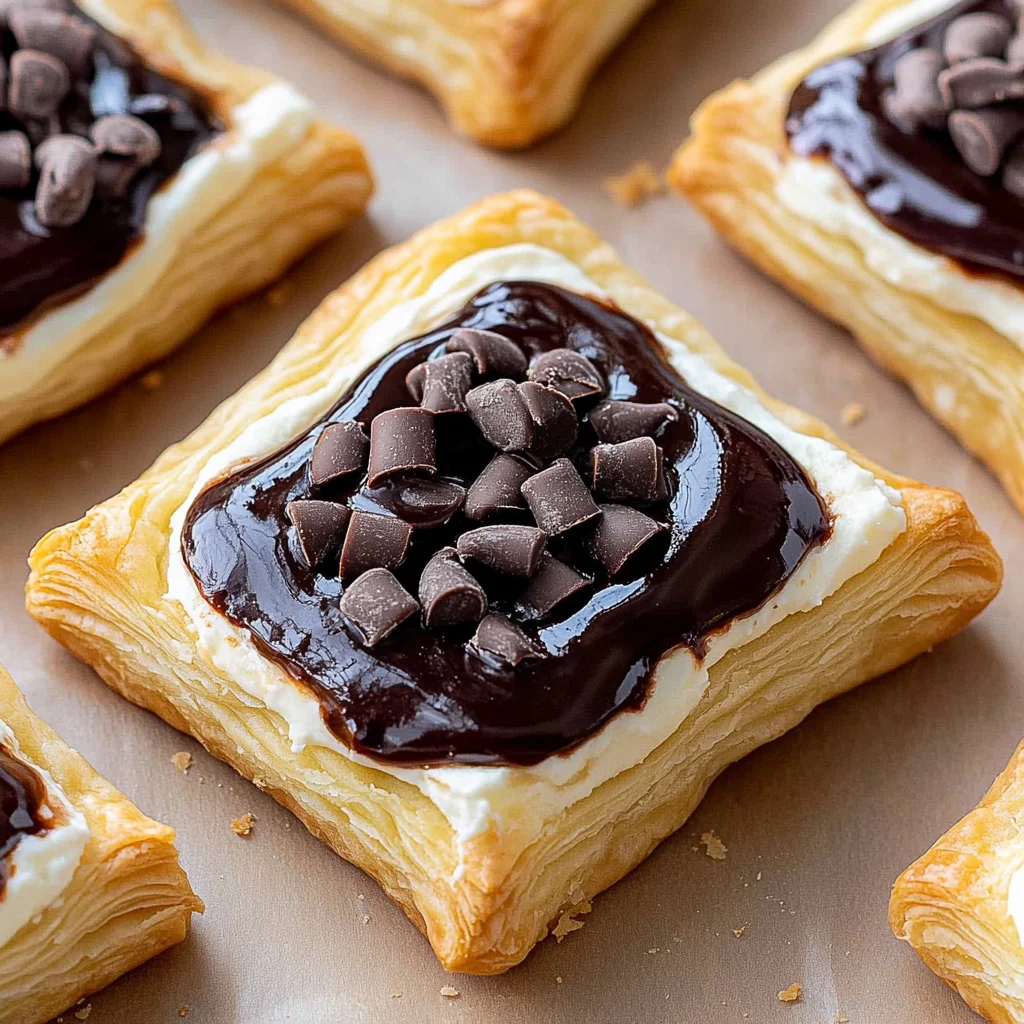
Chocolate Cream Cheese Danish
Ingredients
Method
- In a mixing bowl, combine softened cream cheese, powdered sugar, cocoa powder, and vanilla extract. Mix until smooth and creamy.
- Fold in the chocolate chips until evenly distributed.
- Preheat the oven to 375°F (190°C).
- Roll out the puff pastry on a lightly floured surface to smooth out any creases.
- Cut the pastry into 4 equal squares.
- Place a generous spoonful of the chocolate cream cheese filling in the center of each pastry square.
- Fold the corners of the pastry over the filling to create a pocket, pinching the edges to seal.
- Mix the beaten egg with milk and brush the mixture over the tops of the pastries.
- Place the assembled danishes on a baking sheet lined with parchment paper.
- Bake in the preheated oven for 20-25 minutes or until golden brown.
- Remove from the oven and let cool slightly before serving.