I still remember the first time I had Chicken Caesar Pasta Salad at a little bistro in my neighborhood. It was one of those meals that just stuck with me — the juicy chicken, the crisp romaine, and that creamy Caesar dressing that danced on my taste buds. I thought, “I’ve got to recreate this at home!” But let’s be real, eating out can get pricey, and I was determined to whip up something even better in my own kitchen without breaking the bank. Plus, who doesn’t love a dish that combines all the best parts of a classic Caesar salad and pasta?
After several trials that ranged from slightly soggy to overly bland, I finally settled into an obsessive rhythm of testing — we’re talking five iterations over two weeks! Each time I tweaked the ratios: a splash more lemon here, an extra dash of garlic there. I’ll admit, there were a few culinary disasters that made me question my sanity (and my cooking skills), but hey, nothing ventured, nothing gained! By the end of it, not only did I want to nail that creamy texture, but I also aimed for a balance of flavors that would make each bite sing.
And let me tell you, it was worth every minute spent in the kitchen! The final result is a delicious and hearty Chicken Caesar Pasta Salad that boasts tender chicken mingling with crisp romaine and enveloped in a luscious Caesar dressing. You’re gonna love how the textures play together — think crunchy lettuce with velvety pasta and a bit of crunch from croutons for good measure. So grab your apron and get ready to enjoy this delightful dish; trust me, your taste buds will thank you!
These Chicken Caesar Pasta Salad are….
….the ultimate fusion of flavors and textures that will have you coming back for seconds!
1. They offer a bold, savory flavor that comes from the combination of tender chicken and creamy Caesar dressing. The rich taste is elevated by the addition of parmesan cheese, which adds an irresistible depth that makes every bite a delight.
2. Perfectly balanced texture – a harmonious mix of chewy pasta and crisp vegetables. The penne pasta provides a sturdy base that holds up against the creamy dressing, while the crunchy romaine and juicy cherry tomatoes add refreshing pops of texture in every forkful.
3. Elevated technique – using leftover cooked chicken breast to create a heartier salad that’s both satisfying and efficient. This not only saves time but also adds layers of flavor, ensuring that your Chicken Caesar Pasta Salad is robust without needing to cook protein from scratch.
4. Incredible value – this recipe is a cost-effective way to enjoy a restaurant-quality dish at home. By using simple ingredients like pasta and rotisserie chicken, you can whip up a generous serving that’s perfect for meal prepping or feeding a crowd without breaking the bank.
PS This Chicken Caesar Pasta Salad serves 4-6 people generously, making it ideal for gatherings or as an easy weeknight meal!
Ingredients for the Chicken Caesar Pasta Salad
Each ingredient in this dish plays an essential role in flavor and texture. Here’s what you’ll need:
8 oz penne pasta (or any pasta of choice): Provides a hearty base that holds onto the dressing.
2 cups cooked chicken breast (shredded or diced): Adds protein and a savory richness to the salad.
4 cups romaine lettuce (chopped): Contributes a refreshing crunch and vibrant color.
1 cup cherry tomatoes (halved): Offers a burst of sweetness for balance and brightness.
1/2 cup red onion (thinly sliced): Introduces a mild sharpness that complements the other flavors.
1/2 cup Caesar dressing (store-bought or homemade): Brings creamy, tangy goodness that ties everything together.
1/4 cup parmesan cheese (grated): Enhances the dish with nutty, salty notes.
1 tsp black pepper (to taste): Adds a subtle kick that elevates the overall flavor profile.
1/4 cup croutons (optional): Provides an extra crunch for texture contrast.
2 tbsp fresh parsley (chopped, for garnish): Brightens up the dish with a pop of color and freshness.
You Must Cool Your Pasta. No Skipping!
I’ll confess: I tried to skip the step of cooling the pasta after cooking, thinking it wouldn’t make much difference. Spoiler alert: I was wrong! The first batch of my Chicken Caesar Pasta Salad was a mushy disaster, and I quickly learned that there are no shortcuts when it comes to achieving that perfect pasta texture. Sorry, not sorry for the extra effort!
Cooling the pasta is crucial because it halts the cooking process and prevents your penne from becoming overcooked and gummy. Think of it like letting a steak rest after cooking; if you slice into it right away, all those delicious juices run out, leaving you with a dry piece of meat. Similarly, if you don’t cool your pasta properly, you’ll end up with a salad that lacks that delightful bite — or “al dente” quality — which is so important in this Chicken Caesar Pasta Salad.
What does cooling your pasta do?
- Texture — Cooling the pasta stops cooking, ensuring it retains its firm bite rather than turning mushy.
- Taste — Chilling helps enhance the flavor as the starches set; warm pasta can absorb too much dressing, diluting the Caesar flavor.
- Presentation — Well-cooled pasta keeps its shape and doesn’t clump together, making for a more visually appealing salad.
- Mixing — Chilled pasta makes it easier to toss without breaking apart or causing other ingredients to wilt.
- Temperature balance — It ensures your salad is refreshing rather than warm and soggy, perfect for summertime meals.
Different cooling times
- Immediate cooling (good) — If you cool the pasta right away after draining, you’ll achieve decent texture and temperature control but may still have some slight stickiness.
- 10 minutes (better) — Letting it sit for about 10 minutes allows for better texture retention while still being manageable to toss with other ingredients.
- 20 minutes (best) — Optimal cooling time where you’ll get perfectly firm penne that holds up beautifully in the salad without clumping.
- Beyond 30 minutes (risk of drying out) — If left too long, your noodles might start to dry out around the edges; you want them cool but not desiccated!
So here’s your warning: Don’t skip cooling your pasta! The most common mistake is underestimating its importance; tossing warm pasta with dressing leads to soggy noodles and an unappealing salad. Trust me on this one!
How to make Chicken Caesar Pasta Salad
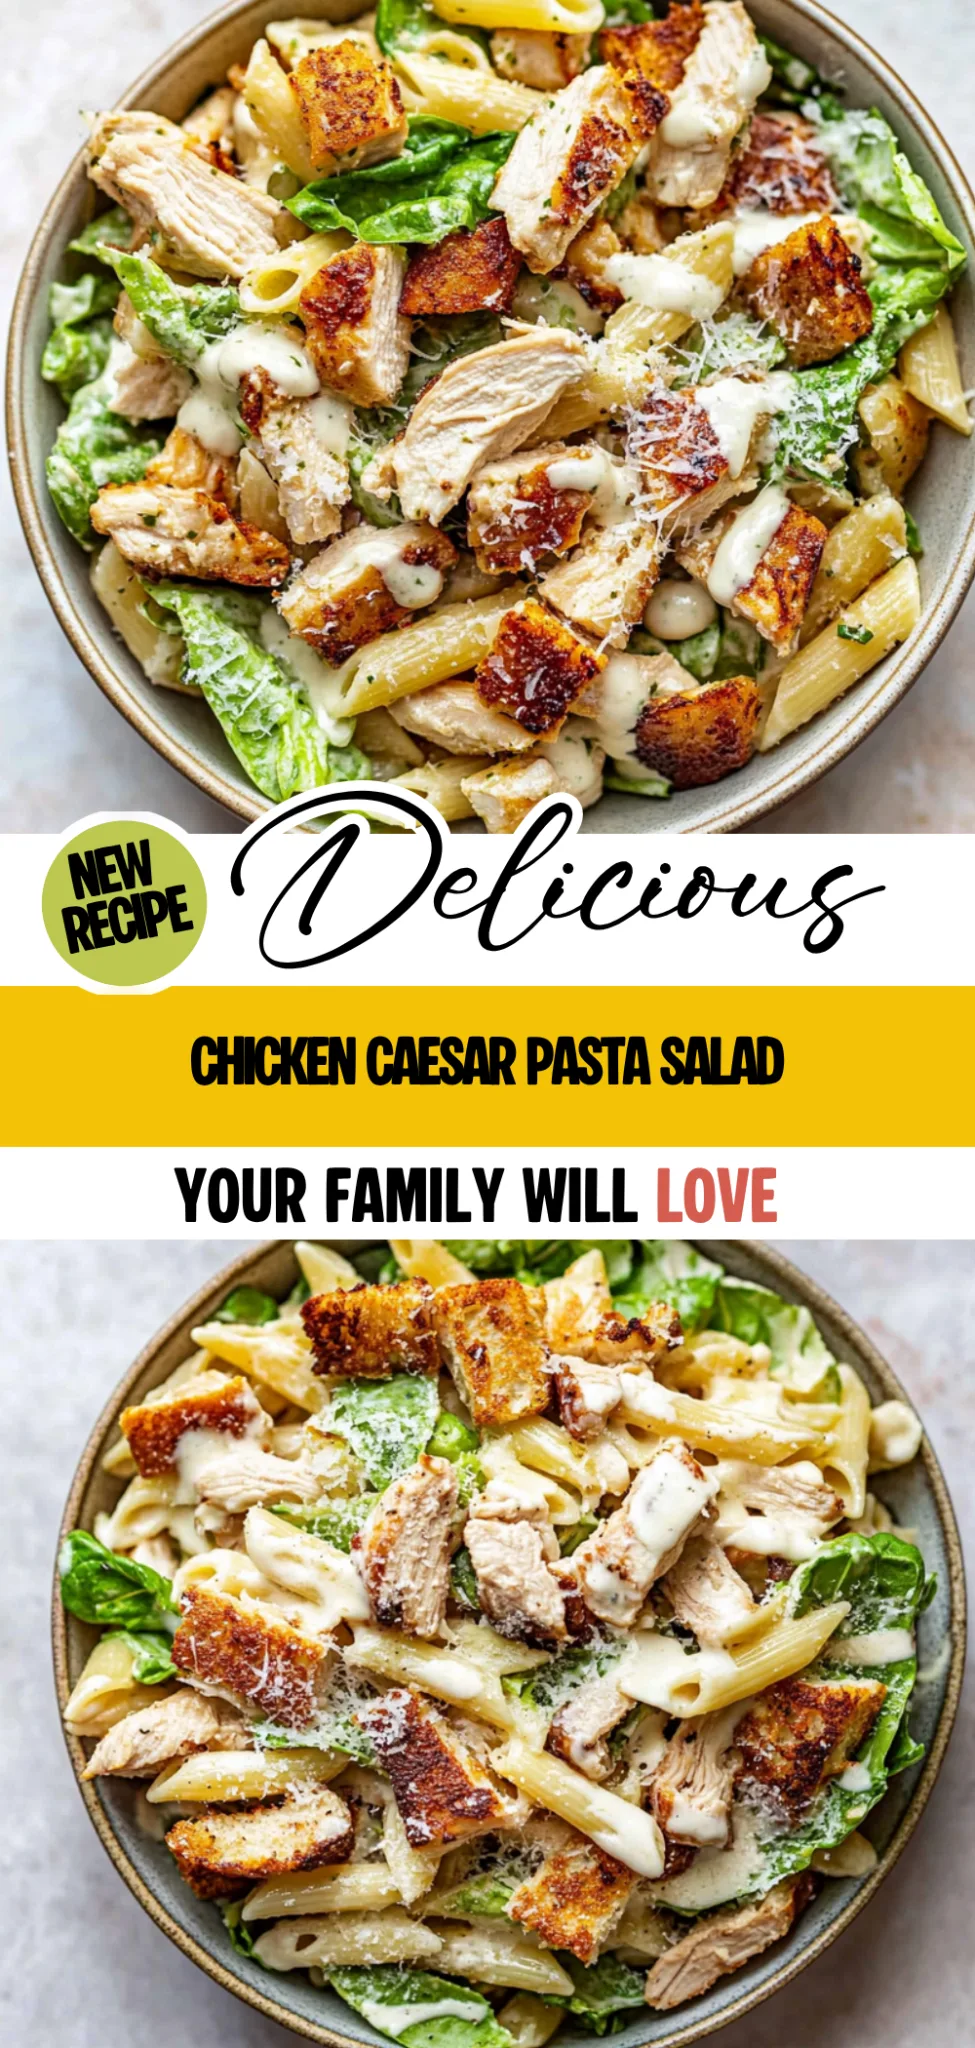
Are you ready to see how straightforward it is to make the Chicken Caesar Pasta Salad of your dreams??
1. COOK THE PASTA
Let’s start with the pasta, which is the base of our delicious salad!
Bold Action Label: BOIL – Bring a large pot of salted water to a rolling boil. Add the 8 oz of penne pasta, and cook according to the package instructions until al dente—this usually takes about 10-12 minutes. You want the pasta to be firm yet tender, so it holds up well in the salad.
Bold Action Label: DRAIN – Once cooked, drain the pasta in a colander and give it a quick rinse under cold water. This stops the cooking process and cools it down, preventing sogginess later on.
HANDY TIPS
- Use any pasta shape you love! Fusilli or farfalle also work beautifully in this recipe.
- If you want a bit of extra flavor, add a drizzle of olive oil to the cooled pasta before mixing it with other ingredients!
2. PREPARE THE SALAD
Now for the fun part—mixing all those fresh ingredients together!
Bold Action Label: COMBINE – In a large mixing bowl, combine the cooled pasta, 2 cups of shredded or diced cooked chicken breast, 4 cups of chopped romaine lettuce, 1 cup of halved cherry tomatoes, and ½ cup of thinly sliced red onion. Toss everything together gently so that each ingredient is evenly distributed without smashing the delicate veggies.
Bold Action Label: DRESS – Pour in ½ cup of Caesar dressing over the salad and toss gently until all ingredients are coated. This adds that creamy flavor we all love!
Bold Action Label: SEASON – Finally, sprinkle in ¼ cup of grated parmesan cheese and 1 tsp of black pepper. Mix well to ensure every bite is bursting with flavor!
HANDY TIPS
- For extra crunch, consider adding more veggies like bell peppers or cucumbers!
- If you’re short on time, using pre-cooked rotisserie chicken can save you both time and effort.
3. SERVE IT UP
Time to make this gorgeous salad shine on your table!
Bold Action Label: TRANSFER – Carefully transfer your beautiful Chicken Caesar Pasta Salad to a serving platter or individual bowls for an elegant touch. Make sure it looks inviting—this salad is as much about presentation as it is about taste!
Bold Action Label: TOP – To finish off, top with croutons for that delightful crunch and sprinkle over some freshly chopped parsley if desired. Serve immediately for best results.
HANDY TIPS
- To keep leftovers fresh longer, store dressing separately and add just before serving.
- Croutons can be homemade too! Simply toast some bread cubes with olive oil and seasonings until golden brown.
You’ve just created a vibrant Chicken Caesar Pasta Salad that’s not only delicious but also visually appealing! With just a little bit of preparation and some simple steps, you can serve up this hearty dish that combines all your favorite flavors. It’s perfect for lunch or dinner—and I bet it’ll become a regular on your menu! – Nagi x
FAQ – Chicken Caesar Pasta Salad
❄️ How long can I store Chicken Caesar Pasta Salad in the fridge?
Chicken Caesar Pasta Salad can be stored in the refrigerator for up to 3 days. However, it’s best enjoyed fresh. On day 1, it’s about 100% as good; on day 2, I’d say it’s around 90%, and by day 3, you’re at approximately 80% as good due to the lettuce wilting and the pasta absorbing moisture from the dressing. To maintain freshness, consider storing the dressing separately and adding it just before serving.
⏳ Can I prepare this pasta salad ahead of time?
Yes, you can absolutely prepare this Chicken Caesar Pasta Salad ahead of time! I recommend mixing all ingredients except for the dressing and croutons. Store the salad in an airtight container in the fridge for up to 24 hours. Just before serving, add your Caesar dressing and croutons to ensure everything stays crisp and delicious.
❄️ Can I freeze Chicken Caesar Pasta Salad?
Freezing is not recommended for Chicken Caesar Pasta Salad as it contains ingredients like romaine lettuce and dressing that do not freeze well. If you really want to make ahead, I suggest freezing just the cooked chicken and pasta (without any dressing). When ready to eat, thaw them in the fridge overnight and then mix with fresh veggies and dressing.
🌾 Is there a way to make this salad gluten-free?
Absolutely! You can easily make this Chicken Caesar Pasta Salad gluten-free by using gluten-free penne pasta or any other gluten-free pasta of your choice. Just be sure that your Caesar dressing is also gluten-free; many store-bought versions are labeled as such. Your taste buds won’t even know the difference!
🥛 Can I substitute the Parmesan cheese for a dairy-free option?
Yes, you can substitute Parmesan cheese with a dairy-free alternative! Nutritional yeast gives a cheesy flavor without dairy and is a fantastic option if you’re looking for vegan alternatives. There are also various brands of vegan Parmesan available that work great in this recipe.
🍝 Why do we rinse the pasta after cooking?
Rinsing pasta after cooking halts its cooking process, which is essential when making a cold pasta salad like this one. It also helps remove excess starch that can cause clumping when mixed with other ingredients. Trust me; skipping this step may lead to a gummy mess rather than a beautiful salad!
🧂 Can I customize this salad with additional ingredients?
Yes! This Chicken Caesar Pasta Salad is super versatile. Feel free to add extras like sliced cucumbers, bell peppers, or even hard-boiled eggs for more protein. If you’re feeling adventurous, try swapping out romaine for spinach or arugula for a different flavor profile altogether—your taste buds will thank you!
Troubleshooting
I will continue to add more to this Troubleshooting section as I start seeing questions coming through from people who have made the recipe.
Troubleshooting tips
“My pasta turned out mushy! 😩”
- You might have overcooked the penne pasta. Cooking it longer than the package instructions can lead to a mushy texture.
- Another reason could be not using enough water in the pot, which prevents the pasta from cooking evenly.
I bet it was still YUM though!
“My salad is too dry! 🥴”
- If you didn’t add enough Caesar dressing, your salad will end up feeling dry and unappealing. The dressing is essential for binding everything together.
- Also, if your chicken is overcooked or dry, it can absorb moisture from the other ingredients, leading to a lackluster salad.
I bet it was still YUM though!
“My pasta salad looks sad and pale! 😔”
- This might be due to not properly incorporating the dressing or not using enough of it. The dressing adds flavor and color to the pasta and vegetables.
- Additionally, if you used a very light Caesar dressing, it may not enhance the visual appeal as much as a richer one would.
I bet it was still YUM though!
“The romaine lettuce went limp and soggy! 😱”
- This typically happens when the lettuce sits too long after being mixed with the dressing. It’s best to serve right after mixing or add the dressing closer to serving time.
- If your lettuce wasn’t fresh or was pre-cut days in advance, that could also contribute to its wilting state.
I bet it was still YUM though!
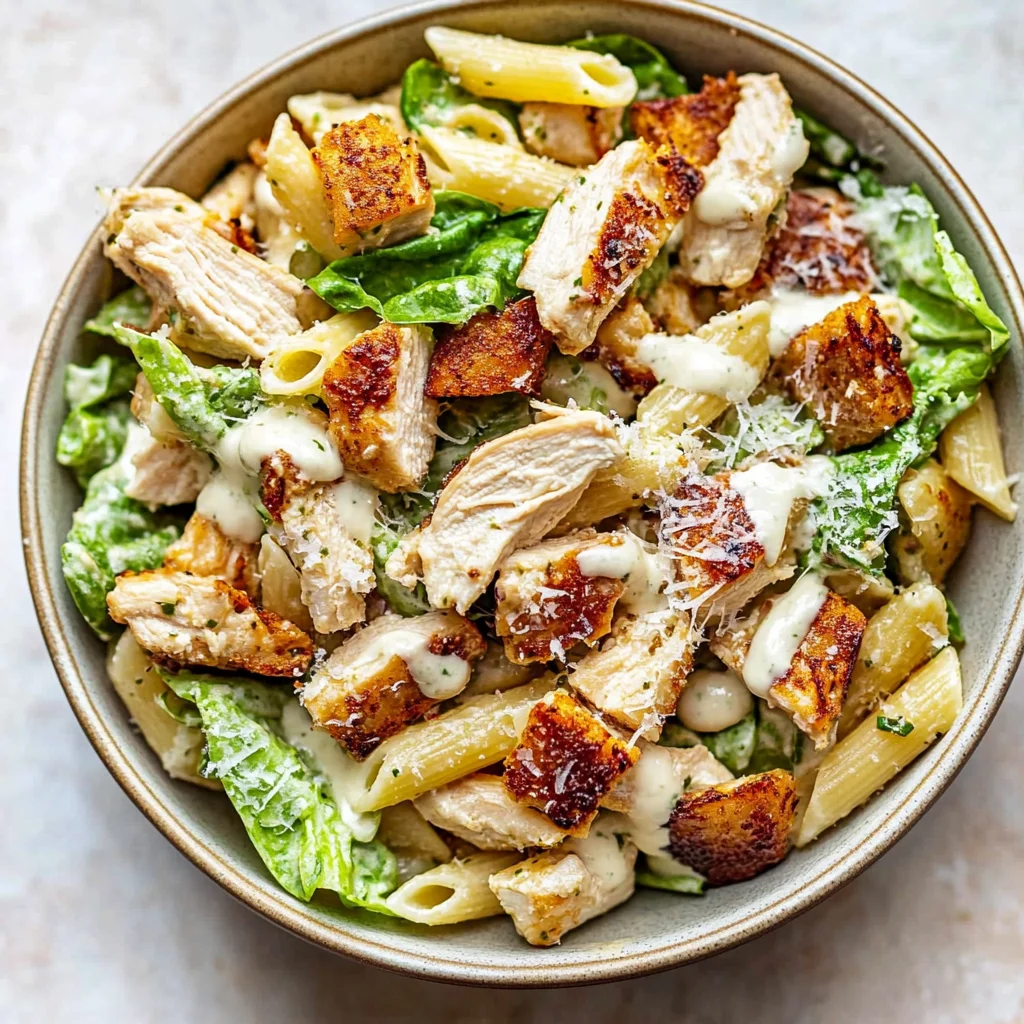
Chicken Caesar Pasta Salad
Ingredients
Method
- Bring a large pot of salted water to a boil. Add the penne pasta and cook according to package instructions until al dente.
- Drain the pasta in a colander and rinse under cold water to cool.
- In a large mixing bowl, combine the cooked pasta, shredded chicken, chopped romaine, cherry tomatoes, and red onion.
- Pour the Caesar dressing over the salad and toss gently to combine.
- Add grated parmesan cheese and black pepper, mixing well.
- Transfer the salad to a serving platter or individual bowls.
- Top with croutons and chopped parsley, if desired. Serve immediately.